This post may contain affiliate links. Please read my disclosure policy.
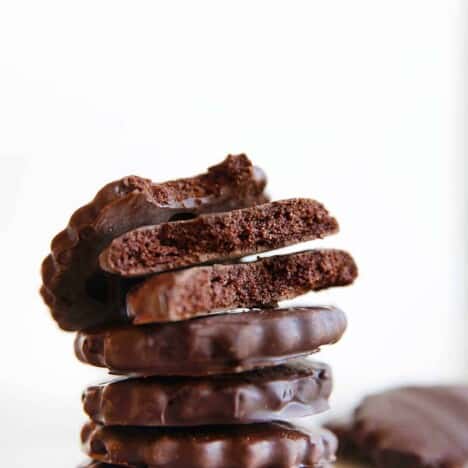
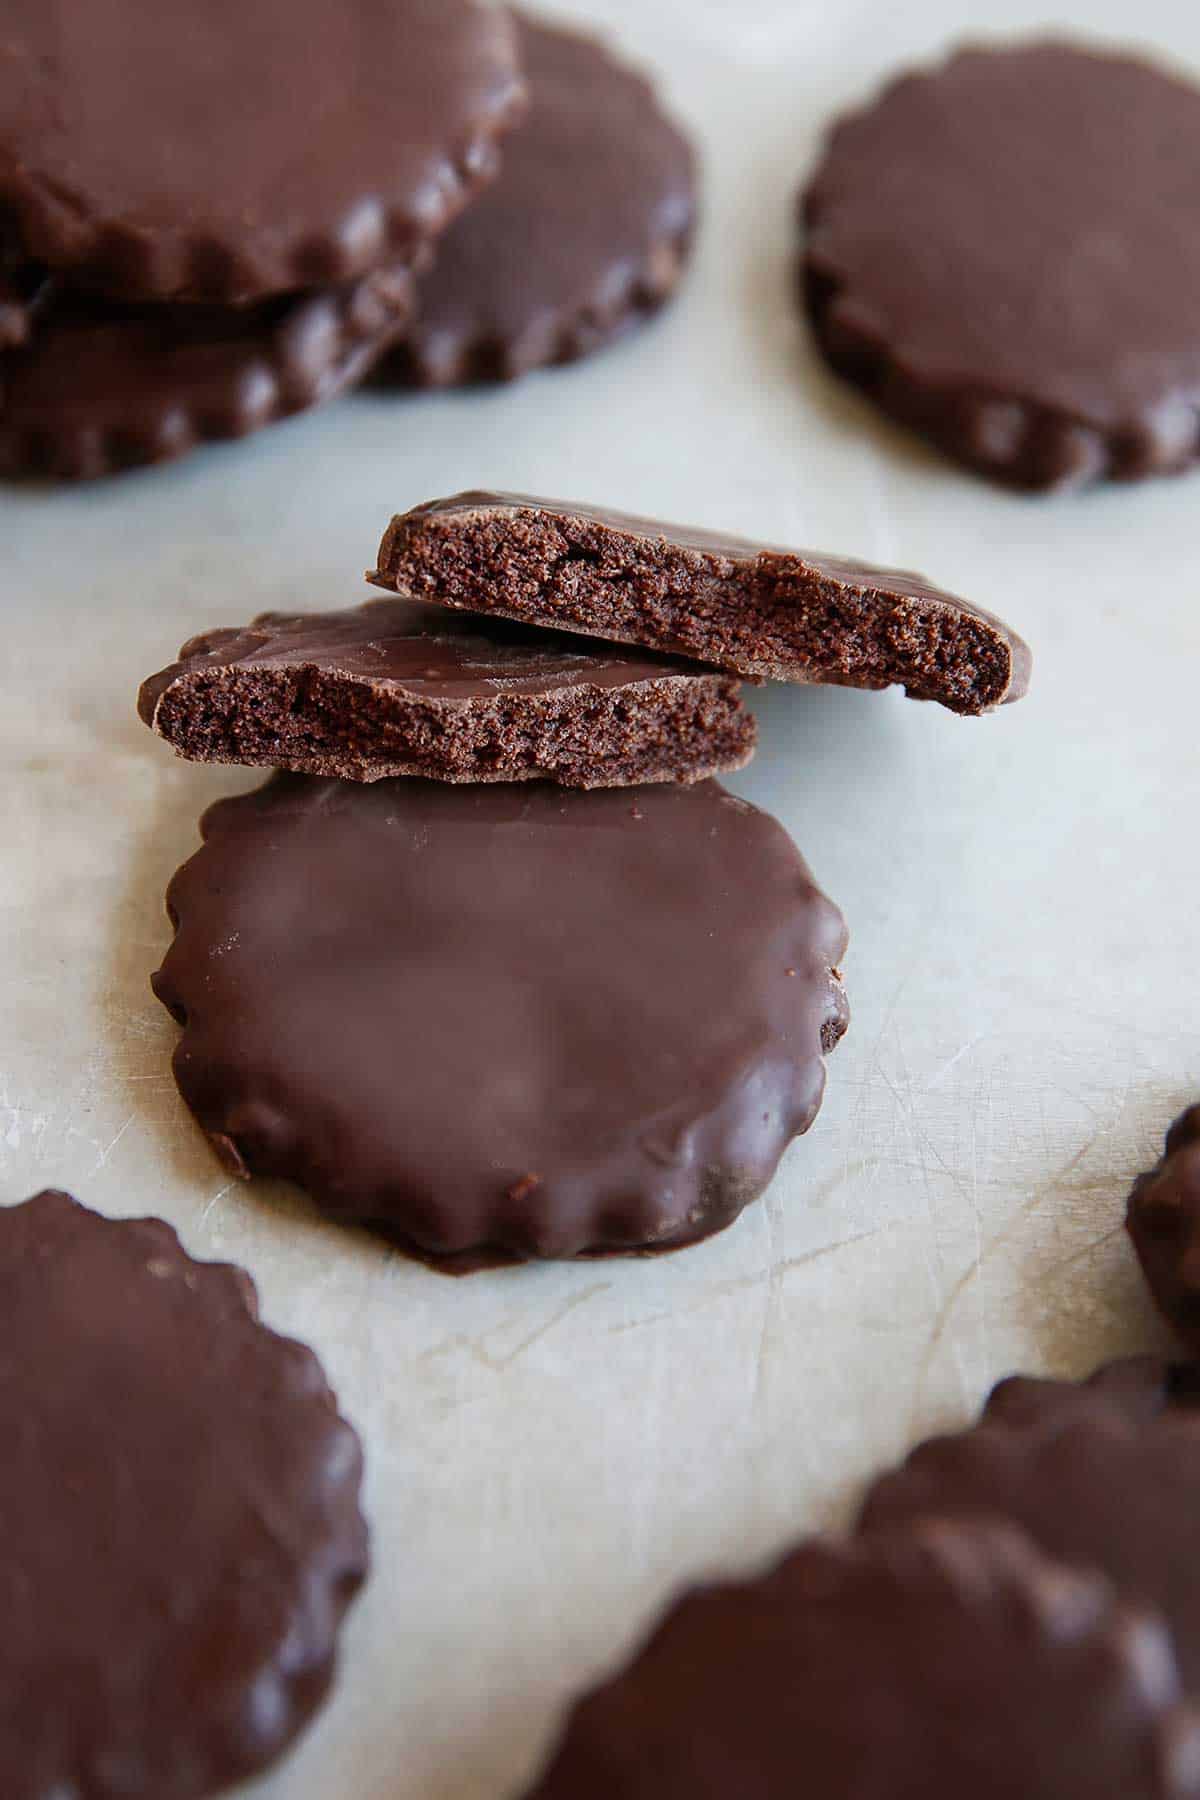
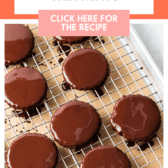
Looking for a healthier version of your favorite Girl Scout cookie? These Gluten-Free Thin Mints are just that! Crunchy, minty, chocolate-y, and just the right amount of sweetness!
They are the real deal, while also being gluten-free, grain-free and refined sugar free!
Homemade Healthy Thin Mint Cookies
Growing up I was definitely more of a Samoa or Tagalong kind of girl. But in adulthood, my palette switched to the Thin Mints. So naturally, I had to recreate them. I love being able to make my favorite childhood favorites at home, but with real, whole-food ingredients! This is no knock on the Girl Scouts and I’m all for supporting those sweet kiddos, but sometimes you just want to indulge in a long-time favorite treat but lighten it up a bit! And this recipe definitely is that.
These cookies are pretty simple to prepare, but if you are new to working with gluten-free cookie recipes we share all the tips below for how to be successful here!
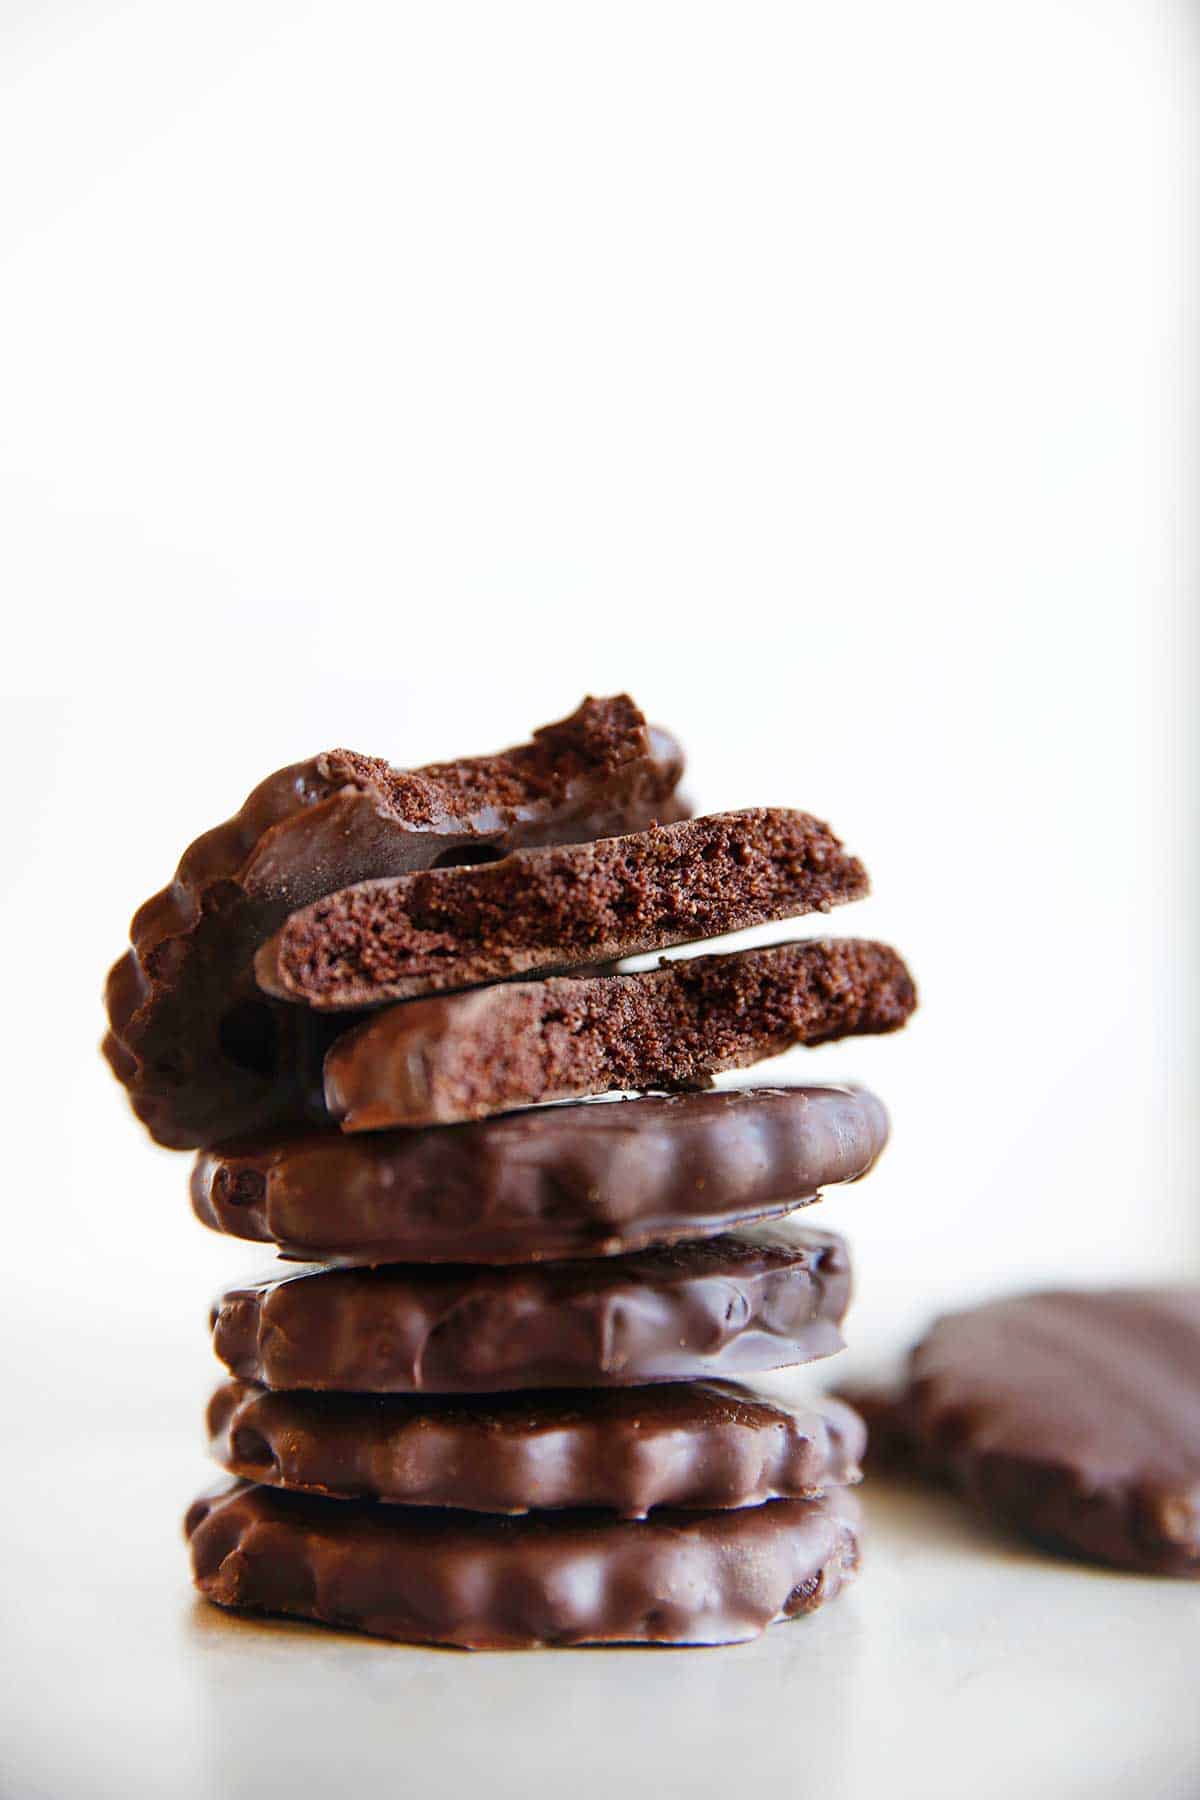
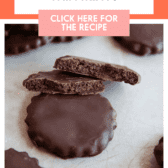
These crunchy chocolate cookies are so delicious and the perfect treat to store away in the freezer for whenever your sweet tooth strikes.
Ingredients Needed
Scroll down for the full recipe!
- Almond Flour
- Tapioca Flour
- Cocoa Powder
- Salt
- Butter
- Vanilla Extract
- Peppermint Extract
- Honey
- Coconut Sugar
- Dark Chocolate
- Coconut Oil
Looking to substitute the almond flour?
This is a common question we get. Unfortunately, we can’t offer a substitute for this as it is the main ingredient in this cookie.
If you do try to replace it with another flour, please come back and comment/share how it went for you!
Tools Needed
- Rolling Pin
- 2.5″ Fluted Cookie Cutter
- Parchment Paper
- Sheet Pan
- Essentials: Mixing bowls, spoons, etc.
Tips for Making Gluten-Free Thin Mints
It is pretty simple to put this dough together, but you must have the correct temperature butter! This recipe calls for softened butter. Others have had an issue with the dough after they try to make this with melted butter.
Butter FYI
Using melted butter will make this dough way too soft. So please, take your butter out of the refrigerator at least two hours before you plan to make the dough.
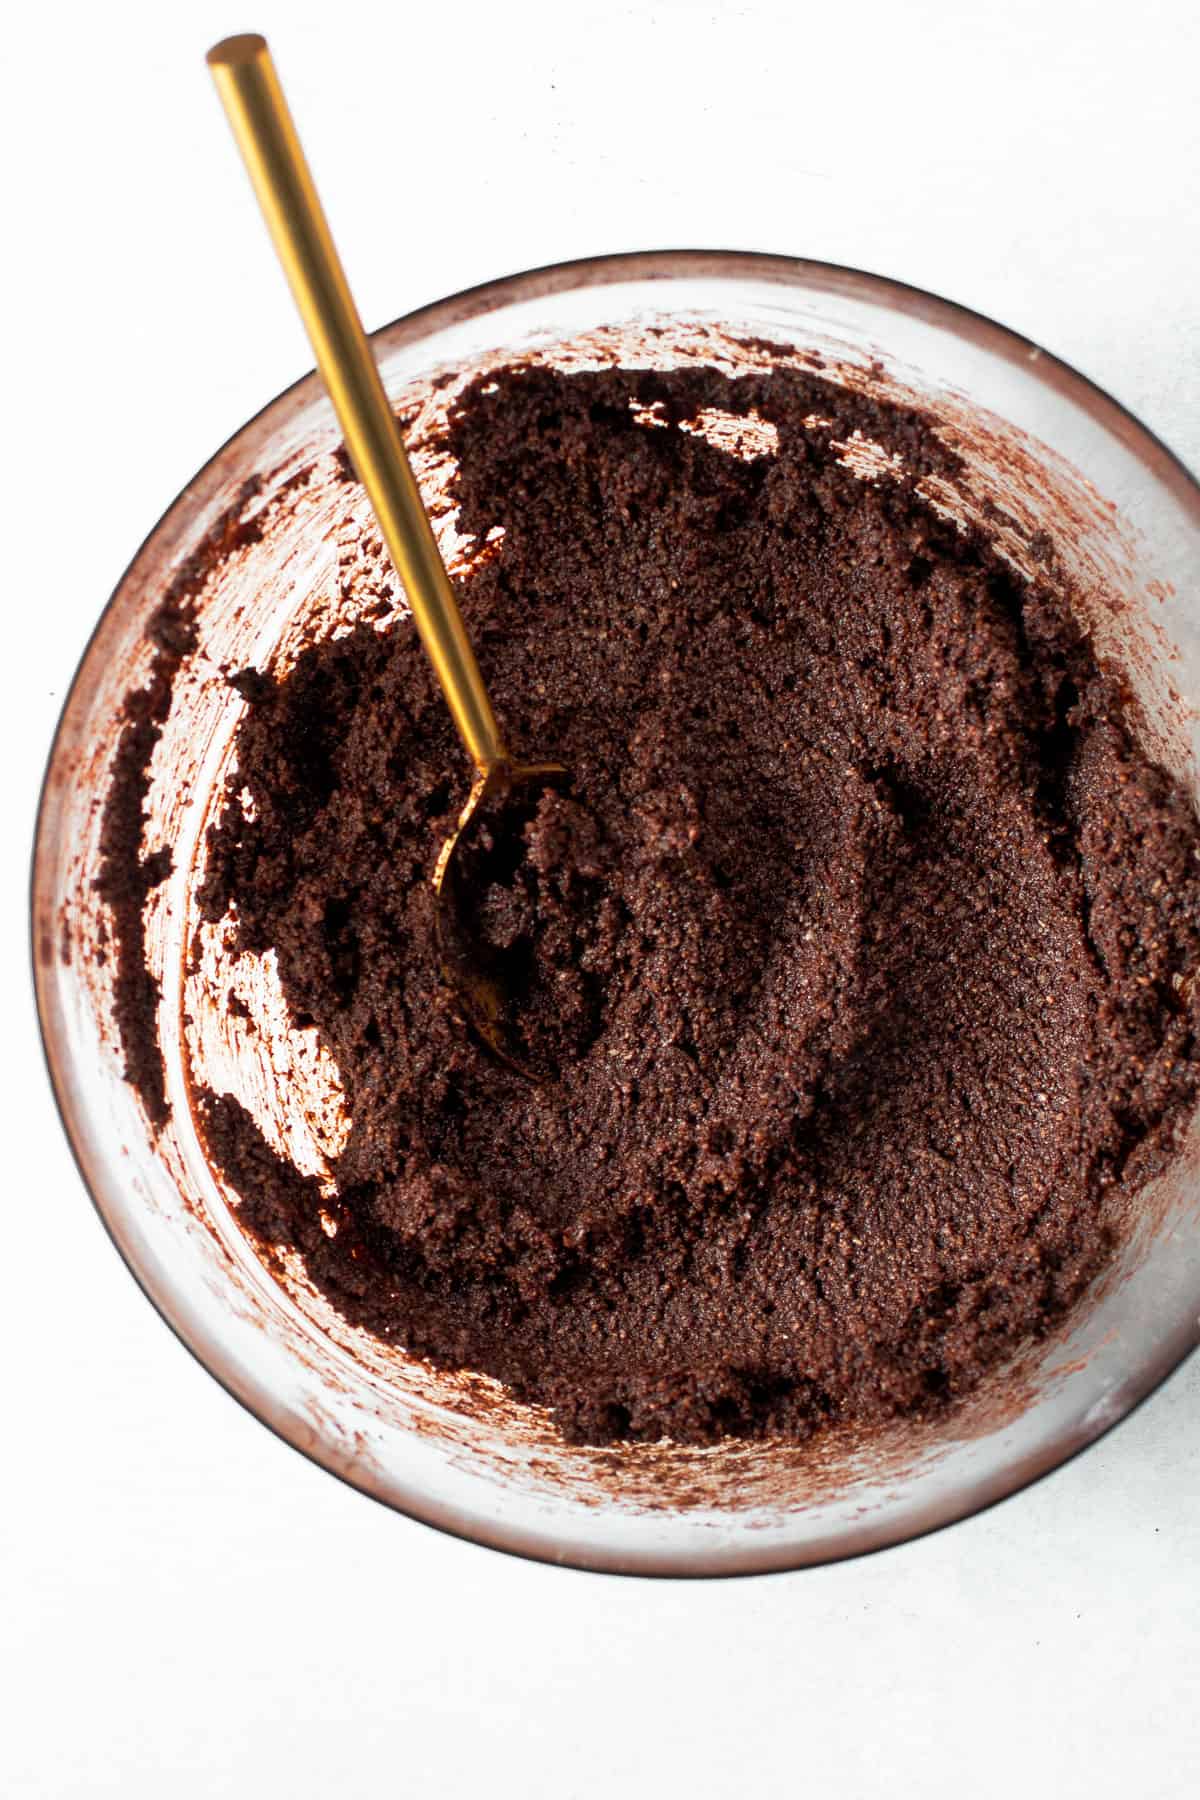
Once you have the correct butter temperature, all you have to do is add the ingredients to a bowl and mix it together–it’s that simple! The dough should be thick, but still pretty sticky.
Once the dough is thoroughly mixed, wrap it in a piece of parchment and stick it in the refrigerator for at least an hour. If possible, let it sit to chill for 2 hours. Once it’s totally firm, it’s ready to roll!
How to Roll Out the Dough
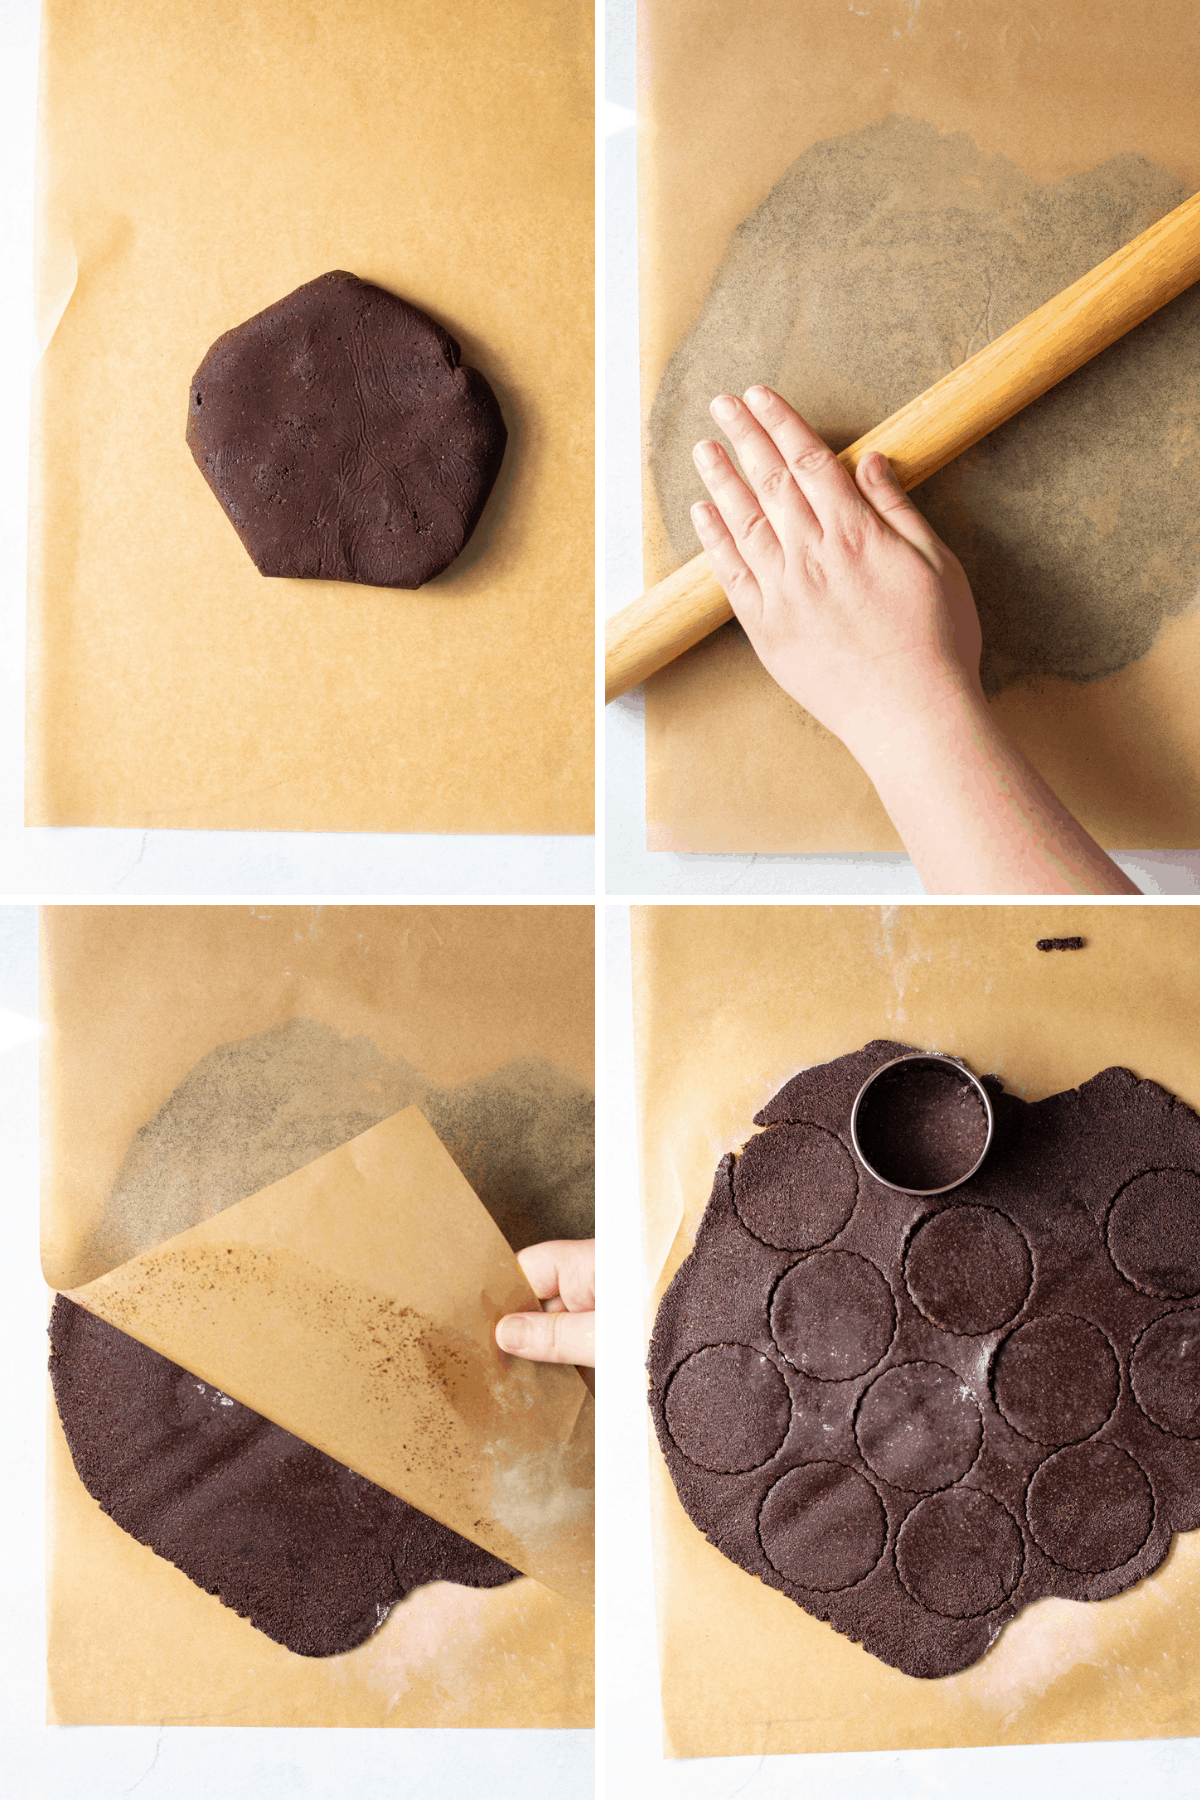
This is the one tricky part about this recipe: rolling and transferring the dough to the baking sheet. But don’t worry, I’m sharing my best tips for working with this gluten-free dough.
- First, make sure your dough is chilled.
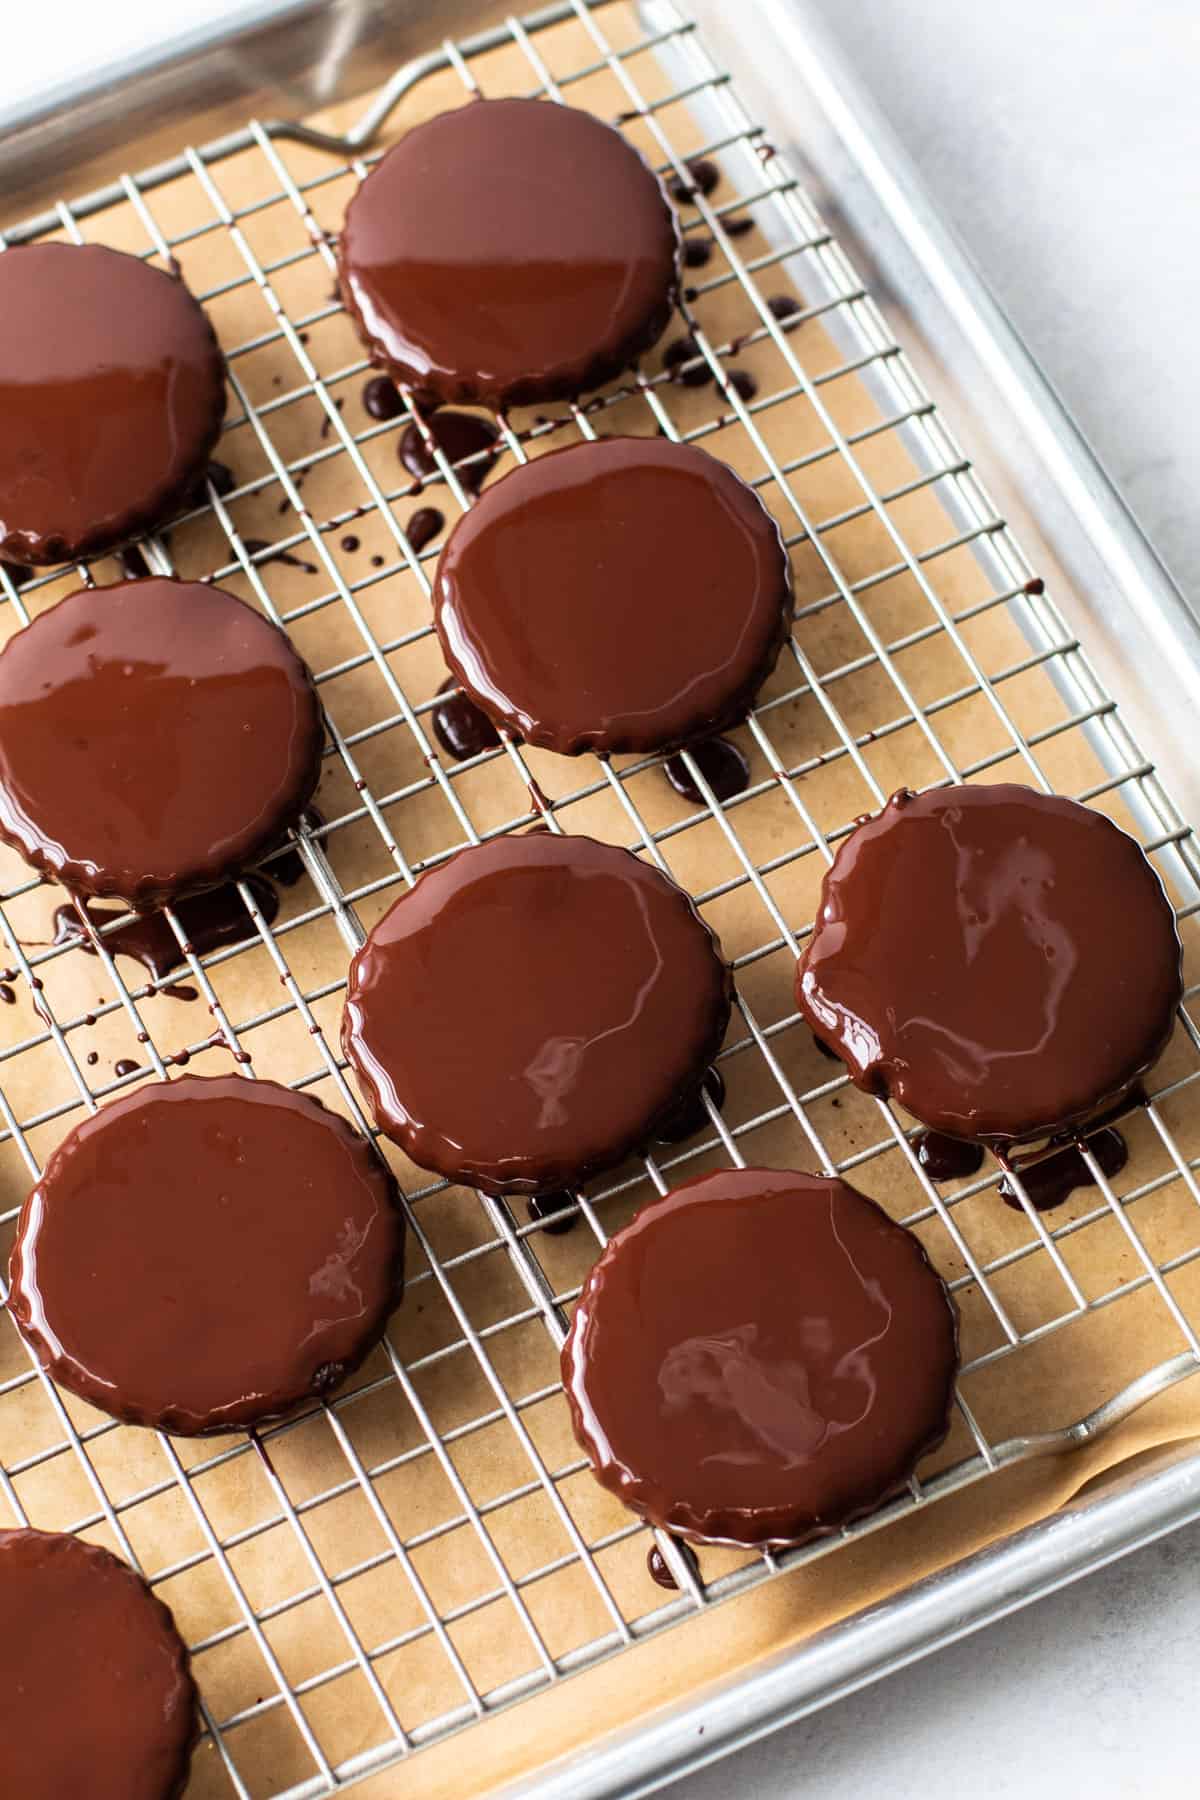
- Place the dough on a piece of parchment paper, and then sprinkle it with tapioca starch. Turn the dough over and sprinkle the other side with tapioca starch. Then place another piece of parchment on top of the dough. Now you are ready to roll it out! The parchment is used because it is an easy surface to remove from the cookies, and so you can transfer the dough on it in case your dough gets too warm.
- The dough should be rolled out to a thickness of 1/4″.
- Then, use your cookie cutter to stamp out as many cookies as possible.
- Once you’ve stamped your cookies, it’s time to transfer them to a (new) parchment-lined baking sheet. If your dough is quite warm, I recommend sticking it back in the refrigerator for 15 minutes before transferring the cookies. To do this, just slide the dough directly on the parchment onto a sheet pan and into the refrigerator. Once the dough is chilled, it’s much easier to successfully move the cookie cutouts.
- To lift the cookies, dust a mini offset spatula blade with tapioca starch and slide it underneath the cookie to loosen the cookie from the parchment. Use the spatula to transfer the cookie onto the baking sheet.
There is some finesse to this, but it shouldn’t be very achievable if your cookie dough is the right consistency.
To Freeze or Not to Freeze
Many people, including myself, love to freeze thin mints and eat them straight from the freezer. And that is a great way to enjoy this gluten-free version.
Freezing: These cookies will keep well in the freezer for up to 3 months. Store them in an air-tight container.
Don’t want to freeze them? That’s fine, but they will need to be stored in the refrigerator since they’re coated in chocolate. The cookies will keep for at least 5 days.
Watch The Video:
More Cookie Recipes:
- Gluten-Free Chocolate Crinkle Cookies
- 3-Ingredient Almond Butter Cookies
- Gluten Free Chocolate Chip Cookies
- Gluten Free Sugar Cookies

Paleo Thin Mints
Ingredients
- 1-1/4 cups almond flour
- 1/3 cup unsweetened cocoa powder
- 1 tablespoon tapioca flour plus more for rolling
- 2 teaspoons coconut sugar
- Pine fine sea salt
- 5 tablespoons butter softened
- 3 tablespoon honey or maple syrup
- 1 teaspoon vanilla extract
- 1/2 teaspoon peppermint extract
Chocolate Coating:
- 1 cup dark chocolate chips
- 1/4 teaspoon peppermint extract
- 2 teaspoons coconut oil or more as needed
Instructions
- Add almond flour, cocoa powder, tapioca flour, coconut sugar, and salt to a bowl. Whisk together until combined.
- Add in the softened butter, honey, vanilla, and peppermint extract. Using a heavy spoon, mix the dough all together until fully combined with no visible butter streaks remaining.
- Transfer the dough to a piece of parchment or plastic wrap, and wrap it up. Chill the dough in the refrigerator for at least one hour or up to 1 day.
- Once the dough is chilled, preheat the oven and line a baking sheet with parchment paper.
- Place the dough on another piece of parchment paper on a work surface, and then sprinkle it with tapioca starch. Turn the dough over and sprinkle the other side with tapioca starch. Then place another piece of parchment on top of the dough. Roll the dough to a thickness of 1/4″. Then, use your cookie cutter to stamp out as many cookies as possible. You can reroll the scraps to get more cookies.
- Dust a mini off-set spatula with tapioca starch, and slide it underneath the cookie to lift it off the parchment and transfer to the baking sheet. If at any point the dough is too soft to handle, transfer it to the refrigerator to firm up for 10 minutes.
- Bake the cookies for 15 minutes. Once done, transfer the cookies to a cooling rack.
- Meanwhile, over a double boiler, melt the chocolate, coconut oil, and extract together. Drop the cookie into the melted chocolate until fully coated. Use a fork to lift the cookie out of the chocolate, letting the excess drop off. Transfer cookies to a piece of parchment paper. Repeat with the remaining cookies.
- Let chill in the fridge (or freezer) for at least 10 minutes, or until the chocolate has hardened. Store in the refrigerator for up to 5 days, or the freezer for up to 3 months.


Am I blind? What temp are these baked?
LCL recipes are my FAVORITE…. but this recipe was beyond disappointing.
First off, the dough was so sticky, I found myself needing to add tapioca flour to the original recipe. Additionally, it never truly set up in the fridge so I felt the freezer for 1 hour would be better. It did make it a little easier to handle but was still so tricky. (Mind you, I recreate LCL recipes often and I’ve never had this issue before)
After 4 different tries (needing to add tapioca flour and allow the dough to rest time after time), I was finally able to roll it out. Measured 1/4 inch thickness as recommended. Baked for 15 minutes as per the instructions. Now typically, when I follow most of your recipes, I find myself needing to add bake time (as my electric oven seems to work a little slower than gas.). No big deal. Removed these cookies at exactly 15 minutes and after allowing them to cool, realized they were all black and burnt.
Basically… I used way too many high quality ingredients for this big of a mess up so to say I’m disappointed is the least of what I’m currently feeling.
This recipe should be adapted. **also adding- I live in NY and literally shut off my heat this morning and opened my kitchen windows as much as they’d go, to maintain a cooler atmosphere since I know a hot kitchen doesn’t help. Nothing worked with this recipe, for me.
Hi Jaclyn! We appreciate you and so happy you often use LCK recipes. We took this comment seriously and headed back into the kitchen to retest these. While I am so sorry something went wrong on your end, but this recipe works as written. While I was testing them again, I went ahead and took new photographs of the process of making them to be more helpful in the future and added additional tips for having this recipe be successful for others! We appreciate you taking the time to share your experience, and I’m happy to troubleshoot with you further about what could have gone wrong on your end. Feel free to shoot me an email: kelli@lexiscleankitchen.com or comment here and we can chat!
Hi. Are the ingredients measured out in American cups? If yes is it possible to have them in grams or ounces as they look amazing! Thank you?
Yes, they are in American cups! We will put it on our list to retest in grams. Thanks!
How long do these last in the freezer? Sorry if I missed it somewhere 🙂
Planning on making these ahead, for my sisters bday!
Sorry Girl Scouts! I just made a double batch of these cookies and just let me say…OMG. I don’t know how she does it but I love coming to Lexi’s Clean Kitchen? Never made a recipe we didn’t like, and these are “real food” recipes, as my husband calls them. Great job, Lexi, and thank you so much!!!!!
PS, after reading some of the reviews, I used the top to my cooking spray for the cookie cutter and just used small plastic things to dip. The melted chocolate will cover any matks
These were awesome!! I rolled them into a log and sliced instead of rolling out and cutting with a cookie cutter. Easy!
Love it!!!!
Can I sub arrowroot powder for the tapioca flour?
Probably, but I haven’t personally tried it so can’t say 100%!
So I just went ahead and used arrowroot powder 1:1 for the tapioca flour and it worked out perfectly! These are delicious cookies!
Awesome! That’s great to know!!
I made these and they turned out great! Thank you for the recipe!
Can a nut-free flour be substituted here? Like cassava flour?
Probably! I’ve never tried Cassava so I can’t promise the same results. Let us know if you try it!!
I was wondering the same thing!!!! Did you try the cassava?
We haven’t yet. Stay tuned!
I’ve made these at least 3-4 times now and my entire family loves them. However they don’t come close to looking perfect like yours, is there a secret to applying the chocolate coating.
Could you tell me what kind of tapioca I need? Starch beads I have no idea. Thank you.
Tapioca flour: http://amzn.to/1THFj9Y
It’s sold at mostly all grocery stores for about $3!