This post may contain affiliate links. Please read my disclosure policy.
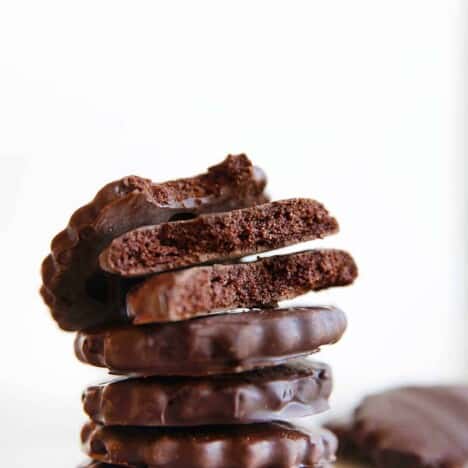
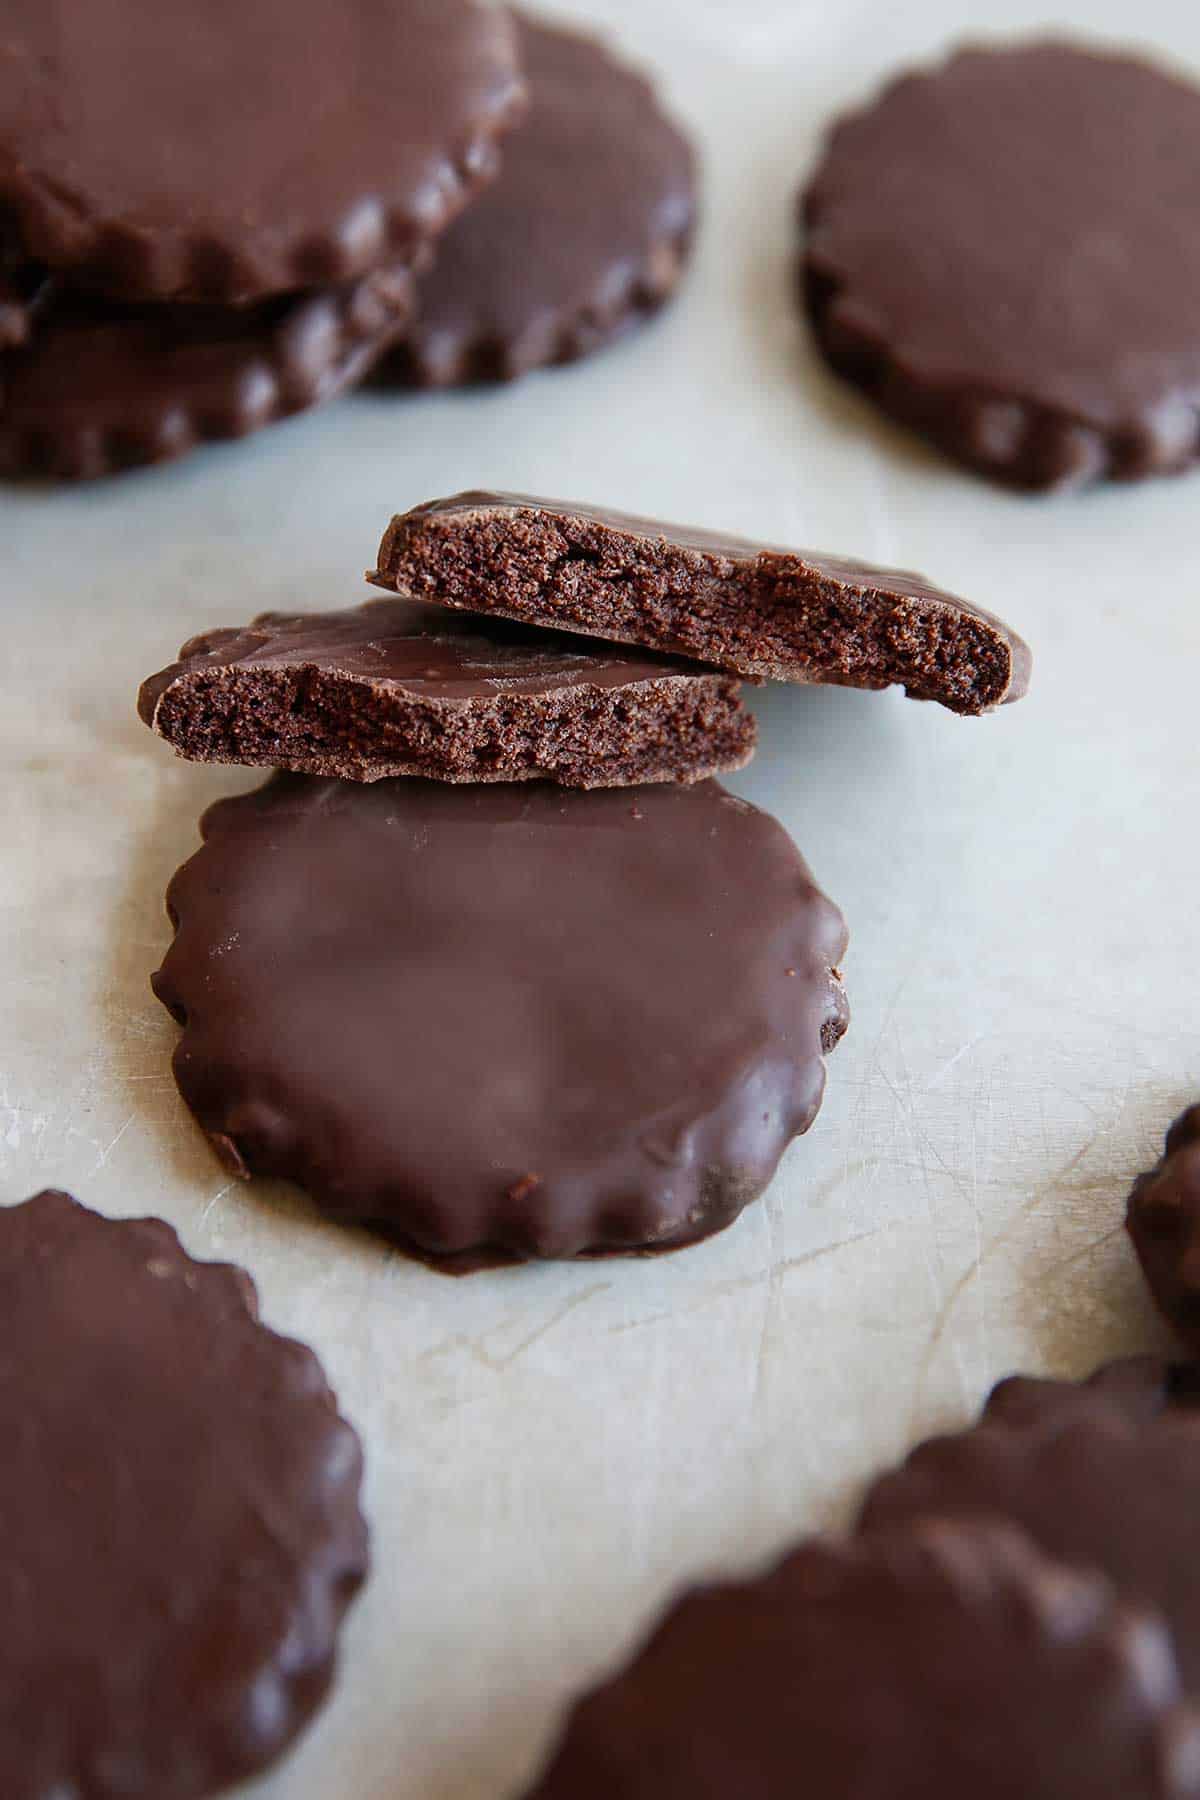
Looking for a healthier version of your favorite Girl Scout cookie? These Gluten-Free Thin Mints are just that! Crunchy, minty, chocolate-y, and just the right amount of sweetness!
They are the real deal, while also being gluten-free, grain-free and refined sugar free!
Homemade Healthy Thin Mint Cookies
Growing up I was definitely more of a Samoa or Tagalong kind of girl. But in adulthood, my palette switched to the Thin Mints. So naturally, I had to recreate them. I love being able to make my favorite childhood favorites at home, but with real, whole-food ingredients! This is no knock on the Girl Scouts and I’m all for supporting those sweet kiddos, but sometimes you just want to indulge in a long-time favorite treat but lighten it up a bit! And this recipe definitely is that.
These cookies are pretty simple to prepare, but if you are new to working with gluten-free cookie recipes we share all the tips below for how to be successful here!
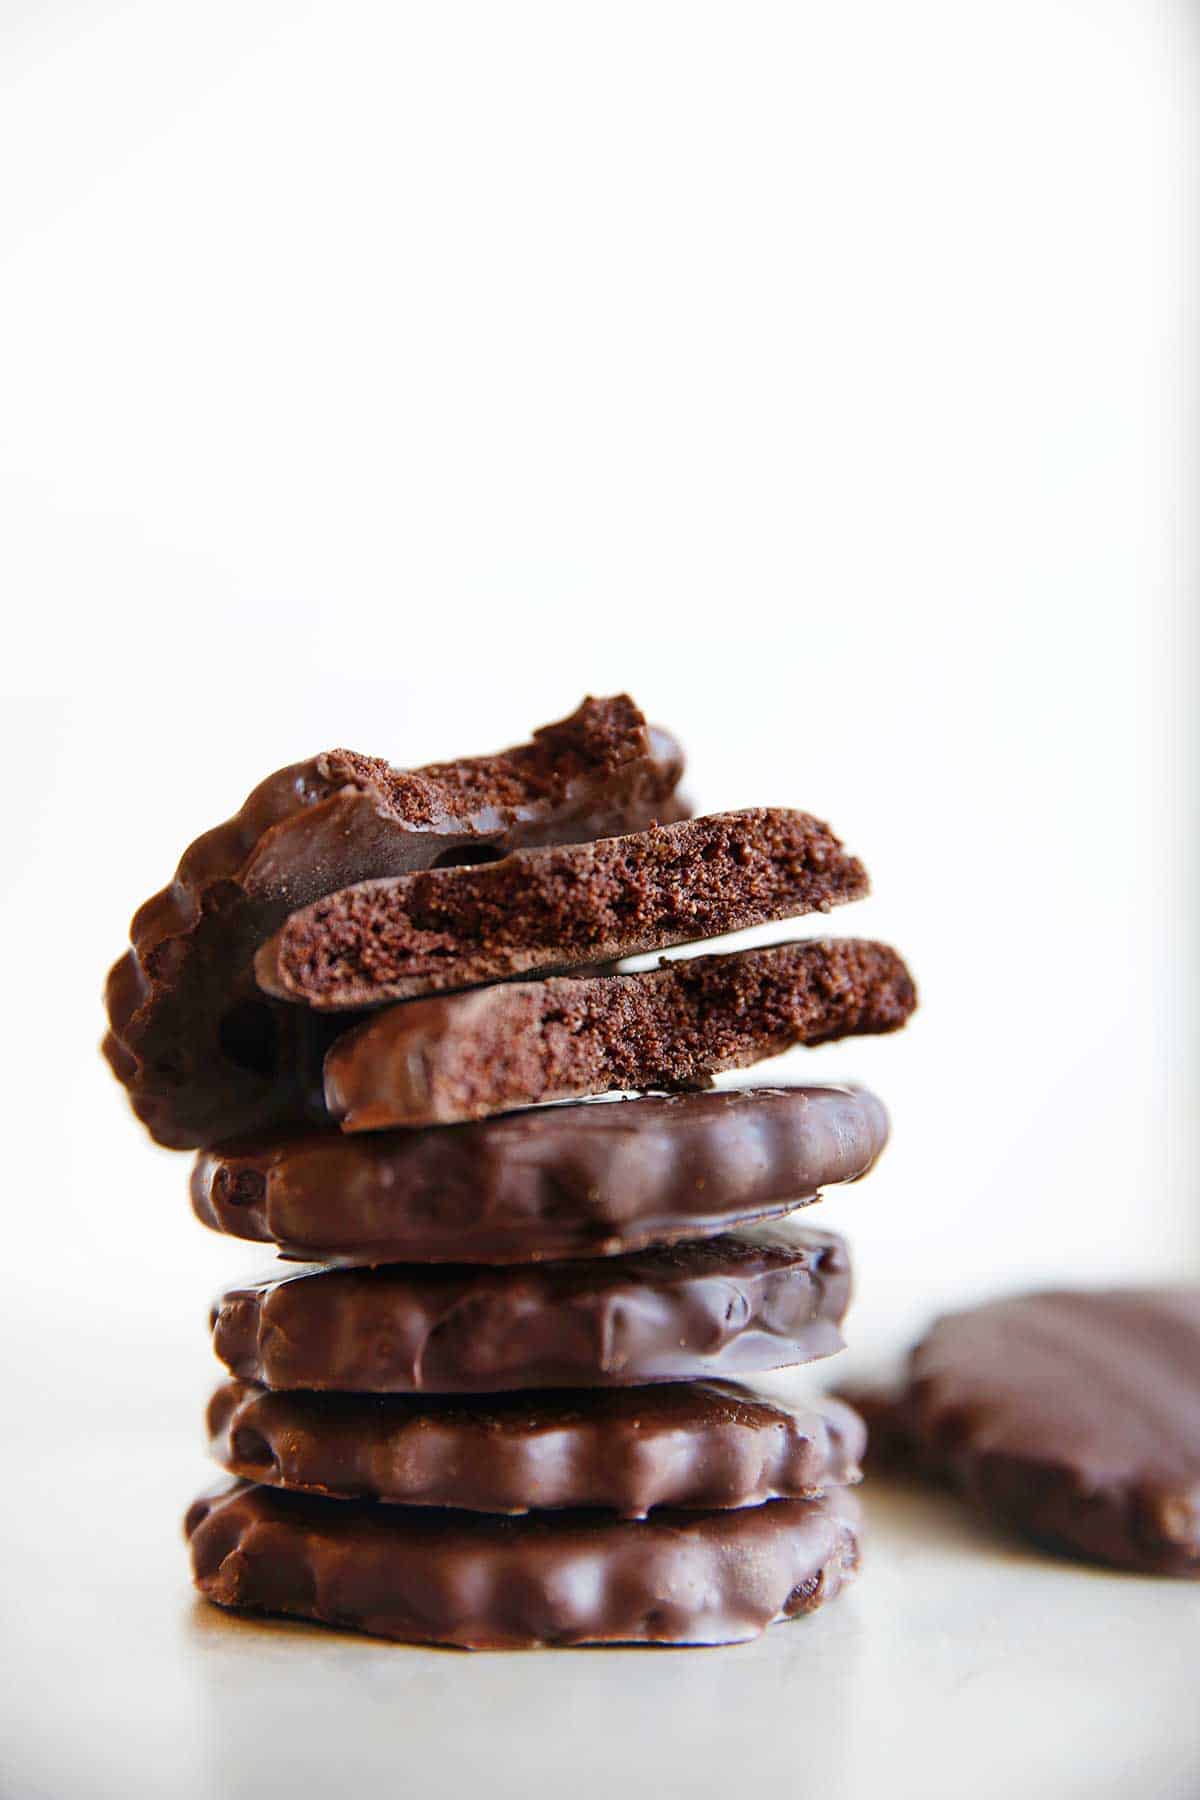
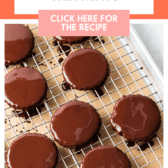
These crunchy chocolate cookies are so delicious and the perfect treat to store away in the freezer for whenever your sweet tooth strikes.
Ingredients Needed
Scroll down for the full recipe!
- Almond Flour
- Tapioca Flour
- Cocoa Powder
- Salt
- Butter
- Vanilla Extract
- Peppermint Extract
- Honey
- Coconut Sugar
- Dark Chocolate
- Coconut Oil
Looking to substitute the almond flour?
This is a common question we get. Unfortunately, we can’t offer a substitute for this as it is the main ingredient in this cookie.
If you do try to replace it with another flour, please come back and comment/share how it went for you!
Tools Needed
- Rolling Pin
- 2.5″ Fluted Cookie Cutter
- Parchment Paper
- Sheet Pan
- Essentials: Mixing bowls, spoons, etc.
Tips for Making Gluten-Free Thin Mints
It is pretty simple to put this dough together, but you must have the correct temperature butter! This recipe calls for softened butter. Others have had an issue with the dough after they try to make this with melted butter.
Butter FYI
Using melted butter will make this dough way too soft. So please, take your butter out of the refrigerator at least two hours before you plan to make the dough.
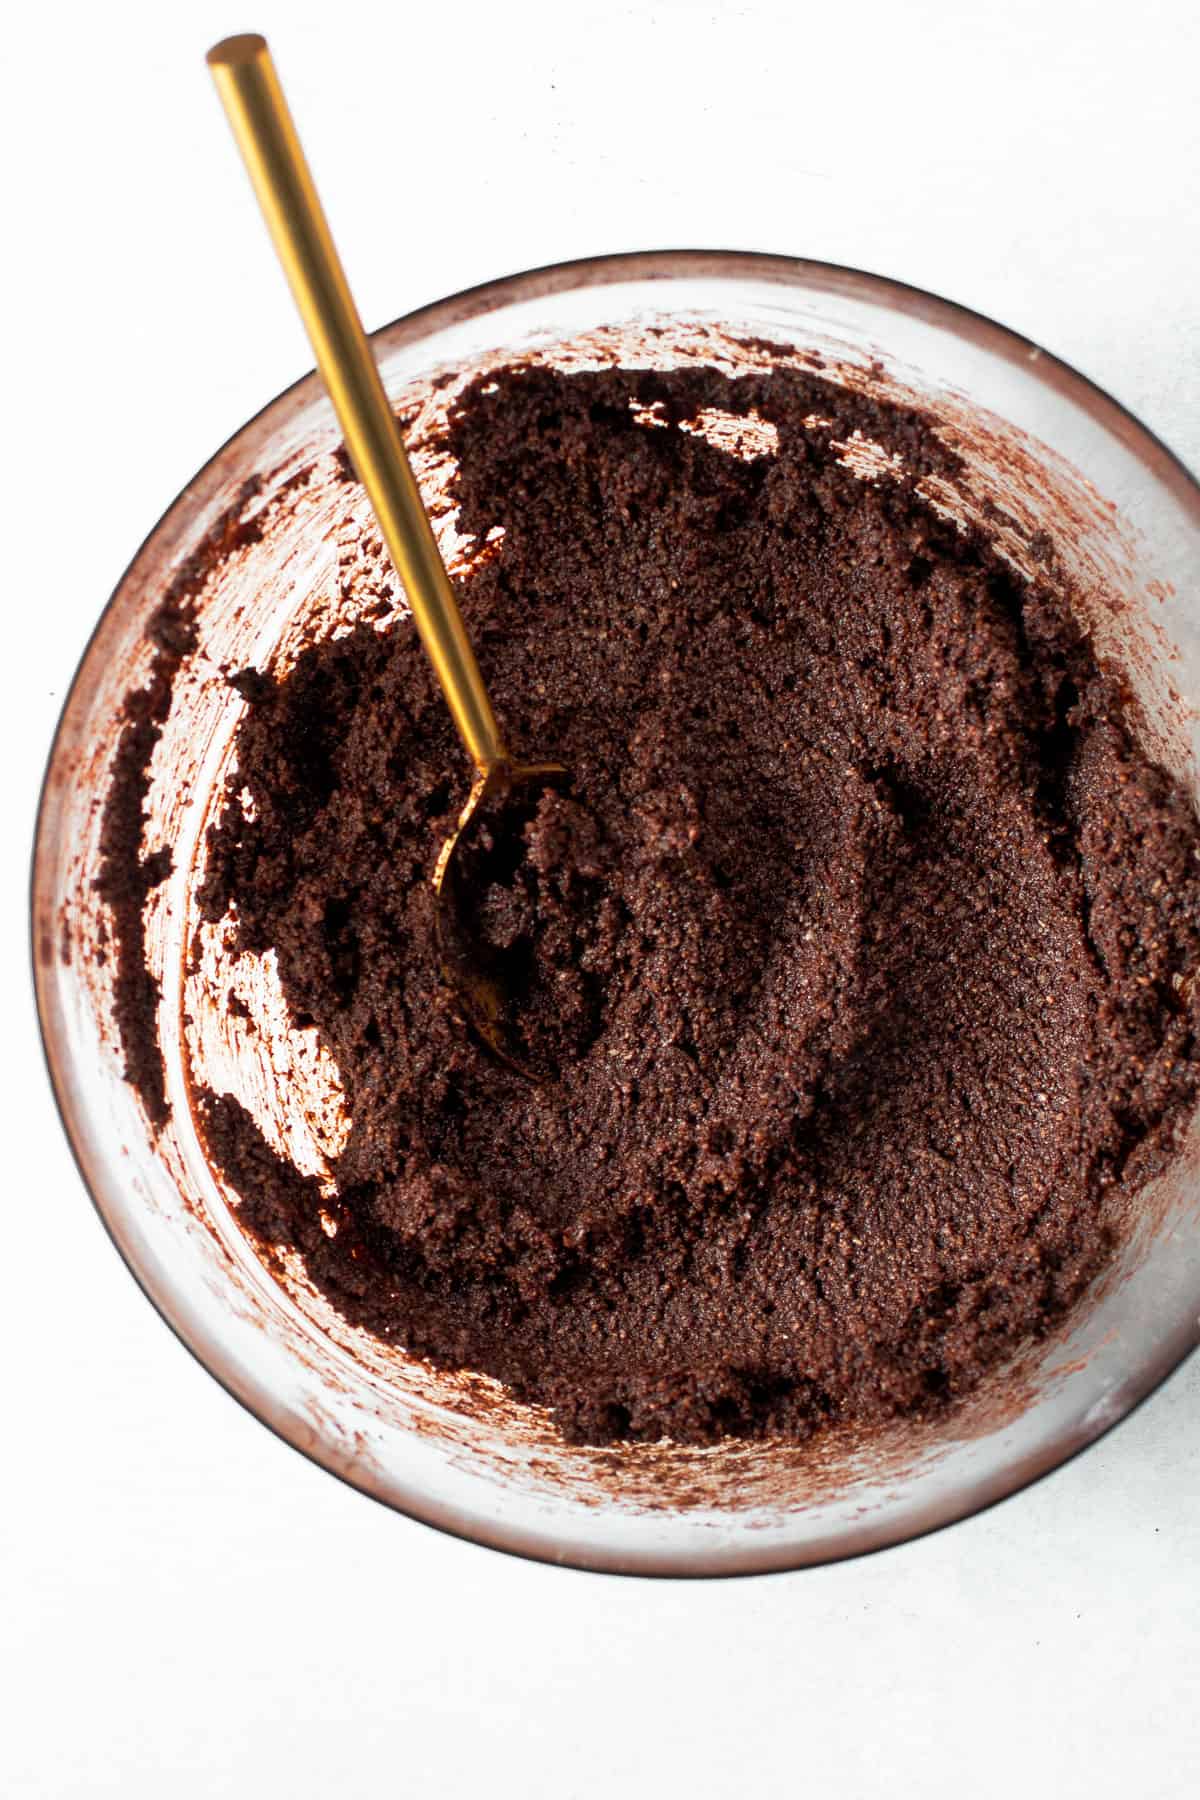
Once you have the correct butter temperature, all you have to do is add the ingredients to a bowl and mix it together–it’s that simple! The dough should be thick, but still pretty sticky.
Once the dough is thoroughly mixed, wrap it in a piece of parchment and stick it in the refrigerator for at least an hour. If possible, let it sit to chill for 2 hours. Once it’s totally firm, it’s ready to roll!
How to Roll Out the Dough
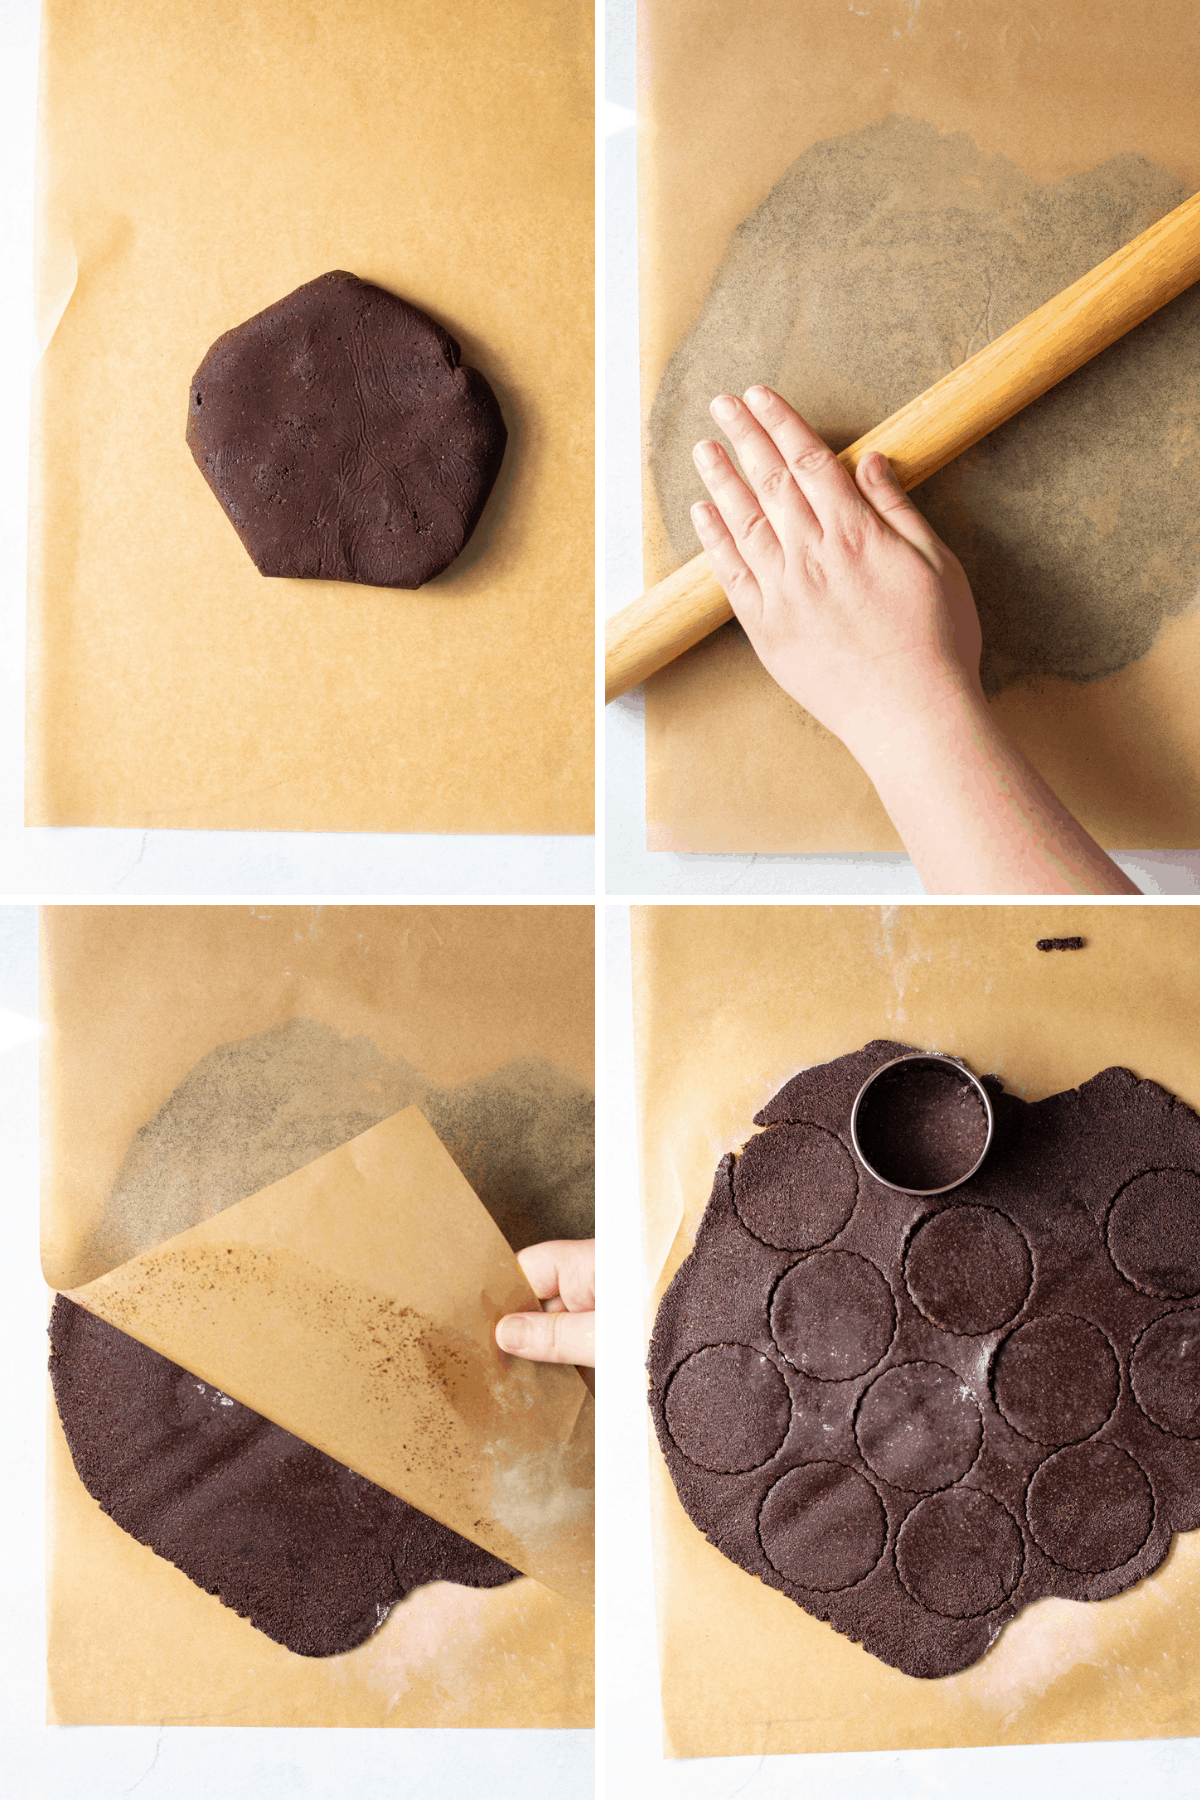
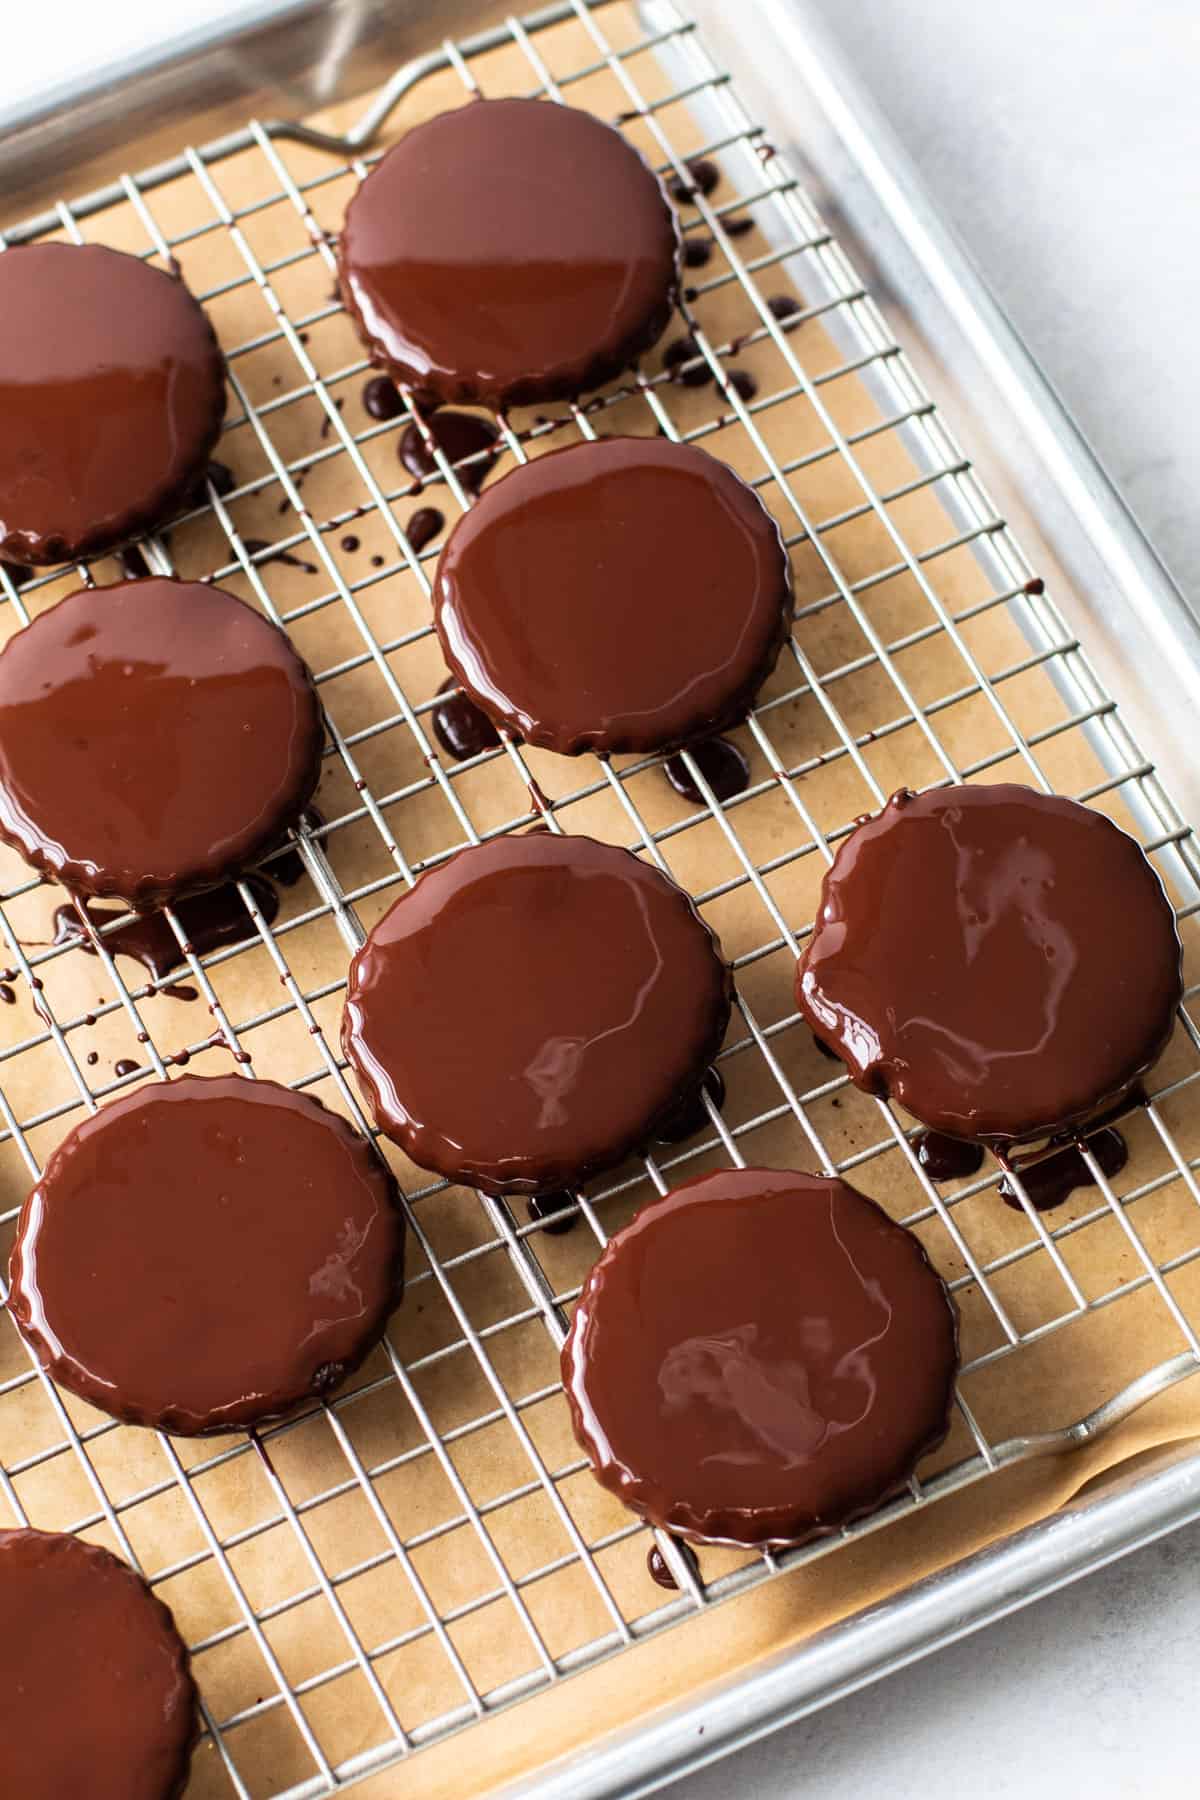
This is the one tricky part about this recipe: rolling and transferring the dough to the baking sheet. But don’t worry, I’m sharing my best tips for working with this gluten-free dough.
- First, make sure your dough is chilled.
- Place the dough on a piece of parchment paper, and then sprinkle it with tapioca starch. Turn the dough over and sprinkle the other side with tapioca starch. Then place another piece of parchment on top of the dough. Now you are ready to roll it out! The parchment is used because it is an easy surface to remove from the cookies, and so you can transfer the dough on it in case your dough gets too warm.
- The dough should be rolled out to a thickness of 1/4″.
- Then, use your cookie cutter to stamp out as many cookies as possible.
- Once you’ve stamped your cookies, it’s time to transfer them to a (new) parchment-lined baking sheet. If your dough is quite warm, I recommend sticking it back in the refrigerator for 15 minutes before transferring the cookies. To do this, just slide the dough directly on the parchment onto a sheet pan and into the refrigerator. Once the dough is chilled, it’s much easier to successfully move the cookie cutouts.
- To lift the cookies, dust a mini offset spatula blade with tapioca starch and slide it underneath the cookie to loosen the cookie from the parchment. Use the spatula to transfer the cookie onto the baking sheet.
There is some finesse to this, but it shouldn’t be very achievable if your cookie dough is the right consistency.
To Freeze or Not to Freeze
Many people, including myself, love to freeze thin mints and eat them straight from the freezer. And that is a great way to enjoy this gluten-free version.
Freezing: These cookies will keep well in the freezer for up to 3 months. Store them in an air-tight container.
Don’t want to freeze them? That’s fine, but they will need to be stored in the refrigerator since they’re coated in chocolate. The cookies will keep for at least 5 days.
Watch The Video:
More Cookie Recipes:
- Gluten-Free Chocolate Crinkle Cookies
- 3-Ingredient Almond Butter Cookies
- Gluten Free Chocolate Chip Cookies
- Gluten Free Sugar Cookies

Paleo Thin Mints
Ingredients
- 1-1/4 cups almond flour
- 1/3 cup unsweetened cocoa powder
- 1 tablespoon tapioca flour plus more for rolling
- 2 teaspoons coconut sugar
- Pine fine sea salt
- 5 tablespoons butter softened
- 3 tablespoon honey or maple syrup
- 1 teaspoon vanilla extract
- 1/2 teaspoon peppermint extract
Chocolate Coating:
- 1 cup dark chocolate chips
- 1/4 teaspoon peppermint extract
- 2 teaspoons coconut oil or more as needed
Instructions
- Add almond flour, cocoa powder, tapioca flour, coconut sugar, and salt to a bowl. Whisk together until combined.
- Add in the softened butter, honey, vanilla, and peppermint extract. Using a heavy spoon, mix the dough all together until fully combined with no visible butter streaks remaining.
- Transfer the dough to a piece of parchment or plastic wrap, and wrap it up. Chill the dough in the refrigerator for at least one hour or up to 1 day.
- Once the dough is chilled, preheat the oven and line a baking sheet with parchment paper.
- Place the dough on another piece of parchment paper on a work surface, and then sprinkle it with tapioca starch. Turn the dough over and sprinkle the other side with tapioca starch. Then place another piece of parchment on top of the dough. Roll the dough to a thickness of 1/4″. Then, use your cookie cutter to stamp out as many cookies as possible. You can reroll the scraps to get more cookies.
- Dust a mini off-set spatula with tapioca starch, and slide it underneath the cookie to lift it off the parchment and transfer to the baking sheet. If at any point the dough is too soft to handle, transfer it to the refrigerator to firm up for 10 minutes.
- Bake the cookies for 15 minutes. Once done, transfer the cookies to a cooling rack.
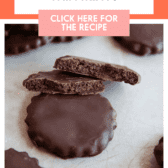
- Meanwhile, over a double boiler, melt the chocolate, coconut oil, and extract together. Drop the cookie into the melted chocolate until fully coated. Use a fork to lift the cookie out of the chocolate, letting the excess drop off. Transfer cookies to a piece of parchment paper. Repeat with the remaining cookies.
- Let chill in the fridge (or freezer) for at least 10 minutes, or until the chocolate has hardened. Store in the refrigerator for up to 5 days, or the freezer for up to 3 months.


Hi Lexi! Love your blog and your recipes! Excited to try this one 🙂 Quick question – what type of dark chocolate do you use for the coating? I am sensitive to both dairy and cane sugar, and unfortunately most dairy free chocolates that I’ve found are sweetened with cane sugar, so I can’t use them for dessert recipes that call for melted chocolate. Any suggestions?!?! Thanks!
How about Enjoy Life? Have you tried them? Or I love Pure7 http://pure7chocolate.com
I cannot wait to make these, but I’m confused about the tapioca. Is it a powered tapioca or a pudding?
OMG! These are so unbelievably amazing!!! I’m really surprised people are having an issue with the batter, I have made these twice now (yea they’re that amazing) and didn’t have any problems. They definitely satisfied my thin mint craving without making me feel awful! I cannot thank you enough for this recipe; you made it much easier to resist the two boxes I bought for my boyfriend that are sitting in the cupboard!
So I have attempted these twice now and each time they are just flattening out like cow pies. They taste fine but don’t have the shape and are really crumbly. I have melted the butter first to help mix faster, it almost seems like I am using too much butter or not enough flours. Any ideas?
When it says tapioca, is that the tapioca pearls or the flour? These look Absolutly delicious btw can’t wait to try them!
Flour!
I can’t have tapioca, would arrowroot work for this recipe as a thickener?
Thanks!
It should be fine!
The recipe has been revamped to work the gooey dough issue people have had! Enjoy!
Made these today. Love them! I had the gooey dough problem too… Added more almond flour as a fix.
I’ve just made these cookies and had the same problem with gooey dough. I sprinkled almond flour on each of the sheets of parchment paper so the dough wouldn’t stick so badly. Next time I make these, I’m going to try this: roll the dough into a log (like old-fashioned icebox cookies) and freeze it. Then slice off cookie-sized slices and bake, without having to roll the dough.
What kind of cookie cutter did you use?
could I substitute coconut flour for almond flour? Thanks!
No that won’t work unfortunately!
Can I substitute the butter with coconut oil?
What brand of cocoa powder did you use?
I like Penzey’s!
Thank you so much for the response! I know there is a huge difference in cocoa powders out there.
I used the Herseys Cocoa Natural Unsweetened
Could you use coconut oil instead of butter? I’m newly paleo & haven’t been using butter at all, but these look too good.
Does it have to be almond flour? I’m allergic and I was wondering if there was a substitute.
Where did you find the cookie cutter? It’s perfect!
Hi Lexi,
Your site is fabulous. I want to try all of these recipes! I’m wondering where you get your ingredients? Whole foods? What would you suggest for those of us who are money conscious?
Thanks!
Ali
Sorry should have clarified I meant the brownie batter was liquid?
My batter was very liquidy if that helps
I just made them again and my batter is not liquidy at all! My tip: don’t melt the butter. It should be softened and cold.
Hi I actually made the paleo brownies and had the same problem with the flatness just checked my baking powder and it says October 2014. Any suggestions ?