This post may contain affiliate links. Please read my disclosure policy.
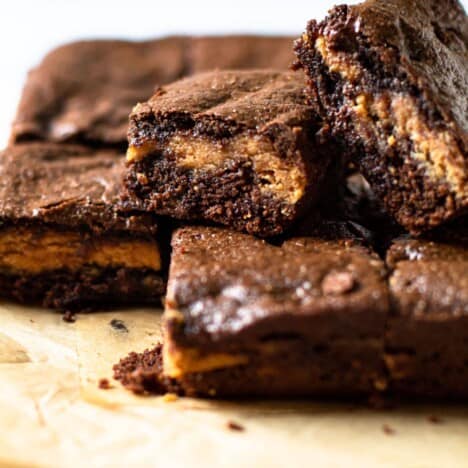
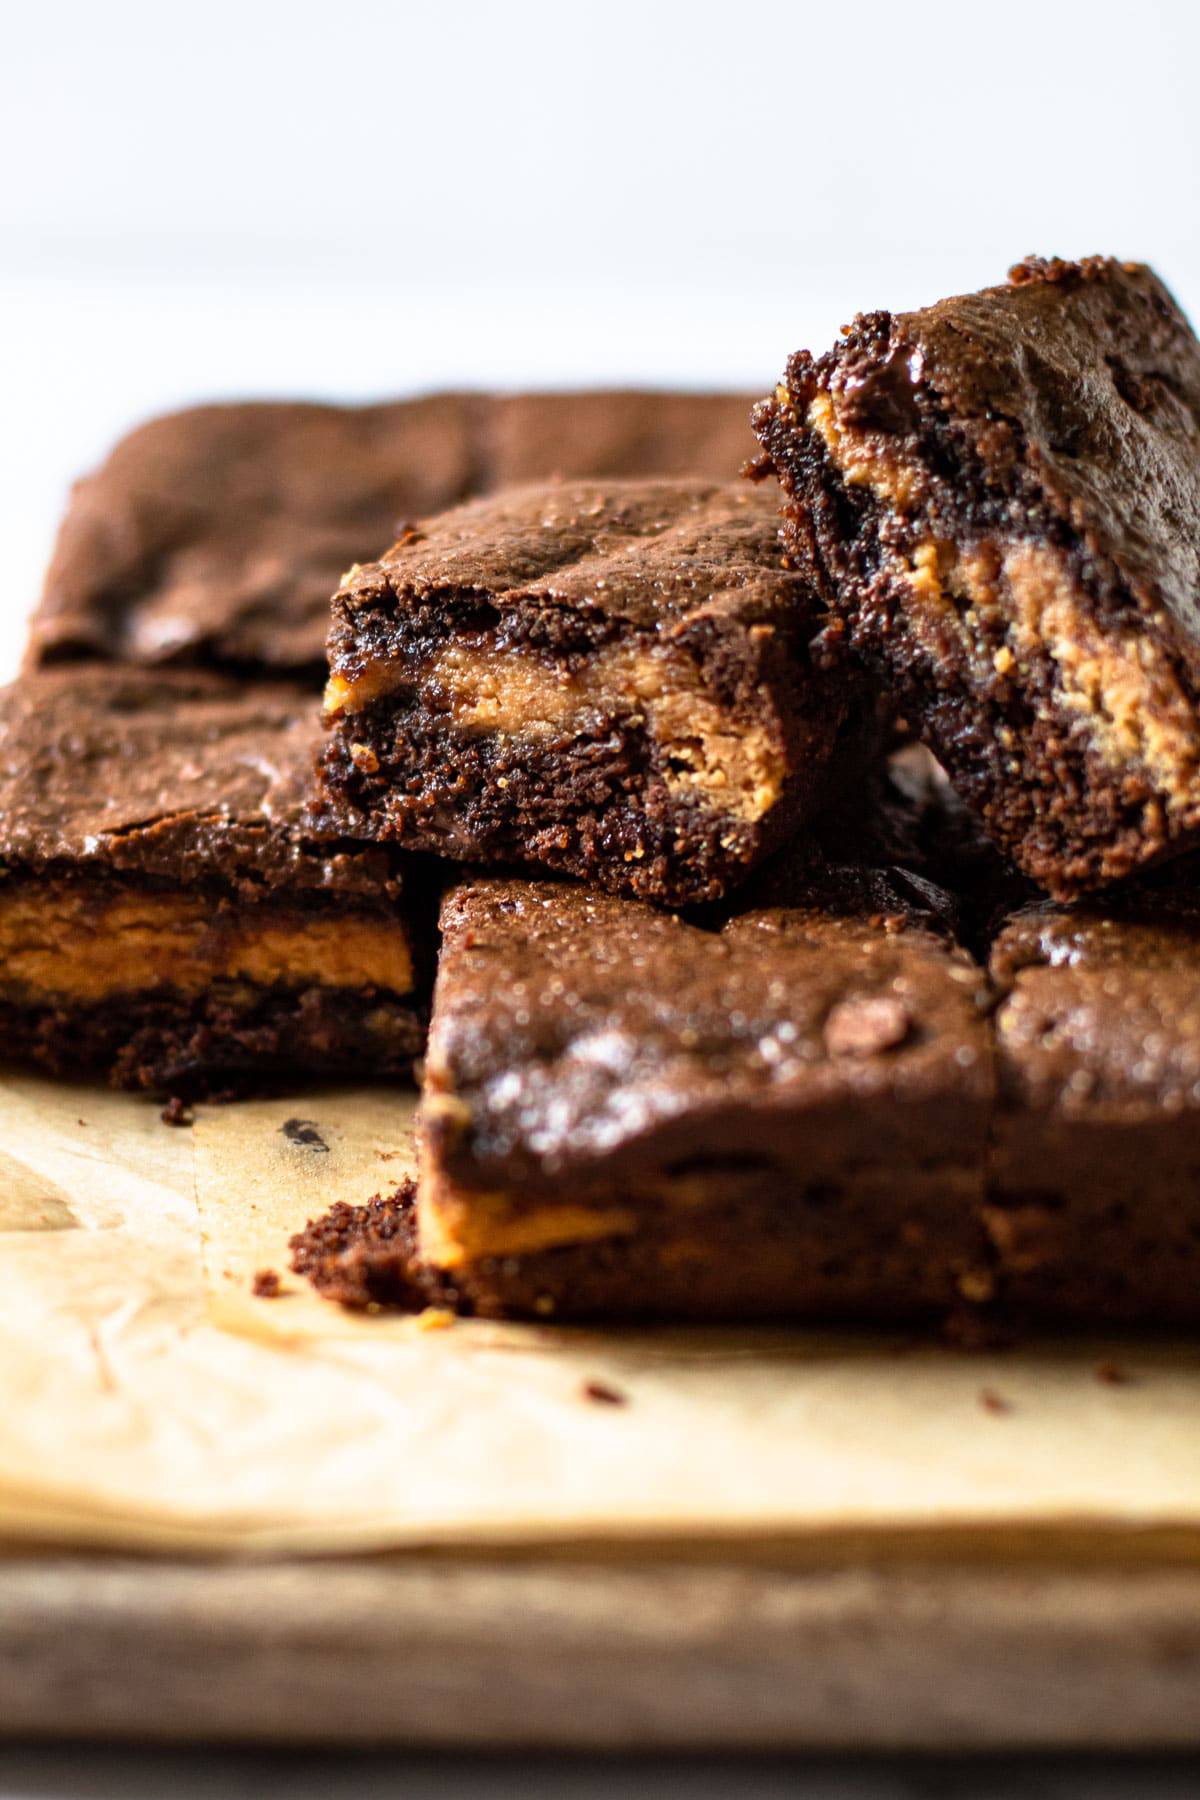
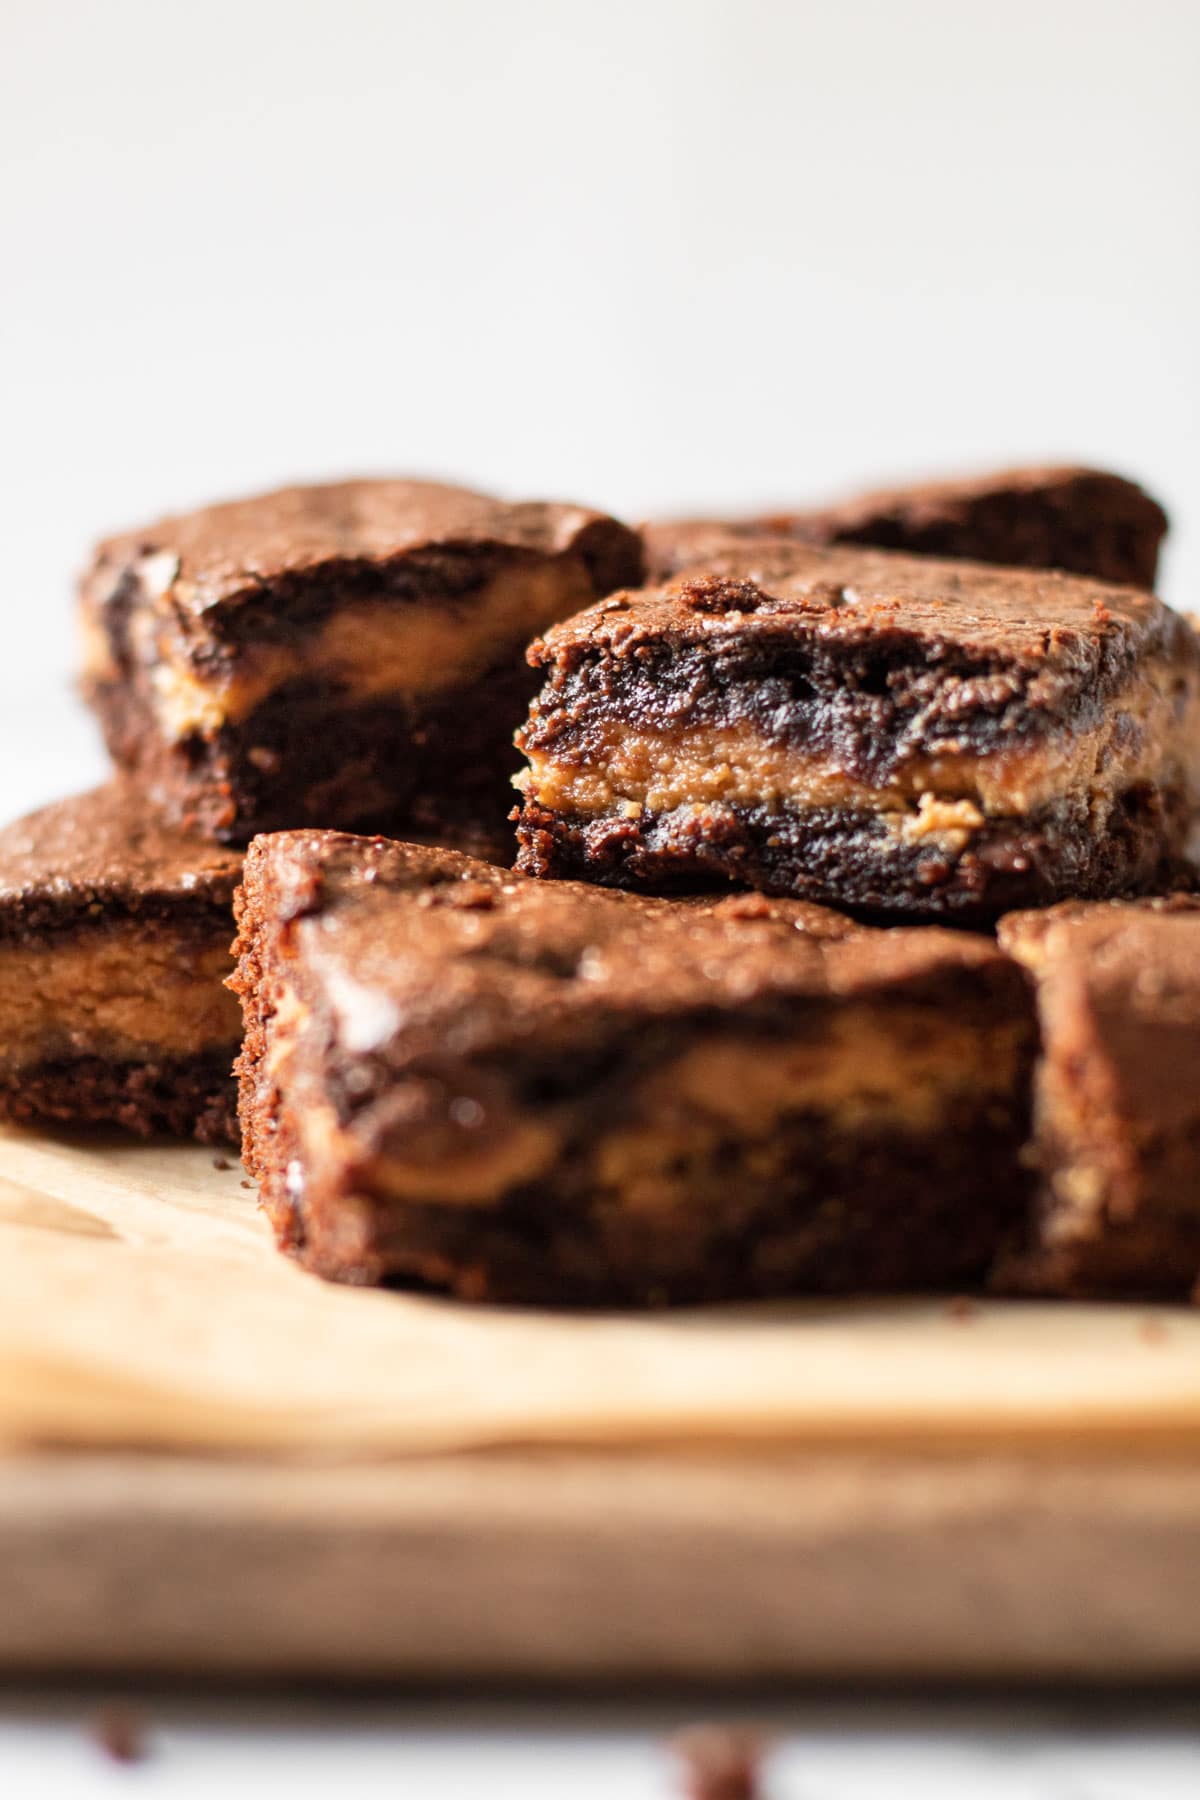
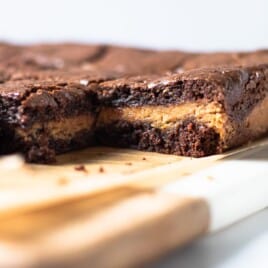
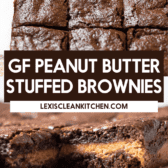
Nothing in this world is better than chocolate and peanut butter together and that’s why these Gluten-Free Peanut Butter Stuffed Brownies are the absolute best. They’re a decadent treat that’s on the healthier side by using almond flour, coconut oil and dark chocolate. That means they’re also grain-free, dairy-free and Paleo, while still being totally delicious.
 Peanut Butter Stuffed Brownies
Hello healthy Halloween treat! Let’s really get into what’s going on with these Peanut Butter Stuffed Brownies. First off, they’re rich with a deep chocolate flavor. As always, we try to keep the added sugar amount as low as we can, so we like to think of these brownies as living in the dark chocolate category. Because these brownies are pretty rich, we recommend baking them until they have risen up and are puffy, which results in a more cake-like brownie. This helps keep it from feeling too rich. But don’t wory fudgy brownie fans, those middle pieces of the brownie are on the edge of cakey/fudgy brownies so there is a little something for everyone with this recipe.
The peanut butter layer really makes this stand out, making this kind of a like healthier version of a Reese’s Peanut Butter Cup baked in a brownie. Since this recipe is dairy-free and gluten-free already, if you needed to make this Paleo friendly too, feel free to swap out the peanut butter for almond butter or cashew butter. Best part? These freeze really well, so you can bake some for now, and have a healthy homemade treat stashed away whenever you need it.
Ingredients Needed
- Almond Flour
- Tapioca Flour
- Dark Chocolate
- Coconut Oil
- Coconut Sugar
- Eggs
- Vanilla Extract
- Unsweetened Cocoa Powder
- Baking Soda
- Creamy Peanut Butter
Substitutions
Flours: First off, we haven’t tried this with any other gluten-free flour. You’ll have to experiment if you wanted to switch those out.
Peanut Butter: We recommend sticking to a peanut butter labeled as “creamy”. Avoid using peanut butter that is really drippy and thin. Feel free to skip out on the peanut butter and use either almond butter or cashew butter here. Sunflower seed butter will not work as it will likely interact with the baking soda in the recipe and can turn green.
Eggs: We haven’t tried this without eggs. Two flax eggs might work, but we haven’t tested it!
Coconut Oil: You can swap in melted butter for this!
Chocolate: Make sure to look for dairy-free chocolate if you need this to be fully dairy-free. We’re big fans of Enjoy Life here! You could also use a different type of chocolate other than dark chocolate, such as semi-sweet or even milk if you wanted to.
Coconut Sugar: We can’t offer a subsitute for this, other than possibly light brown sugar.
Maple Syrup: You could swap this out with honey if you wanted, or alternatively you could use about 1/2 cup of organic powdered sugar, but we were looking to avoid any refined sugars here so we skipped out on it.
Our Best Tip for Making these PB Stuffed Brownies
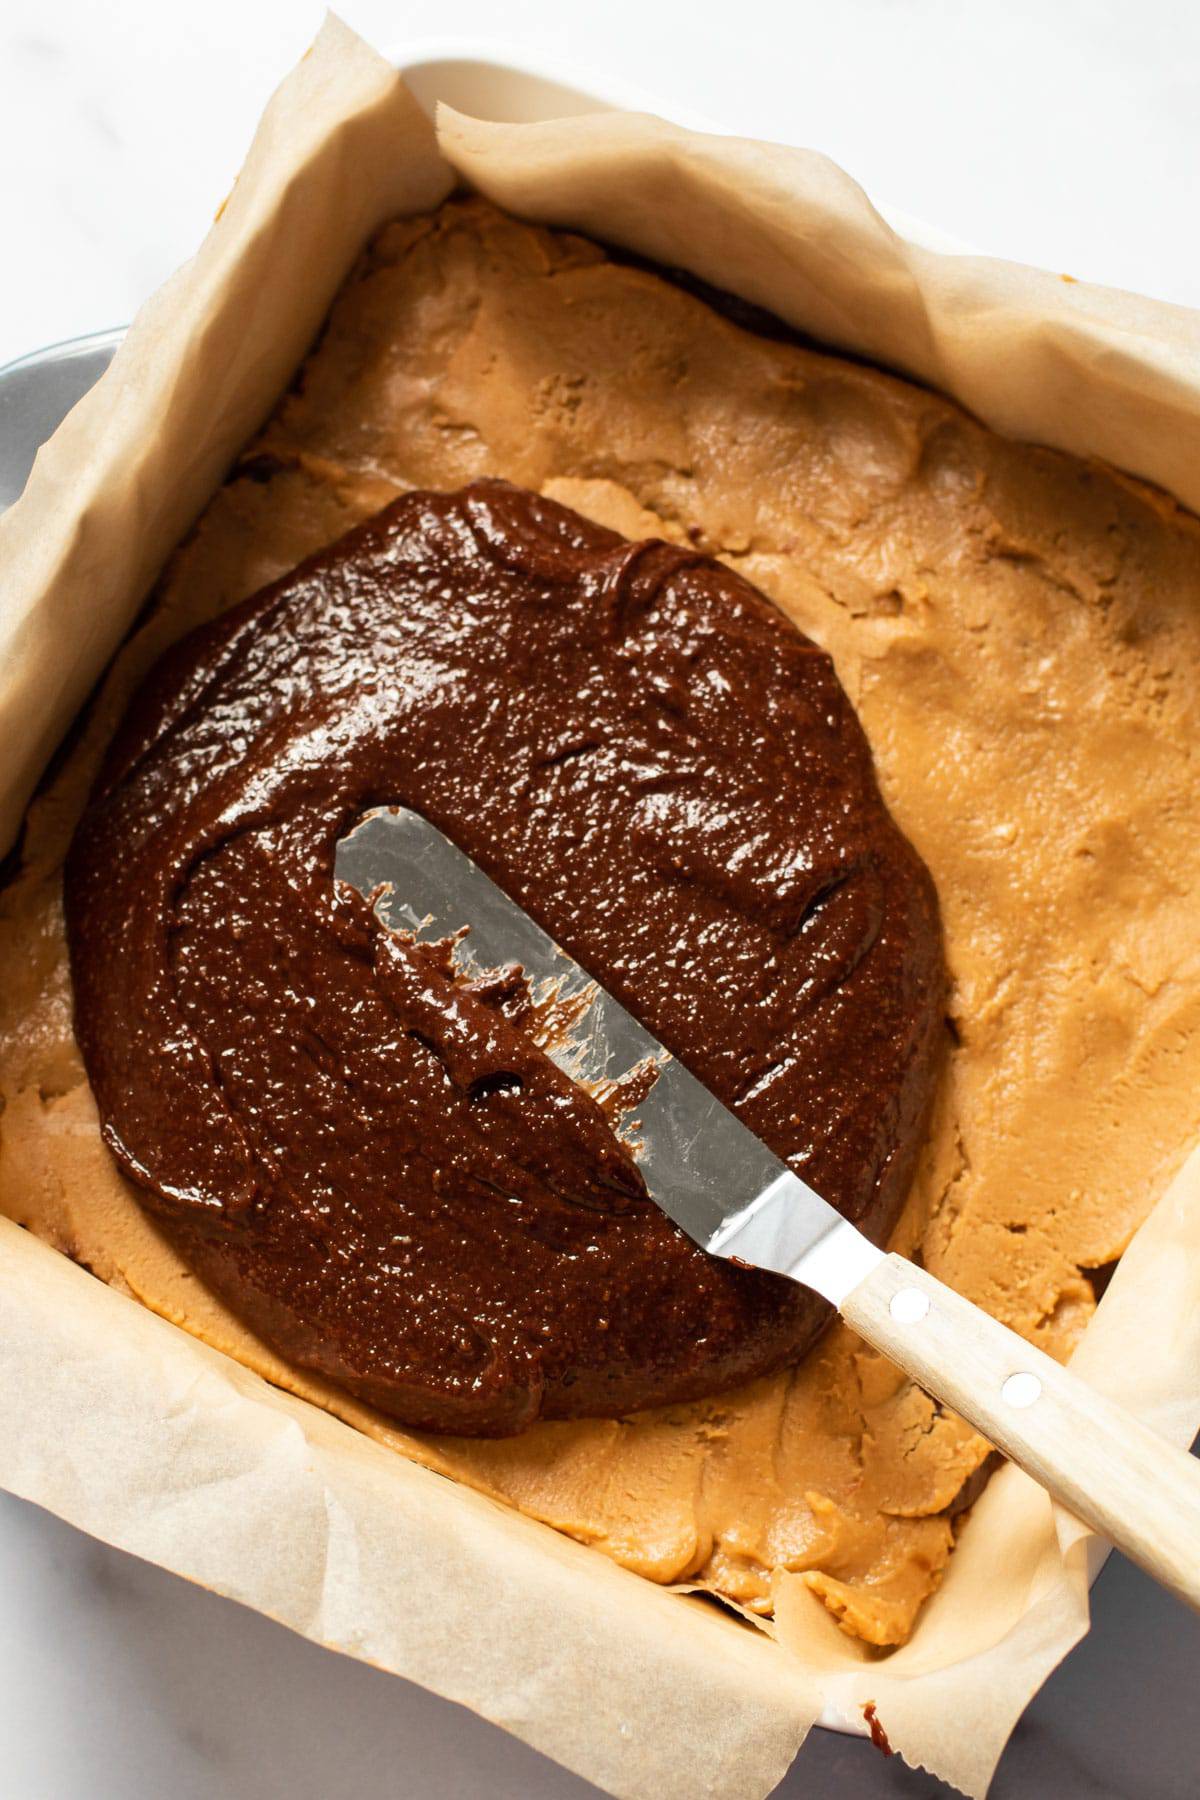
Work quickly! Both the brownie batter and the peanut butter layer will thicken up quickly. The instructions call for making the brownie batter first, then adding half of it to the prepared pan.
It is then that the recipe instructs for the mixing of the peanut butter layer. Take care not to overmix, because some peanut butter can seize up when adding in maple syrup, so just mix it until it’s barely combined, and immediately pour it on top of the brownie layer. Spread it to an even thickness before adding on the remaining brownie batter on.

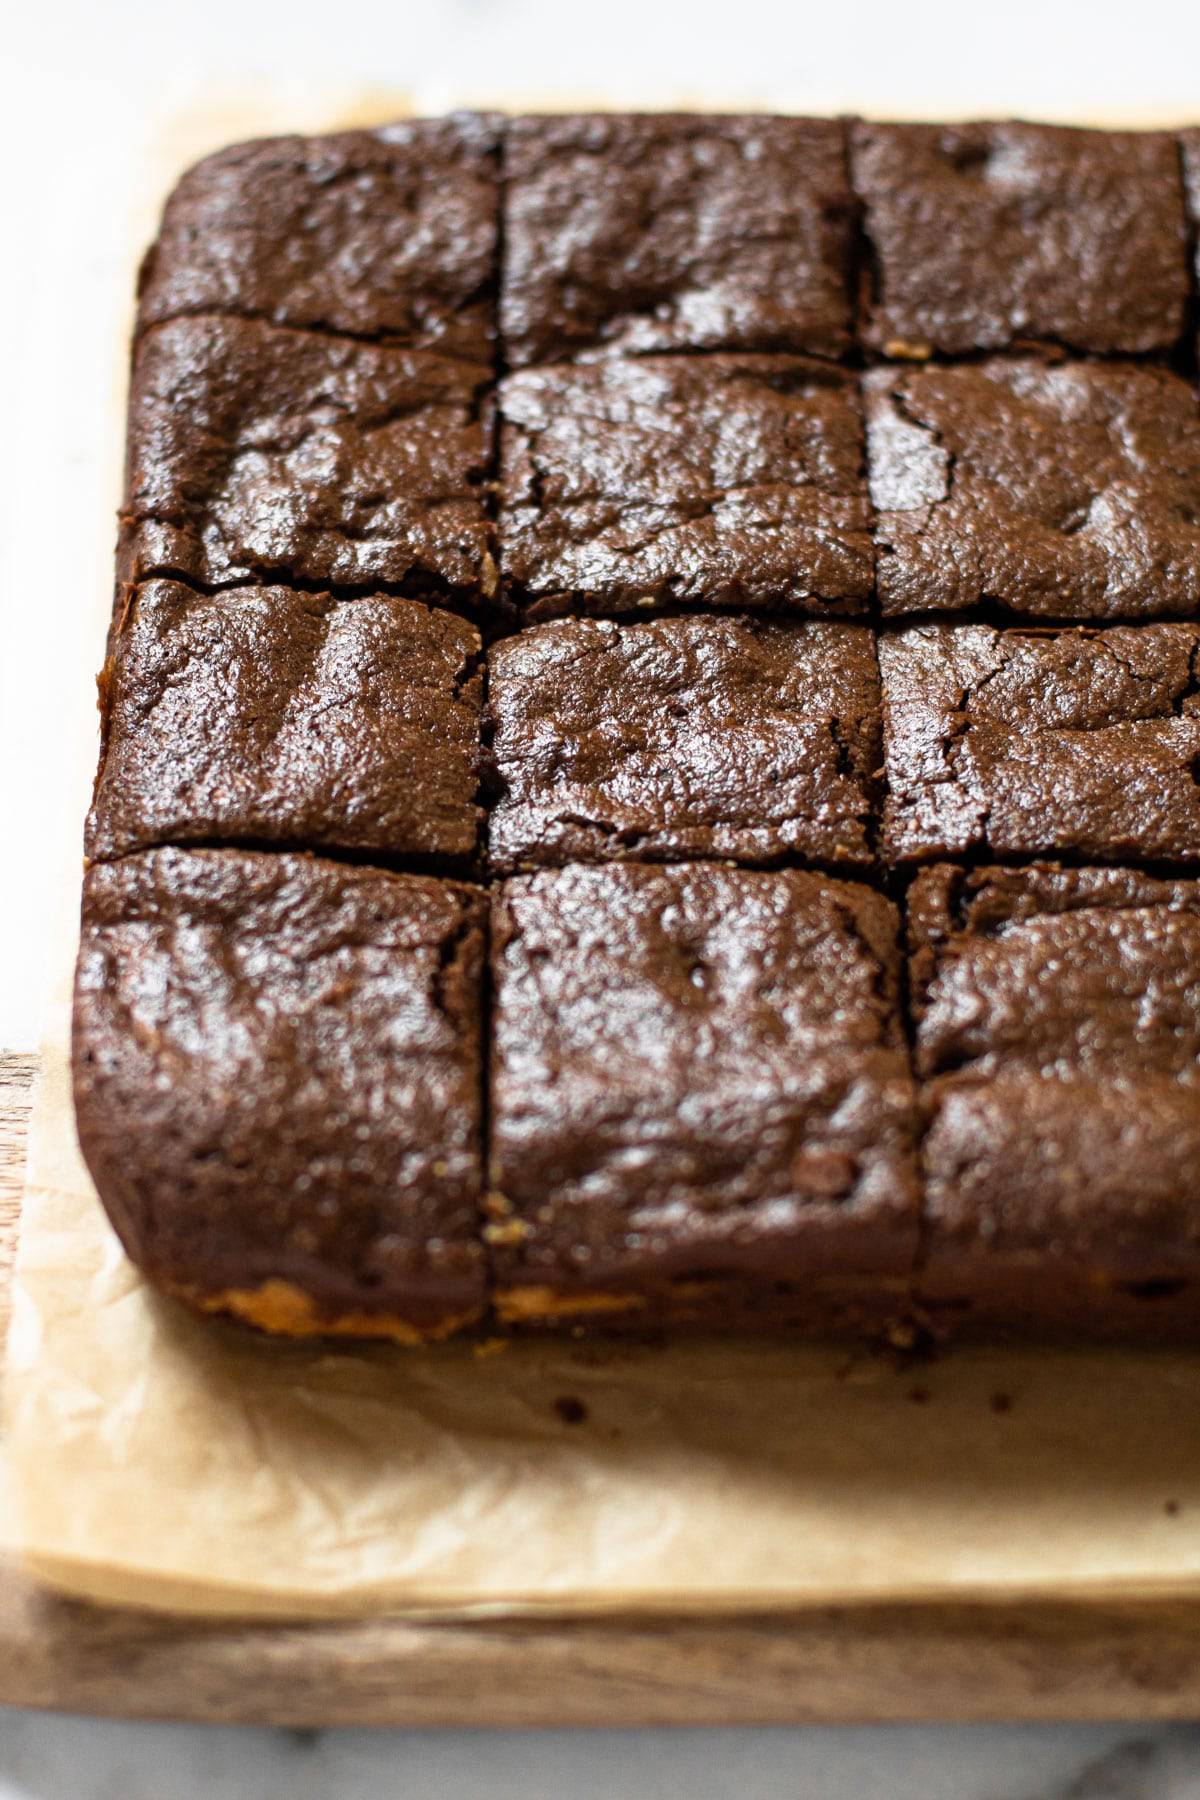
How to Perfectly Bake Them
This brownie as instructed will be more on the cakey side. Some of the middle pieces will be a bit fudgier. If you want to achieve a fudgy brownie all around, you can bake them for about 2 minutes less than the recommended time. We found the perfect time to be around 25 minutes in the oven for the perfect consistency, but depending on the heat of your oven it may be a minute or two less or a minute longer. You want the top of the brownies to be dry, and puffed up nearly all around.
How to Cut Perfect Squares
- Use a parchment paper sling so you can easily remove the brownies in one piece.
- Let your brownies cool close to room temperature, or place it in the refrigerator to cool down. And use a warm knife that has been run under hot water and dried to cut your brownies.
- To get even pieces without using a ruler always cut down the middle! Make your first cut directly down the middle. Then cut each half in half down the middle. This of course only works if you are looking to make an even amount of slices.
- Sometimes brownies have raised edges. If you wanted a very even appearance you could trim the edges of the baked good first. Then, save the scraps for yourself!
How to Store these Brownies
These brownies can sit at room temperature for up to two days but can be stored for longer in the refrigerator (about a week). These freeze really well. We suggest freezing in an air-tight container for no more than 3 months.
Watch the video here:
If you like this brownie recipe, check out these others:
Gluten-Free Peanut Butter Stuffed Brownies
Ingredients
For Brownie Layer:
- 1/3 cup coconut oil or grass-fed butter
- 3/4 cups dark chocolate chips divided
- ¾ cup coconut sugar
- 2 eggs
- 1 teaspoon vanilla extract
- 3/4 cup 75 grams almond flour
- 1/2 cup 60 grams grams tapioca flour
- 1/3 cup 30 grams unsweetened cocoa powder
- 1/4 teaspoon baking soda
- Pinch of salt
For PB Layer:
- 3/4 cup creamy peanut butter
- 1/3 cup maple syrup
- ⅓ cup almond flour
Instructions
- Preheat oven to 350ºF and grease an 8″ baking dish and line with a parchment paper sling.
- In a double boiler, melt together ¼ cup chocolate chips and coconut oil.
- Pour chocolate mixture into a large bowl and add in coconut sugar. Whisk together, and let the mixture cool slightly, about 3 minutes.
- Add in the eggs and vanilla extract and whisk together vigorously, about 1 minute until the mixture has lightened and thinned out.
- In a small separate bowl, whisk together the almond flour, tapioca flour, cocoa powder, baking soda, and salt until there are no clumps remaining in the flour.
- Add the dry ingredients into the wet, along with the remaining ½ cup chocolate chips and mix together until just combined.
- Pour half of the batter in the prepared baking dish.
- Add peanut butter, maple syrup and almond flour into a small bowl and gently mix the ingredients together. Immediately pour the peanut butter mixture on top of the brownie batter, and spread it into an even layer.
- Working quickly, add the remaining brownie batter on top in an even layer.
- Bake in the preheated oven for 25 minutes, or until the brownies have puffed up.
- Let cool completely. Slice into 16 squares.
Delicious and decadent! Can’t wait to make it again. I used gluten free all purpose flour in place of tapioca and it worked perfectly.
This is easily THE BEST gluten free dessert I have ever made! Super simple to make. I did use butter instead of the coconut oil. I will definitely have to freeze some of these because I could easily eat the whole pan!
These were so delicious!!! I made them when I had friends over and they were ooh-ing and ahh-ing over them, and asked to take one home with them. I froze the last few and enjoyed them!
Want the stats/ calorie and all of that on these. I love your recipes and love you supply that information to help me make decisions on whether it fits my lifestyle. Thanks.
OMG!!! Lexi does it again. I made these yesterday and they were perfect. The consistency is everything you want in a brownie and more. My husband and I could not stop eating these.
Yum!! I cut and freeze these. That way when I have a craving I can grab 1 and enjoy. Soooo good!
I can’t wait to make this recipe! Instead of coconut sugar, may I use lakanto powdered sugar and if so, same measurement? TIA!
Hi Kristina, we haven’t tested it with a sugar replacement so we couldn’t advise on this. Please come back and let us know if you give it a try!
What brand of peanut butter works best? I love fresh ground pb, but I don’t want to ruin the consistency.
Hi Kathy. We haven’t tried fresh ground peanut butter, but it might work. A peanut butter labeled as “creamy” is best. Basically, as long as it’s not a really thin and drippy peanut butter, it should work!
Can they be stored in a container on the counter or do they have to be stored in the fridge after cooking? And how long before they have to be frozen? Thank you!! 🙂
I’m going to put a quick update in the post to answer these questions as I think they might be helpful for everyone! Thanks!
These are insanely good. Don’t hesitate. Make them. So good and actually very easy – like pretty much everything on this site. In love.
They were delicious but I’m wondering if the chocolate batter was supposed to be a dough like consistency or thin? Mine was like a dough and it was hard to spread. The final result was very dense ( which I like). I wasn’t sure if it might have been something I did.
HI Karen. Did you read through the post? In it, it talks about how you need to move quickly with this batter, as it does thicken up quickly. However, the final brownie shouldn’t be super dense (it’s actually more cake-like) so perhaps there might have been a mismeasurement somewhere? And I wouldn’t describe the batter as dough. How did you measure your flours?
I swapped butter for the coconut oil and they came out great!!
These were so good!
Could arrowroot be used instead of tapioca?
We haven’t tested it that way, so can’t guarantee the same results, but that would be my swap guess. Let us know!