This post may contain affiliate links. Please read my disclosure policy.
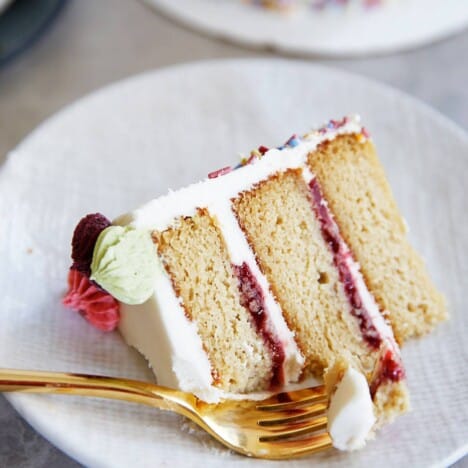
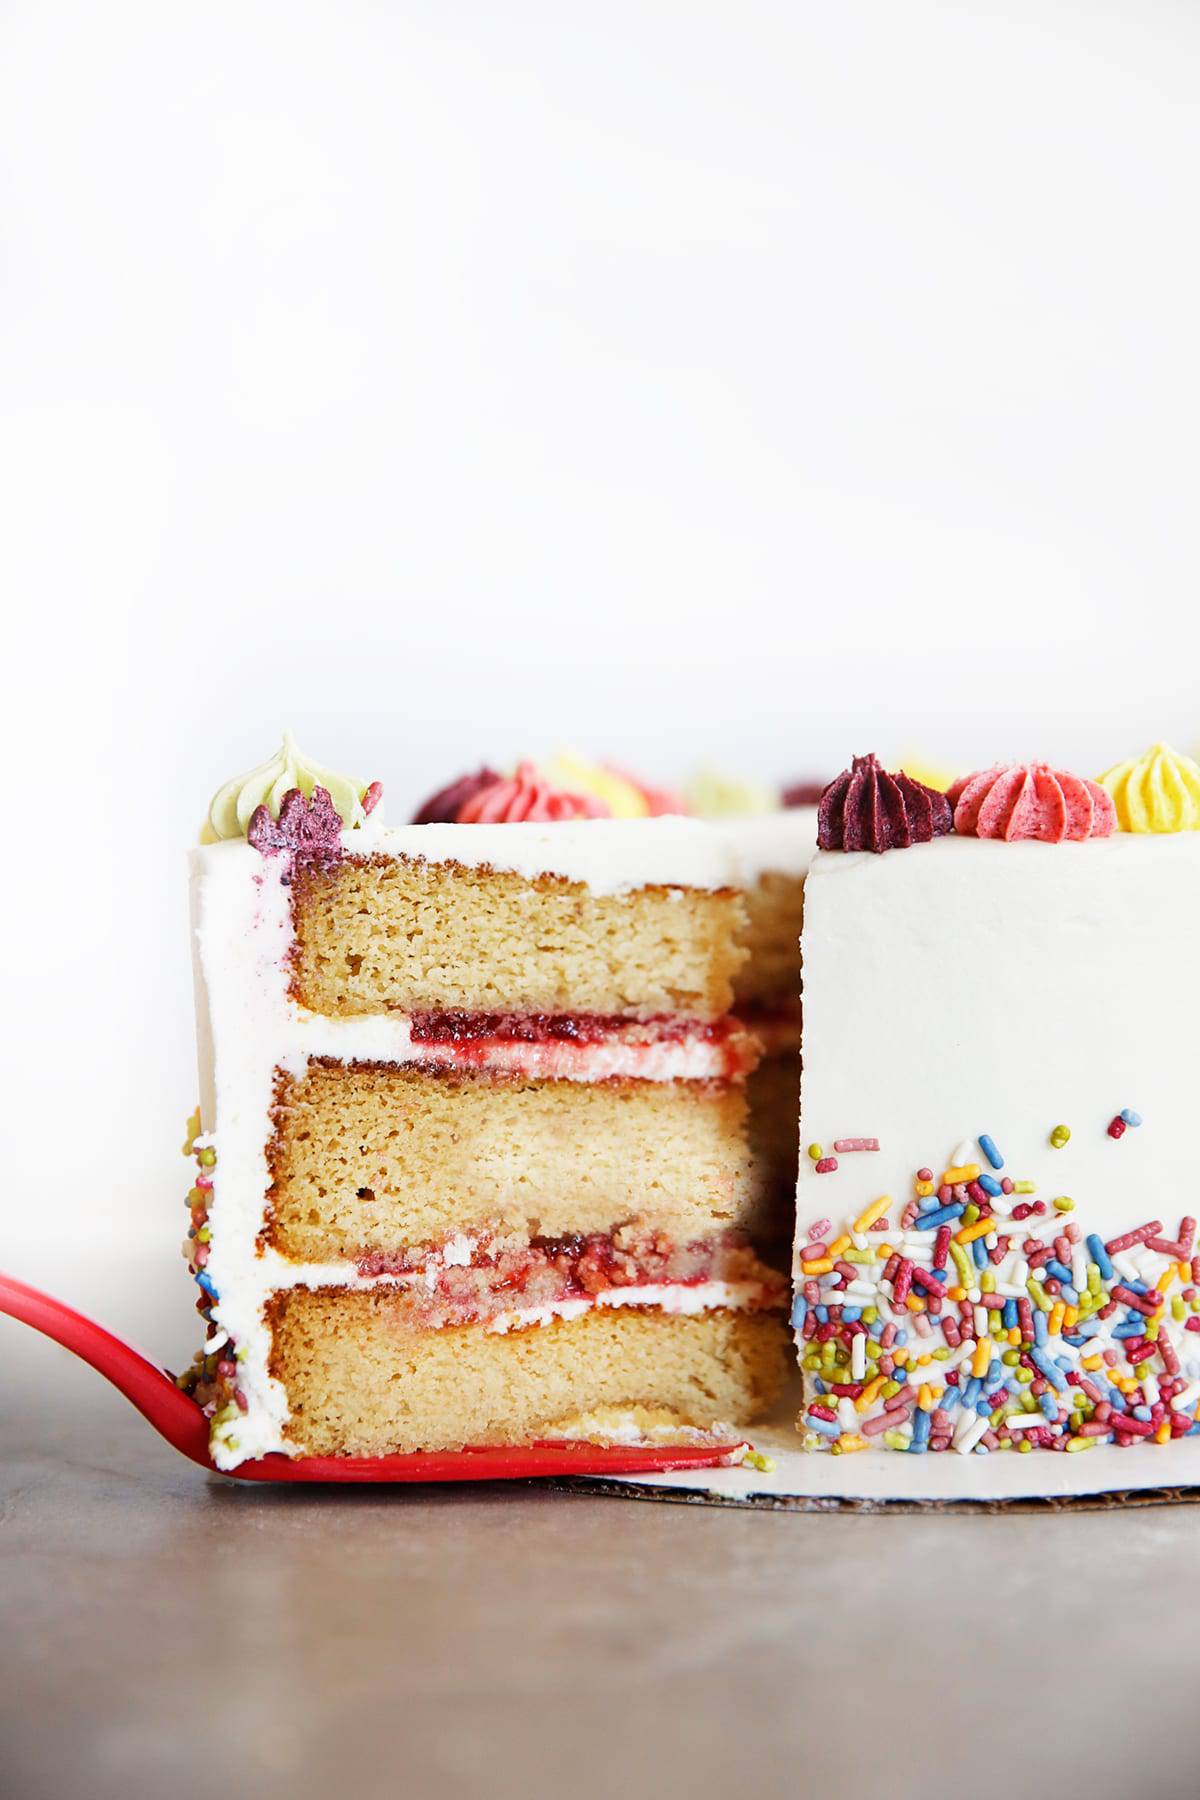
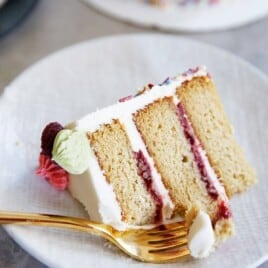
This really is The Best Gluten Free Birthday Cake! It tastes like the real deal, but it’s made gluten free so everyone can celebrate. It’s made with moist, tender vanilla cake layered with homemade strawberry filling, and a light, fluffy buttercream.

Easy Gluten Free Cake Recipe
This seriously is the Best Gluten Free Birthday Cake. We took my nut-free cake and it made it even more amazing. It’s made up of three layers of a super moist and tender gluten free cake infused with homemade strawberry jam and layered with homemade buttercream.
This delicious dessert is so decadent and perfect for celebrating! Or just for any day of the week. 😉
What is Gluten-Free Cake Made Of?
Gluten free cake is made up of most of the classic cake ingredients, just with gluten free flour instead of regular all-purpose flour.
In this case, we’re using a combination of almond flour and coconut flour which creates the perfect moist and tender texture.
Ingredients Needed:
Cake
- Butter: make sure the butter is softened to room temperature so it incorporates smoothly with the sweetener.
- Sweetener: I use a combination of honey and maple syrup, but feel free to use one or the other.
- Flour: our gluten-free flour blend is a combination of almond flour and coconut flour.
- Baking Powder and Baking Soda: keeps the cake light and fluffy.
- Sea Salt: enhances flavor and cuts the sweetness slightly.
- Milk: I use almond milk, but whatever you have on hand will work.
- Vanilla Extract and Almond Extract: I love the flavor depth achieved with a combination of vanilla and almond, but feel free to leave out the almond if you want.
Strawberry Filling
- Strawberries: you’ll need 2 cups of fresh strawberries, sliced. You can use frozen strawberries if you want, but you will need to thaw them first so they can be easily sliced.
- Honey: naturally sweetens the filling and creates that thicker, jam-like texture.
- Vanilla Extract: adds flavor depth.
Buttercream Frosting
- Butter: again, make sure you soften the butter first!
- Powdered Sugar: I recommend sifting the powdered sugar to prevent any clumps from forming.
- Vanilla Extract: adds flavor depth and a touch of extra sweetness.
- Milk: I like almond milk, but anything works.
- Natural Food Coloring: check out my 5 ways to naturally color frosting!
How to Make Gluten Free Cake
This gluten free birthday cake is so simple yet so delicious. Just whip up three quick layers, assemble your cake, and it’s ready to go!
- Make the batter: Using a mixer, combine butter and sweetener until light and fluffy. Add the eggs one at a time, blending after each one, then mix in flours, baking powder, and baking soda. Mix in milk and extracts, then beat until light and fluffy.
- Bake and cool: Divide the batter evenly between three 6” buttered and parchment-lined cake pans, then bake until a toothpick comes out clean. Cool in the pan for 5-10 minutes, then transfer to a cooling rack to cool completely.
- Make the filling: In a saucepan, combine strawberries, honey, and lemon juice. Cook until reduced, then cool completely.
- Make the frosting: Using your stand mixer and paddle attachment, beat the butter until fluffy. Add in sugar and mix until combined, then add in vanilla and milk. Finish with the natural food coloring of your choice. Blend until smooth.
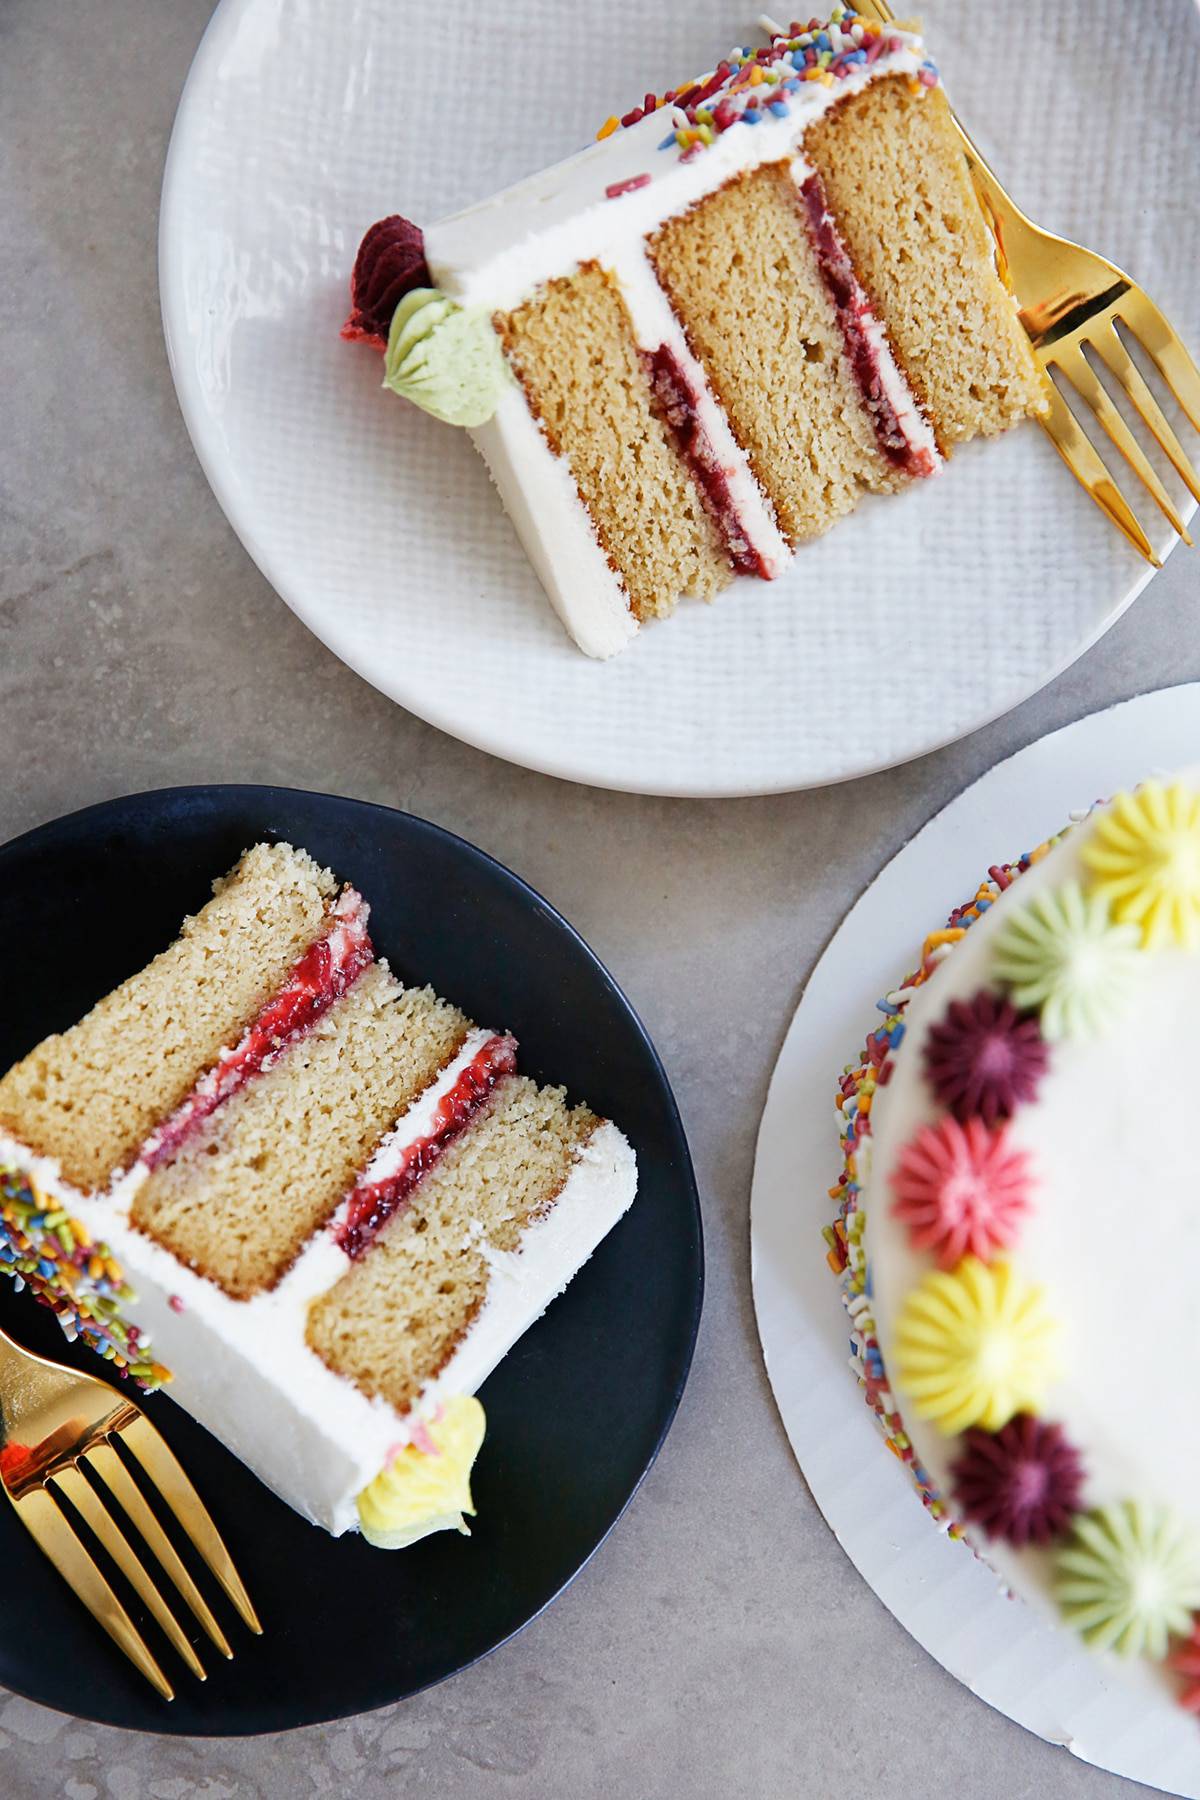
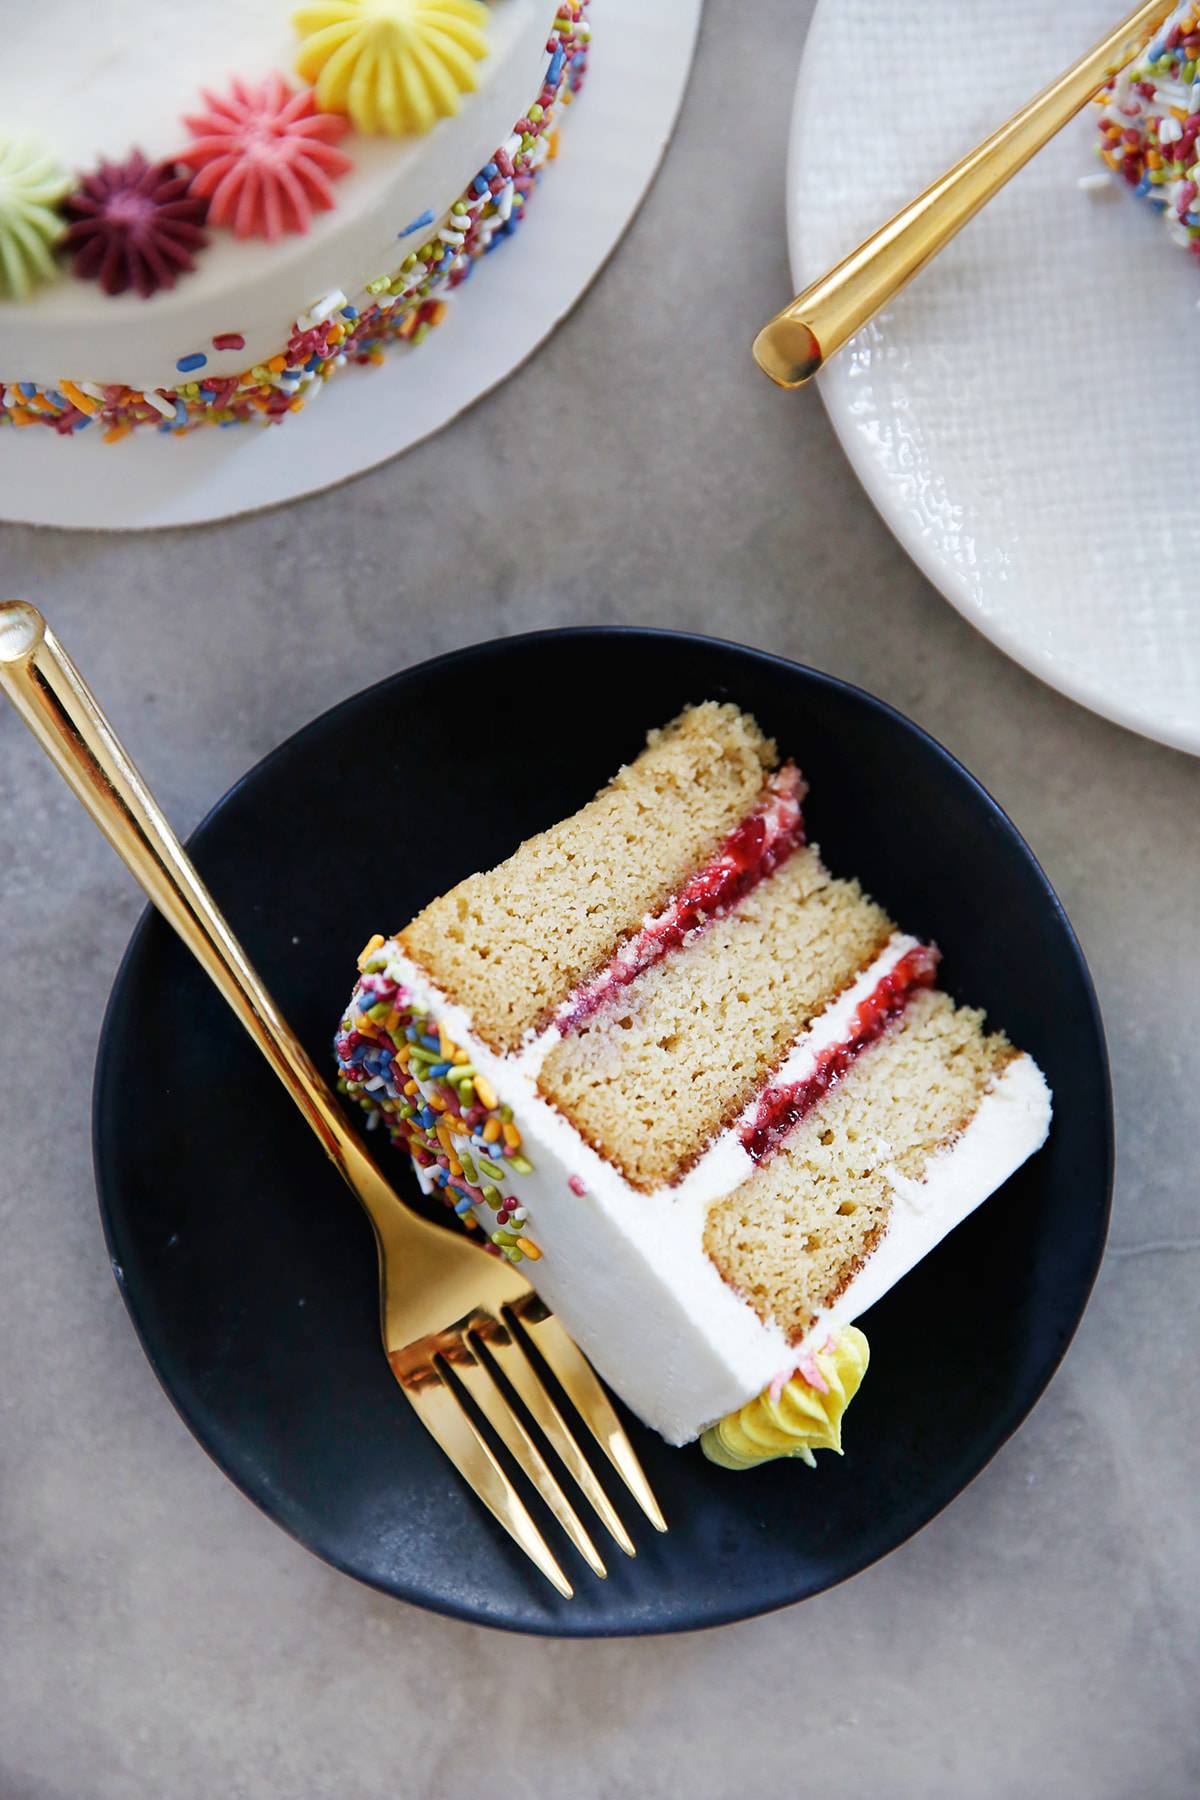
- Assemble the cake: Place one layer of your cake onto a serving platter. Frost with a thin layer of buttercream, then use a piping tip or offset spatula to create a ½” dam of frosting around the cake. Top with jam and smooth over. Repeat with another layer of cake, buttercream, and jam, then add the final cake layer, and place it in the fridge to chill.
- Finish frosting and serve: Add the rest of the frosting to the top of the cake, then use an offset spatula to smooth it over the top and down the sides. Decorate as desired, then slice and serve or store in the fridge.
Tips and Notes
- Butter and line the pan. Make sure you butter the sides and bottom of each cake pan, then cut parchment paper circles to line the bottom. This makes is so much easier to remove it after baking.
- Use room temperature ingredients. Bring the butter, eggs, and milk to room temperature for the best results.
- To quickly bring your ingredients to room temperature, place your eggs in a bowl of warm water for 10 minutes, microwave the butter for 15-20 seconds, and gently heat the milk on the stove or in the microwave. Remember, we want them to be room temperature, not hot!
- Check for doneness. To make sure your cake is done, insert a toothpick into the center. If it comes out clean, it’s good to go.
- Cool the cake and the filling completely. Make sure your cake and filling are cooled completely before you layer the cake.
- Apply a crumb coat. Frost the cake with a thin layer of frosting to lock in any stray crumbs.
- To achieve a smooth finish, chill the cake again for 10 minutes after frosting. Heat a bench scraper or off-set spatula with hot water, dry it completely, then use it to make one final swoop to smooth the frosting out.
- Use another fruit. Feel free to swap the strawberries out for another fruit. Raspberries, blueberries, or blackberries would all work great!
Tips Tools Needed to Frost a Cake Like a Pro
Now not everyone is going to frost this cake like we did. But if you want to give it a whirl, getting these tools make it easier to get an even and smooth cake!
- Offset Spatula
- Turntable
- Cake Board
- Flat Bench Scraper
- Decorating Bags
- Decorating Tips
- 6 Inch Baking Pans
Additionally here are some tips that make it easier to frost a cake:
- Temperature matters: Chill your cake layers before assembling, and chill the cake after you have built your layers as it helps keep your cake evenly stacked.
- Apply a crumb coat: Frost the cake with a thin layer of frosting that locks in any stray crumbs
- To achieve a smooth finish: Once you have finished frosting the cake, chill again for 10 minutes and then heat the bench scraper or off-set spatula with hot water (make sure to dry it off completely) and make one final swoop to smooth it all out.
Making Ahead of Time
There are a few ways you can prep this Gluten Free Birthday Cake ahead of time.
First, you can make the cake layers, jam, and frosting the day before, then store them separately in the fridge.
You can also bake and cool your cake, wrap the layers tightly, then store them in the freezer for up to 3 months. When you’re ready to make your cake, thaw them in the fridge, make the filling and frosting, then assemble.
How to Store
A fully assembled cake must be stored in the fridge. It will last for 3-5 days.
More Gluten Free Cake Recipes You’ll Love
- Chocolate Gluten Free Pound Cake
- Gluten Free Vanilla Cupcakes
- Healthy Smash Cake
- Paleo Flourless Chocolate Cake
Watch the Video:
The BEST Gluten-Free Birthday Cake
Ingredients
For Cake:
- 1/2 cup 4 oz. or 1 stick butter, softened (see note)
- 1/3 cup honey or maple syrup see note
- 4 eggs
- 2 cups 192g almond flour
- 1/2 cup 48g coconut flour
- 1 teaspoon baking powder
- 1 teaspoon baking soda
- pinch fine sea salt
- 1/2 cup unsweetened almond milk or milk of choice
- 1-1/2 teaspoon vanilla extract
- 1/2 teaspoon almond extract optional
For Strawberry Filling:
- 2 cups strawberries sliced
- 2 tablespoons honey
- 1 teaspoon lemon juice
For Buttercream Frosting:
- 1 cup 2 sticks butter, softened
- 3 cups powdered sugar sifted
- 1 teaspoon vanilla extract
- 1 to 2 tablespoons almond milk
- Natural food coloring follow this guide
Instructions
- Pre-heat oven to 350ºF and prepare three 6" cake pans by cutting out a three parchment paper circles to fit exactly inside the cake pan. Butter sides and bottom of cake pan and place parchment paper circles inside.
- In a heavy duty stand mixer, or hand held mixer, add butter and honey/maple syrup to bowl and cream together until light and fluffy, about 3-5 minutes.
- Add eggs, one at a time, blending together after each one.
- Add almond flour, coconut flour, baking powder, baking soda and salt and beat on medium for 1-2 minutes until well blended.
- Add almond milk, vanilla extract and almond extract and beat on medium for 2 minutes until light and fluffy.
- Divide batter into cake pans, about 1 cup of batter each, and bake for 20 minutes, or until toothpick inserted in center comes out clean.
- Let cake cool in pan for 5-10 minutes, and then remove from pan to a cooling rack to cool completely before frosting.
For Strawberry filling:
- In a medium sauce pan place strawberries, honey and lemon juice and turn on heat to medium low.
- Cook, stirring frequently, until reduced, about 15 minutes.
- Let cool completely before using in cake.
For Buttercream Frosting:
- In the bowl of a stand mixer fitted with paddle attachment beat the butter until light and fluffy, 3-5 minutes.
- Add the sugar and mix on low speed until well blended. Increase the speed to medium and beat until fluffy, 1 to 2 minutes.
- Add the vanilla and 1 tablespoon of almond milk (or more if needed) and beat on medium speed until lightened in color.
- Add natural food coloring if using and blend.
To Assemble Cake:
- Once cake and jam is cooled completely place first layer on serving plate and frost with a thin layer of buttercream. Create a 1/2" dam of buttercream on the perimeter of the cake layer by piping it, or using a offset spatula, to prevent the jam from leaking out of the cake. Top with 2 heaping tablespoons of jam and smooth over.
- Add next layer of cake and repeat with layer of buttercream, buttercream dam, and jam.
- Place cake in refrigerator for at least 15 minutes, to let set up and to make frosting cake easier.
- Once cake has chilled, add about half of frosting to the top of the cake and using an offset spatula frost cake starting with the top and moving excess down the sides of the cake and smoothing as going.
- Decorate as desired with additional frosting.
- Cake will keep 3-5 days in refrigerator.
Notes
- We used a combination of maple syrup and honey equal to 1/3 cup together to prevent the cake from taking on the flavor too much of either one.
- The butter absolutely must be at room temperature or it will not cream together with the honey. It is always best when making a cake if all ingredients are as close to room temperature (especially eggs and milk) as the cake batter comes together more easily and you get a fluffier textured cake. If the eggs are not at room temperature you can place them in a bowl with warm (not hot) water for about 10 minutes. You can also gently heat up milk using your preferred method (stove top or microwave) to bring it up to room temperature (but make sure it is not hot).
- Follow this guide for our post on Natural Food Coloring!
- Sprinkles we use: We get them from Whole Foods because they are artificial food dye free. These are also a decent option.
Thank you for being a part of the Lexi’s Clean Kitchen family throughout these amazing 5 years. I love you all!!

Can I freeze the cake and put it together later ?
You didn’t tell me to beat butter till fluffy before adding the honey combination which I thought was odd and now it’s separated.
This is supposed to be for a loved ones birthday tomorrow. Hoping it still turns out.
It’s correct, you cream the butter with the honey. Did you over beat? We haven’t ran into this issue and so many have made it/we make it all the time!
This cake is my absolute favorite !! I make it every year for my birthday. Can’t wait to make it this week
I just made this cake for my son’s 5th birthday and it was a big hit! Super moist and I didn’t feel like it tasted like “a Paleo cake”. Everyone really liked it, also all our friends who don’t typically eat Paleo.
I doubled the recipe and made 2 layers of 9”. I made the cake the day before as well as the strawberry jam so everything had time to chill and set and to give myself more time to focus on the decorating. Thank you for a wonderful recipe and for the decorating tips and video/.
Can use buttermilk in place of the milk? Not sure if buttermilk works well with gluten free flour.
Because of the added acidity and thickness of buttermilk, I can’t say for sure whether it would work out ok. If you do try it, let us know if it works!
I tried it mixing by hand as the stand mixer bowl was already in the dishwasher on a 300+ min cycle. It turned out very dry and I was unable to smooth it down in the pans very well due to the dough-like consistency. It didn’t rise at all (not all that surprising given gluten free, but usually i get a tiny bit of fluff out of cakes, but there was none here at all). Upon taking the cakes out, they were very tasteless, not sweet at all like cake, more like I’d baked round flat plain bread. I will note I’m at a very high altitude, over a mile high, so that could have something to do with it. The only other thing I could think of was the eggs maybe weren’t as large as we wanted them to be? Either way, I salvaged it by putting pure jam between the layers and smothering it in chocolate flavored icing (also to hide the very lumpy edges because I guess my round pans were too big or something as well? I couldn’t spread the dough all the way out or it’d have been see-thru thin, but they were normal round size pans I’ve had for years). So either a) the altitude b) the egg size or c) hand mixing instead of stand mixing totally threw this off. Use it as caution for anyone proceeding not to somehow make my mistakes.
(I’ve been baking for years, so I don’t think I just completely messed it up recipe-wise.)
Hi Alexandria. What size pan did you use? This recipe calls for 3 6″ pans. Sounds like there was a major error in the making of the recipe, beyond not using a stand mixer. And to be clear, it’s essential to use a stand mixer to get the mixture light and fluffy. You probably already know this, but when a recipe calls for creaming together the butter and the sweetener, it’s for a good reason! Sorry this didn’t turn out for you.
Can’t wait to make this for my daughter-in-law. We are both gluten free and she is also dairy free. Do you know of a way to make the icing without butter?
Hi! I saw that you tested in 8 inch pans as well. Can you give me the recipe and cook time for that please? I don’t own 6 inch pans, and I want to make it this weekend for my little man’s first birthday party!!
Could you do this in a 9×13 sheet? Would that be the right size? I would just leave it in the sheet pan to frost and serve:) Thanks!
Hi Jenny–I’d be worried it would be too thin of a layer. It could definitely be baked in it, but it might be a matter of it being a thin cake. Let us know if you try!
This cake was amazing! I usually don’t like cake because it’s usually too sweet. But this cake was perfect!!!
So happy you enjoyed 🙂
Just made this for my son’s 1st birthday. The family was shocked that a “grain free/gluten free cake could be so good.” I am so pleased at how it turned out.
I definitely had some doubts during the baking process, and some of you may have a few doubts as well- so hopefully this is helpful:
A. MY BATTER’S CONSISTENCY was much thicker than I expected, and even though I mixed it until light and fluffy- it looked kind of grainy. It didn’t just pour or take the shape of the cake pan- I had to plop the batter into the pan and spread it around myself in order for it to take the shape of the pan- this had me worried, I thought for sure I had done something wrong or that it would not rise. If your batter looks like this then DO NOT WORRY it turns out great!
B. 8″ PANS work fine however I chose to double the recipe, otherwise each individual cake would be thin and I wanted a nice tall layered cake like in Lexi’s video. I agree with the author though, that you should absolutely use 6″ pans if possible because the cakes are delicate and I had to be super careful when assembling my larger cakes.
Again, wonderful recipe-and I had fun! go for it people!
Is this recipe do-able without an electric mixer? I don’t have one on me currently!
It might be tough to cream the butter and sugar by hand, but you can give it a try. It needs to be light and fluffy before you proceed with the rest of the recipe!
do i have to use the coconut flour? or can i just add more almond flour?
You do need the coconut flour!
I used this cake recipe as the basis for a chocolate 7-layer cake and it was ahhh-mazing!
Flavorful and moist. Loved by both the GF and non-GF crowd alike!
Anxious to test out this recipe for my daughters birthday! Just wondering if anyone has tried to make this recipe into cupcakes instead ?
Never even heard of 6″ pans for cakes! I have 8″ & 9″ only. Thinking I may try 2 8″ and see how it goes!
This is by far the BEST gluten free cake I’ve ever made! I’ve made it numerous times and people rave about it! I was making it for a recent office baby shower and needed to serve 12-15 people, so I doubled all ingredients and it worked out great! It definitely took longer to bake, and if I did it again, I may place some foil on top of the cake after the first 15 minutes of baking just so the top and sides don’t get quite as brown. But it produced 3 9″ layers and was a huge hit for the shower!!
That makes me so so happy!
Hi,
Do you have a step by step video guide on how to make this cake? I’ve noticed you’ve only got the assembly of the cake with icing video.
I’ve made this for the first time and want to make sure the cake is looking the right consistency when I add each ingredient and mix.
I want to use the recipe in a oblong baking tray to make my grandson a iggle piggle bithday cake. Using the same amount of ingredients so would need to make 2 lots would the amount work per tin tin size 9 inch by 13 inch or could you recommend a oblong size
Also how long would you need to bake the cake before his birthday Thankyou ps I’ve never baked gluten free cakes this sounds like it would be just right.
Hi Sheralee! Unfortunately we can’t advise on how many batches you’d need to make to fit any particular size. We tested it in an 8 inch pan and a 6inch round pan. We opted to instruct to make in a 6″ pan because the final cake can be a bit delicate and is easier to handle in a small size. Are you planning to leave the cake inside the tray, or remove it? If you are planning to remove it and decorate you may find it difficult to do so without breaking it. If you plan to make it and frost it in the pan you could try it.
Just made this. My new to go recipe. All ingredients were at room temperature. Used honey. Texture was wonderful. Frosted it with cashew cream frosting