
This post may contain affiliate links. Please read my disclosure policy.
These Gluten Free Cut-Out Cookies are the best cookies for decorating this holiday season! No more just dreaming about those popular, decadent, cut-out cookies that everyone is enjoying, now you can too!
These cookies are so simple to make and can be rolled out immediately; no extra refrigeration time is needed here. Whether you’re looking for the perfect holiday cookie or simply a festive celebration any other time of the year, these cookies are truly ideal.

If you want plain cookies to enjoy as-is or festive cookies decorated with icing and sprinkles, this recipe gives a sturdy, tender base that works either way. And the best part? The cookies are made with only five ingredients (plus a pinch of salt), and the dough rolls out easily, ideal for making with the kids this holiday season.
Why I Love These Gluten Free Cut-Out Cookies
Seriously, how cute are these? Not only are these the cutest cookies you’ll see this holiday season, but they also taste delicious, and we’re sharing a few different flavor options.
- Minimal ingredients, maximum ease. With just a few paleo- and gluten-free-friendly base ingredients, these cookies are straightforward — no complicated flour blends or unusual additives.
- No chill time needed (unless you want it!). Unlike many cut-out recipes, this dough works great for rolling out right away, perfect for spontaneous baking, especially with the kids.
- Customizable & versatile. Want almond, citrus, vanilla, or mint-infused cookies? We’ve got you covered. Scroll to the recipe card for the details! Or you can keep them plain and decorate however you’d like.
- Great texture + shape retention. These cookies bake up with a nice balance of chew and crisp, and they hold their shape beautifully, which is key for the cut-outs and decorating.
PRO TIP:
Roll the cookies right away! No need to have the dough set up in the refrigerator for a few hours or a couple of days. This recipe truly makes for the perfect cut-out cookie recipe to make with kids. *Bonus – no eggs included, so sample the dough while cutting them out!
What Ingredients You’ll Need
*Scroll down to the recipe card for complete ingredients and instructions.
For the Cookie Dough
- Butter (or butter alternative): At room temperature.
- Honey: Or maple syrup as a substitute.
- Vanilla Extract: Base flavor.
- Almond Flour: For structure and a naturally gluten-free base.
- Tapioca Flour: Helps with texture and structure in the absence of gluten.
- Sea Salt: Just a pinch!
Optional Flavor Add-Ins:
- Mint extract
- Orange zest
- Almond extract
For Decorating (Optional)
- Organic powdered sugar
- Almond milk (or alternative milk)
- Vanilla extract
- Natural / dye-free food coloring (if you want colored icing)
Step-by-Step: How to Make Gluten Free Cut-Outs
1. Make the dough
- In a mixer (stand or hand), cream the butter (or butter alternative), honey, and vanilla until light and airy.
- In a separate bowl, whisk together the almond flour, tapioca flour, and salt.
- Add the dry ingredients to the butter-honey mixture and mix until the dough comes together. It may look crumbly at first, but keep mixing until it forms a cohesive dough.
- Optionally: add your flavor choice (mint, orange zest, or almond extract).
You can roll the dough out immediately — or wrap and refrigerate it for up to 3 days if you want to bake later.
2. Roll out & bake
- Preheat your oven to 350°F. Line a baking sheet with parchment paper or a Silpat.
- Between two sheets of parchment (or plastic wrap), roll the dough out to about ¼″ thickness. Then cut out your shapes with your cookie cutter favorites.
- Carefully transfer cut-outs to your baking sheet. They don’t spread — so you can place them fairly close together.
- Reroll scraps and cut more cookies. If the dough warms up and becomes too soft, pop it back in the fridge for a bit before re-rolling.
- Bake for about 7 minutes, until the edges are just starting to turn golden. Let cookies cool completely before decorating.
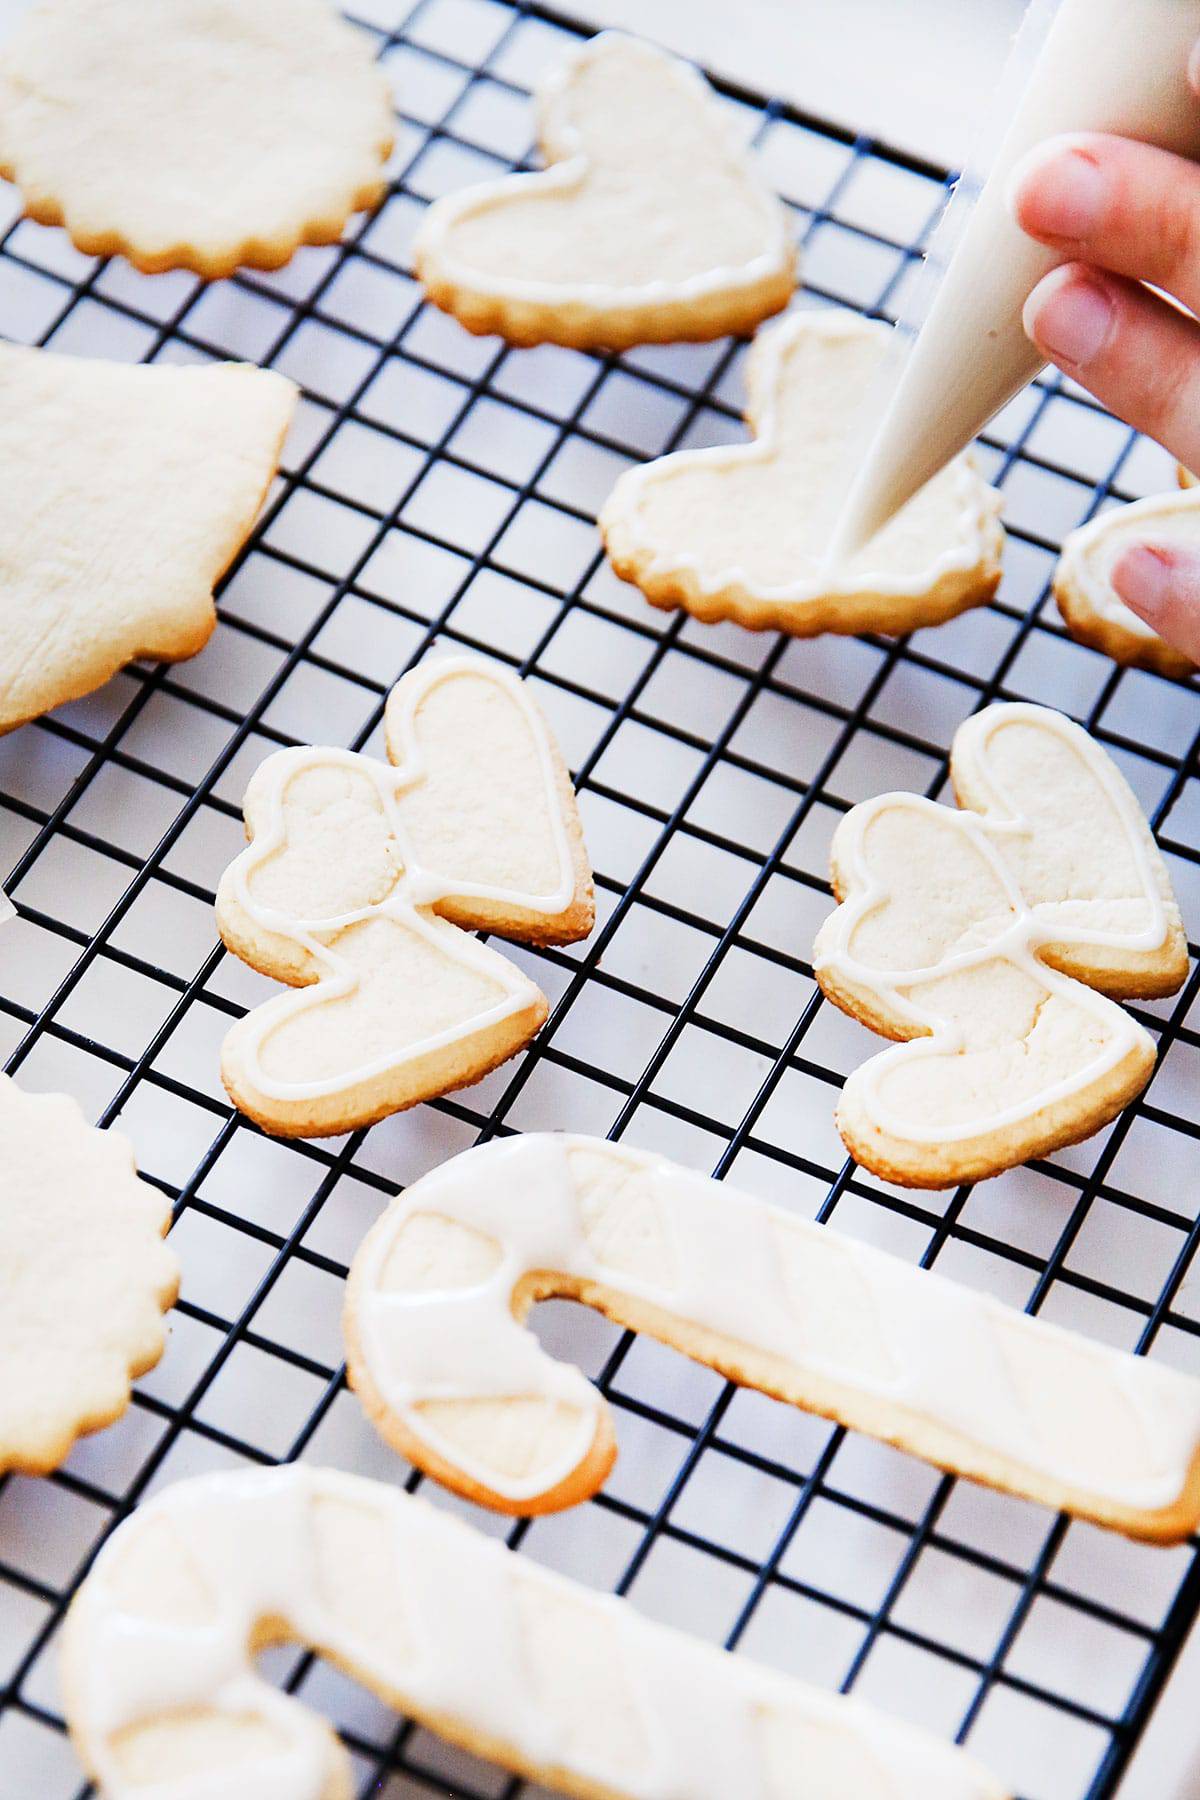
3. Decorate (optional, but fun!)
- Whisk together powdered sugar, almond milk, and vanilla until smooth. For piping or borders, keep the icing thicker; for flooding/covering the cookie, thin out with a touch more milk.
- Divide and tint icing with natural/dye-free food colorings if you like colorful cookies.
- For decorating: first pipe borders or outlines; let them set briefly (10 minutes or so), then fill in with thinner icing for a smooth finish.
- Let cookies sit until icing hardens (a few hours or overnight) before stacking or storing.

Baking + Decorating Tips (for Best Results)
- Use parchment paper or a silicone baking mat to prevent sticking.
- Roll to about ¼″ thick — thick enough for structure, thin enough to bake evenly.
- Reroll scraps as needed — gluten-free dough is more forgiving than wheat-based, but be mindful if the dough warms up. Chill if needed.
- For decorating: using two icing consistencies (thick for outline, thin for flooding) makes cookie decorating easier and the finish cleaner.
- If kids are helping: try squeeze bottles instead of piping bags — way easier for little hands and less messy.

Natural Dye Options:
We’ve talked about making your own food dye with food-based powders. These homemade dyes tend to work best with a buttercream frosting.
While it’s totally possible to frost these cut-out cookies with a buttercream frosting, it won’t have the classic feel we talked about above with Powdered Sugar Icing. So, we went ahead and tested a handful of brands that offer artificial food coloring and, here’s what we found:
We actually loved them all, and they all fall into different price points.
We Tried:
- Whole Foods Market 365 Brand: This one was the most economical and worked well, except for the red, which tinted more towards pink. This brand most resembles traditional dye in the sense that it comes in little liquid squeeze bottles. It is under $10 for a pack with core colors and offers a guide on the package to mix additional colors.
- ColorKitchen Foods: This dye-free coloring comes in powder form. You can mix it with your wet ingredients to hydrate or add a touch of water to hydrate before adding it to the icing (which is the method we used). This one was surprisingly very potent, but it’s pricier. It comes in single-use packets, which is both a pro and a con.
- TruColor: This brand works like magic, but it is expensive. It also comes in powdered form but in small jars (depending on the amount you order), so you can store any leftovers right in the container. You must store this food coloring in the refrigerator. Any red coloring that you see in this post uses TruColor, and you’ll see it makes a perfectly vibrant red.
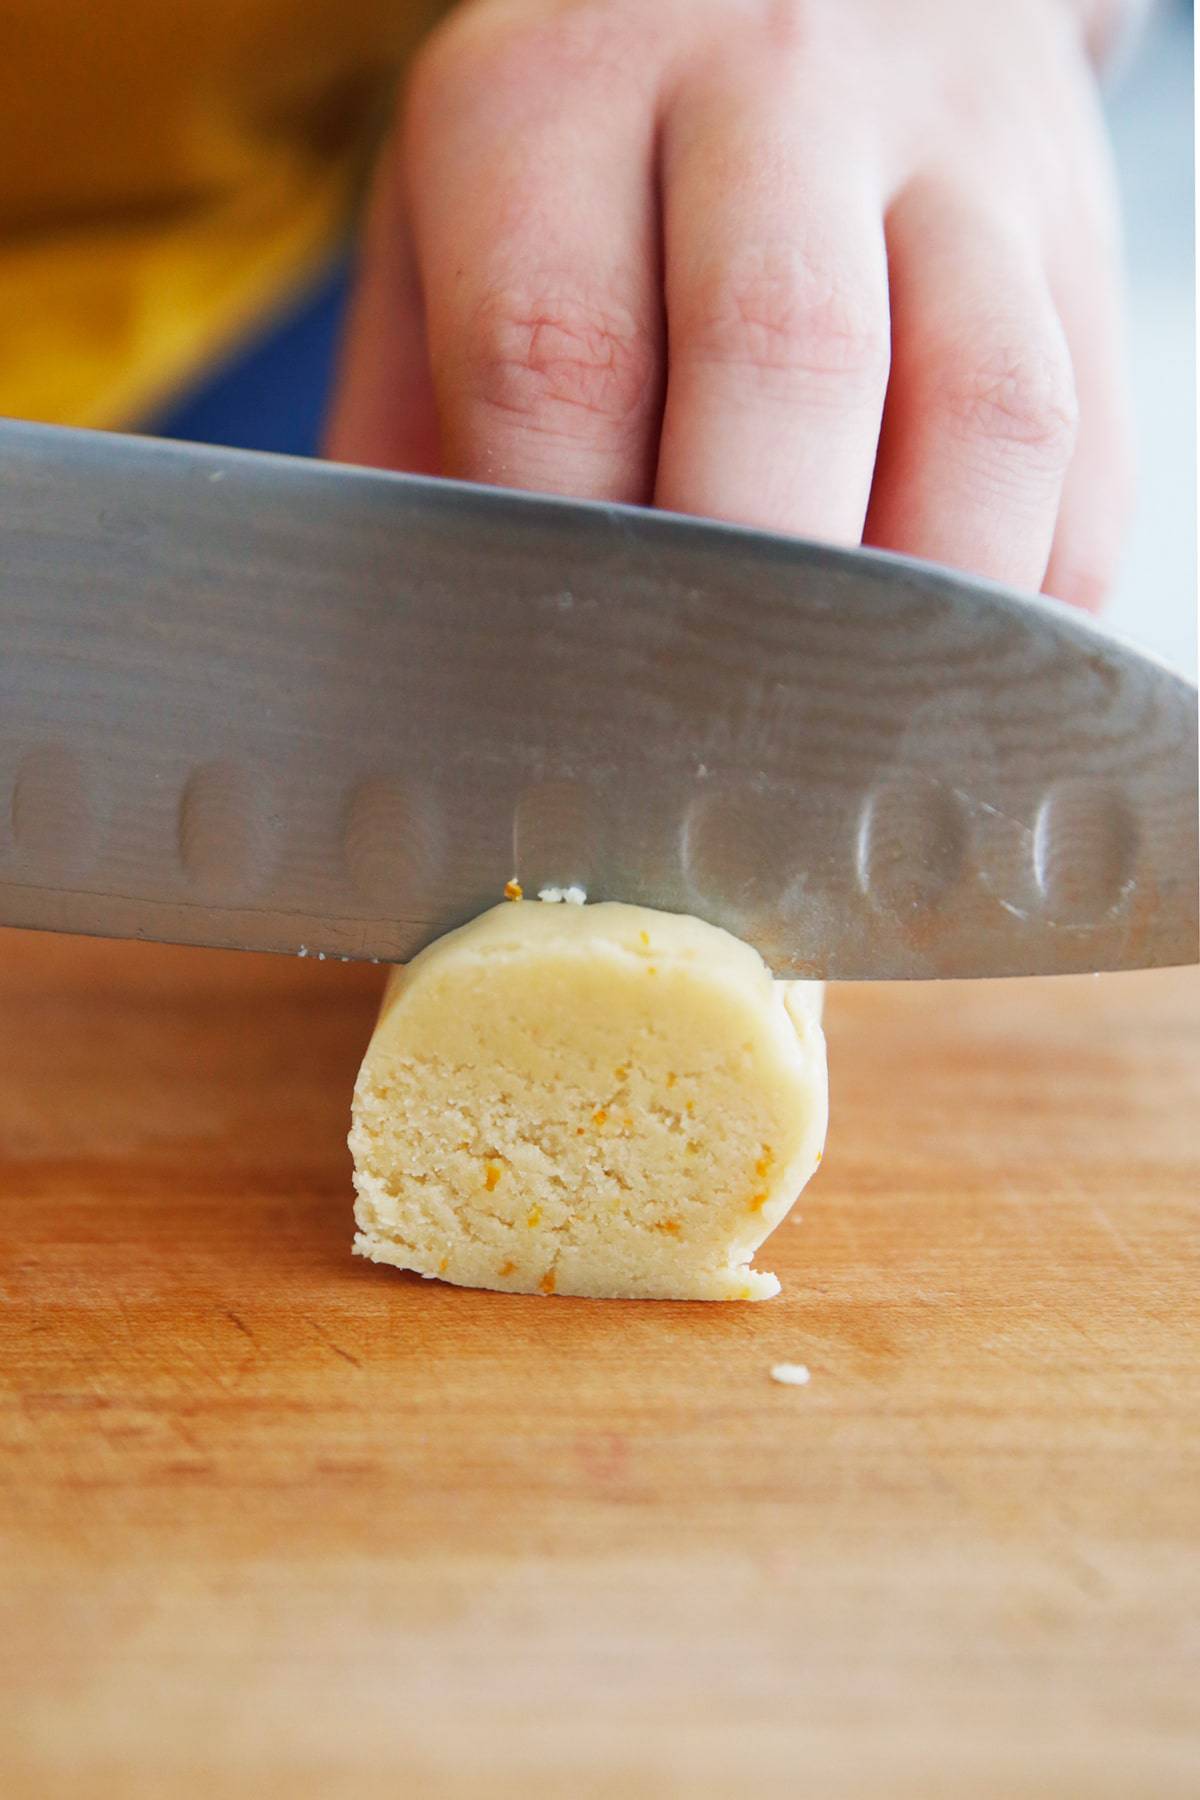
Don’t feel like cutting out designs with these cookies?
You don’t feel like cutting out designs with these cookies? No problem! The dough can also be rolled into a log, placed in the refrigerator for about 1 hour (or more if you’d like), and then sliced! You’ll follow the baking directions we’ve outlined below. We’ve included some flavor options in the post, including almond, citrus, and mint!
FAQs:
At room temperature for 5-7 days, in the fridge for about 10 days, and in the freezer for 6 months.
You can store the dough in the fridge for 2-3 days.
No – this is tried and true with the almond and coconut flour combination.
Yes, maple syrup works!
Yes – see the comments below!
No! You can use any ziplock-esque bag and cut the tip!

Kitchen Tools I Use:
- Stand Mixer
- Sheet Pan
- Silpat
- Offset Spatula
- Cookie Cutters
- Rolling Pin
- Piping Bags or Mini Squeeze Bottles
- Artificial Free Food Dye
- Cleaner Sprinkles
- Additional standard equipment: bowls, whisks, etc.
More Cookie Recipes:
- Paleo Chocolate Chip Cookies
- Double Chocolate Chunk Macadamia Nut Cookies
- Gluten Free Oatmeal Raisin Cookies
- Gluten-Free Funfetti Cookies
Watch The Video:

Gluten Free Cut Out Cookies
Ingredients
- 1/4 cup butter room temperature (or butter alternative)
- ¼ cup honey
- 1 teaspoon vanilla
- 1-½ cup 190g almond flour use a food scale for percision
- ½ cup 60g tapioca flour use a food scale for precision
- Pinch of fine sea salt
Optional Flavors (choose one):
- 1/2 teaspoon mint
- 1 tablespoons orange zest
- ¼ teaspoon almond extract
For Decorating:
- 1 cup organic powdered sugar
- 1-½ to 2-½ tablespoons almond milk
- 1/4 teaspoon vanilla extract
Instructions
To Make Cookie Dough:
- In a stand mixer, or with a hand mixer cream butter, honey and vanilla, until light and fluffy, about 3-5 minutes
- In a medium bowl add almond flour, tapioca flour and salt and whisk to combine.
- Add dry ingredients to butter and combine. It may look crumbly at first, but continue to mix until the dough comes together.
- Roll out immediately (see directions below) or wrap in plastic wrap and keep in refrigerator until ready to roll, up to 3 days.
To Roll Out and Bake Cookies:
- Preheat oven to 350 and line a baking sheet with parchment paper or a silpat.
- Roll out dough between two sheets of parchment paper or plastic wrap. Roll out to a thickness or 1/4" and cut out with cookie cutters. Carefully peel cut out cookies off parchment and place on lined baking sheet. They will not spread so you can spaces them as close as 1/4" apart.
- You can re roll scraps, chilling in between if dough is getting too warm.
- Bake for 7 minutes, until slightly golden around the edges.
- Let cool before decorating.
To Decorate:
- Whisk 1-1/2 tablespoons almond milk, vanilla and powdered sugar together until smooth. You want it to be thick enough to pipe. If you plan to flood the cookie you can make two smaller batches and add a touch more almond milk to want to make it thinner to floor the cookie in between the piping icing. Drop in some food coloring (see post for more info) depending on what color you’d like to make. Decorate using squeeze bottles of piping bags.
Notes
- Read the post for more information and tips for making these cut-out cookies.
- Storing the cookies:
- At room temperature – baked cookies will last 5-7 dyas.
- In the freezer – baked cookies will last for 6 months.
- Cookie dough – you can store in the fridge 2-3 days.


What other flour can be used instead of almond flour or coconut flour (allergies/sensitivity).
Thanks,
Nancy
This dough always comes out a bit too wet and difficult to work with for me. Not sure why – I bake a lot and can usually make a recipe work on the first try. With this, I keep having to add more dry ingredients to make it work. I finally gave up after trying the recipe a few times, and now I just use your other sugar cookie recipe, which holds up great for cutouts (and is also delicious).
We made these for Christmas cutout cookies and they were delicious. They weren’t gritty like some Ive tried. With the leftover dough we rolled them into balls and made those cookies where you press a chocolate kiss in the middle right when they come out of the oven. I just decided to make the chocolate kiss version for tomorrow for St Patrick’s Day for my family and use dye-free green sugar sprinkles I found over the holidays. Thanks for such a great sugar cookie recipe.
Would there be anyway to add cocoa powder to make these a chocolate sugar cookie? If so, how much and would it affect the overall dough?
I think you might be able to swap add in some cocoa powder (maybe try 1/4 cup) and then also add in more sweetener to account for the extra dry and the bitter that is added with cocoa. I honestly don’t know if it will work or not, so you’d have to up for some experimentation! Let us know if you do!
These are our favorite!! We used a mix from Pamela’s the other day and my son said he liked yours better. Perfect texture, so yummy. We love the ingredients ❤️
can we sub out agave or maple syrup for the honey Lexi?
Maple syrup will work!
Hi I would love to try these cookies but I’m. Allergic to almonds.
Can you suggest an alternative flour? Thanks.
So sorry–this recipe was developed specifically for almond flour so I can’t recommend a substitute. -Kelli
These are awesome! The cookies themselves aren’t too sweet which is nice. I topped the glaze with Christmas sprinkles and they are just perfect. It’s been so long since I’ve had cut out cookies!
Should it matter if I use a vegan butter substitute
Hi Julianna! Kelli here, part of the LCK team. We didn’t personally test it with vegan butter but one reader did use it with satisfactory results. Happy baking!
Our dough was a but soft and fussy to work with. I used almond extract in place of vanilla, but I don’t think that should make that much of a difference. Got any thoughts on why that might be? Thanks!
Hi Kim! Kelli here, part of the LCK team. We chatted a bit on Facebook, but replying here for others who are seeing your comment. If the dough was soft and fussy there may have been a measuring error in there somewhere, which can happen especially when you make 2x, 3x or 4x the dough like you did. You might not even have realized it either, which happens to everybody! The dough shouldn’t be soft, and if it is there may be too much fat (or conversely not enough of one of the flours). Chilling the dough for 5-10 minutes should also be sufficient if you are finding it tricky to move the cut out cookies while keeping there shape, but if that isn’t working there might be an error with measurements. Best of luck on the next batch!
I added orange zest to my dough and I am so thrilled with how they taste!
Hi Aubrey! Kelli here, part of the LCK team. WE are so thrilled you loved the cookies!
I’ve tried several paleo cut out recipes, and these are hands down the BEST! They have a nice chew, but also have a crisp to them that most other recipes lack. I used maple syrup for the honey and used vegan butter and had great success! I can’t say enough good things about this recipe, non-paleo family members loved them and had no clue they were a cleaner version of the classic!!
I just saw an online ad for a wooden rolling pin that had designs in it. You just roll it over your rolled out dough, cut with round or whatever cookie cutters and bake. They looked so pretty but I didn’t have a recipe for sugar cookies. Do you think this dough would hold up to something being pressed into it? I am lazy and while I love the look of frosted cookies, I would rather leave them plain. These look delicious and I would try them regardless.
We haven’t tried, but I don’t see why not!
These are going to make so many GF cookie dreams come true!
Decorated cut-outs are a MUST make every Christmas. Definitely worth the time and effort. Love all your tips!
I want a dozen!
These are SO CUTE! The fact that you iced these with plain powdered sugar icing (with a royal icing look) makes me want to give it a try! What type / size piping tip did you use? In one of the photos, it looks like you may have just snipped the end of the bag. Either way, any suggestions? Thanks.
Hi Carrie! Kelli here, part of the LCK team. As you guessed we didn’t even use a piping tip! We just cut a hole in the piping bag and decorated with that! It truly was simple, you just have to make sure to only add the amount of liquid to the powdered sugar as suggested and it works really well!