
This post may contain affiliate links. Please read my disclosure policy.
It’s time to talk all things Gluten-Free Pumpkin Pie. If you’ve been craving the creamy, cozy dessert that feels classic and comforting, yet clean and allergy-friendly, this is it.
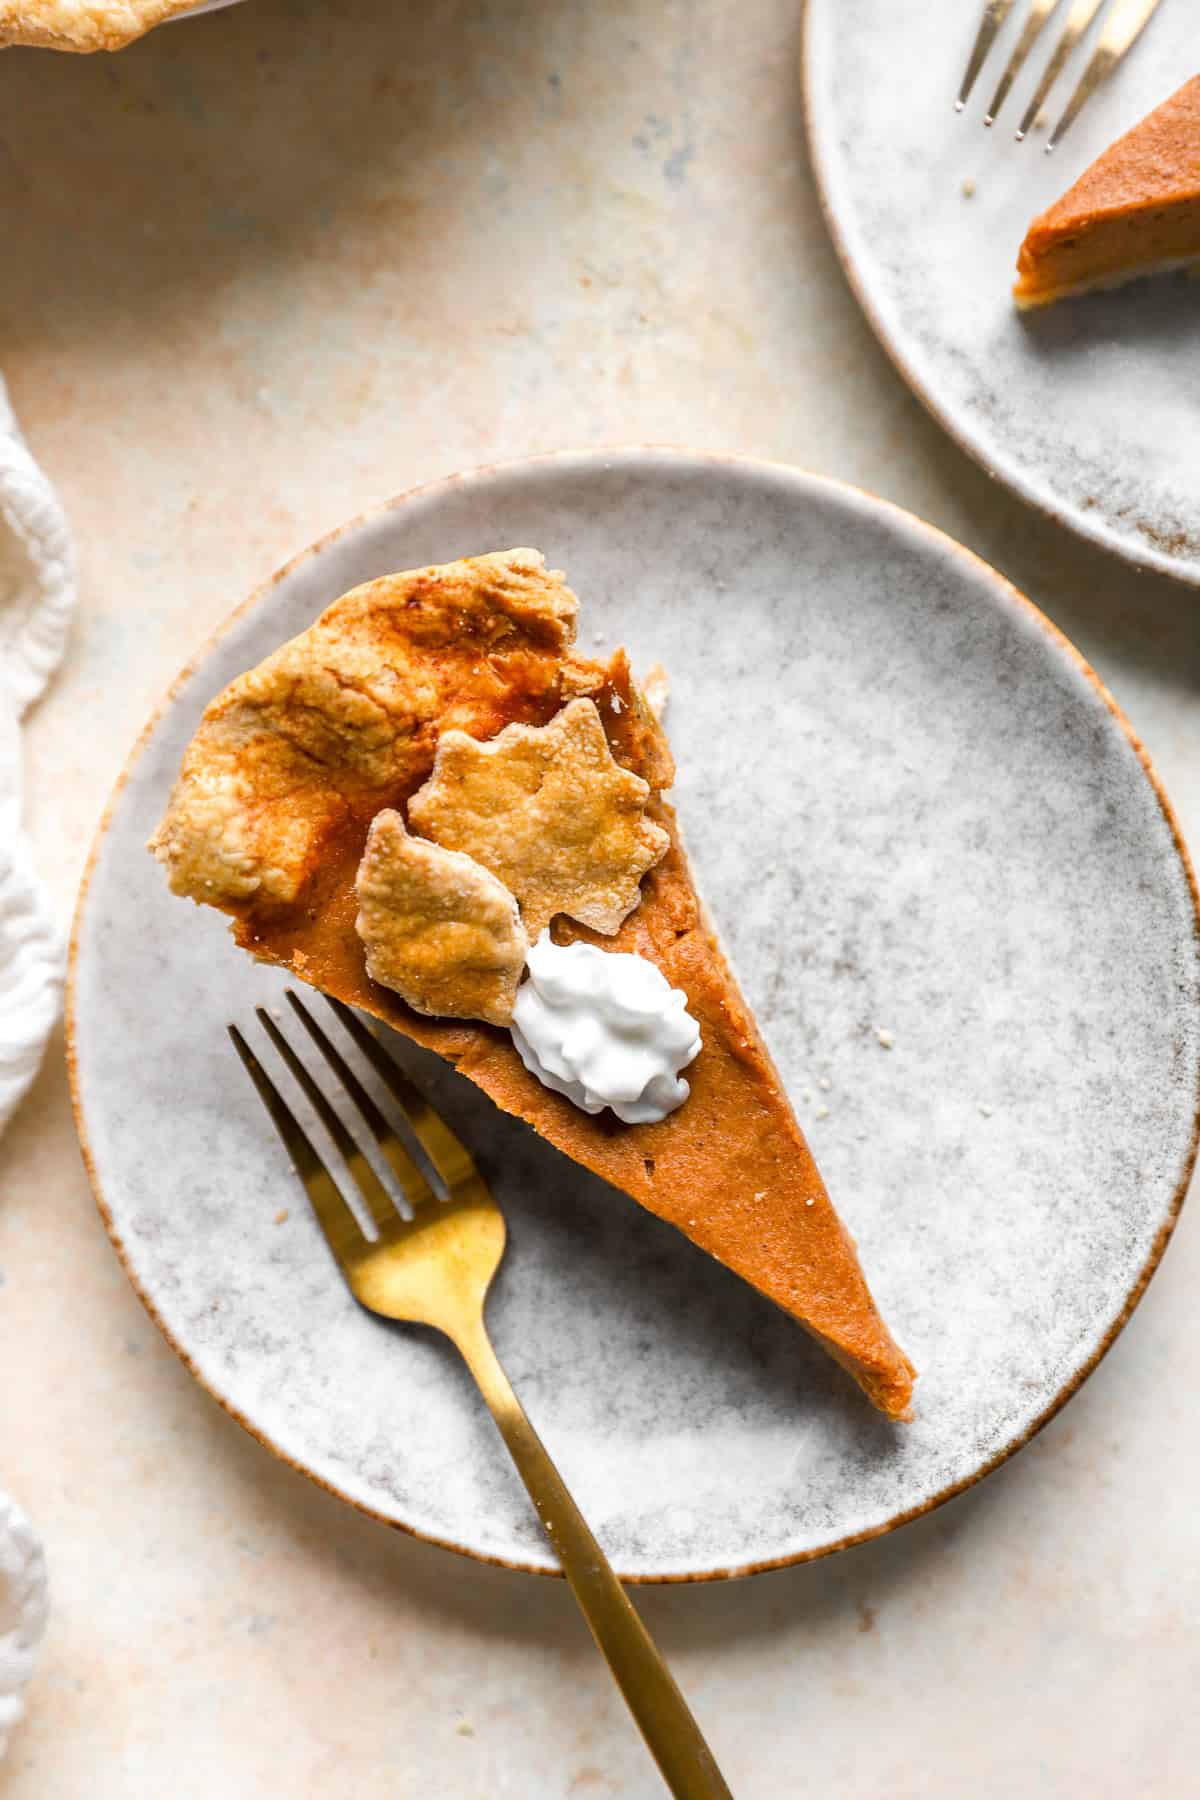
Whether you’re hosting a holiday get-together, Thanksgiving dinner, or simply want a dessert that feels indulgent without the junk, this pie is the kind of thing you’ll want to make ahead and show off. One slice and you’ll understand what makes this version stand out: smooth filling, warm spice, and a crust that’s gluten-free and nut-free.

You’ll Love This Easy Gluten-Free Pumpkin Pie Recipe
Thanksgiving is coming, and I think you’d be hard-pressed to find a Thanksgiving dessert table without a Pumpkin Pie on it.
There’s a lot to love about this recipe (especially the gluten free pie crust recipe), but here are a few standout reasons it deserves a spot on your dessert table:
- Classic Flavor, Made Clean: You get that perfectly spiced, custard-like pumpkin filling — with ingredients you can feel good about.
- Gluten-Free and Nut-Free: A tender, gluten-free that everyone can enjoy. Actually I have two pie crusts:
- Rich and Creamy: Made without heavy cream, full-fat coconut milk provides the perfect texture and makes it dairy-free for the gluten-free pumpkin pie filling.
- Holiday-Friendly: Make it a day ahead and chill until it’s time to serve.
It’s the kind of dessert that proves gluten-free baking doesn’t have to be complicated — or compromise the flavors of your classic favorites.
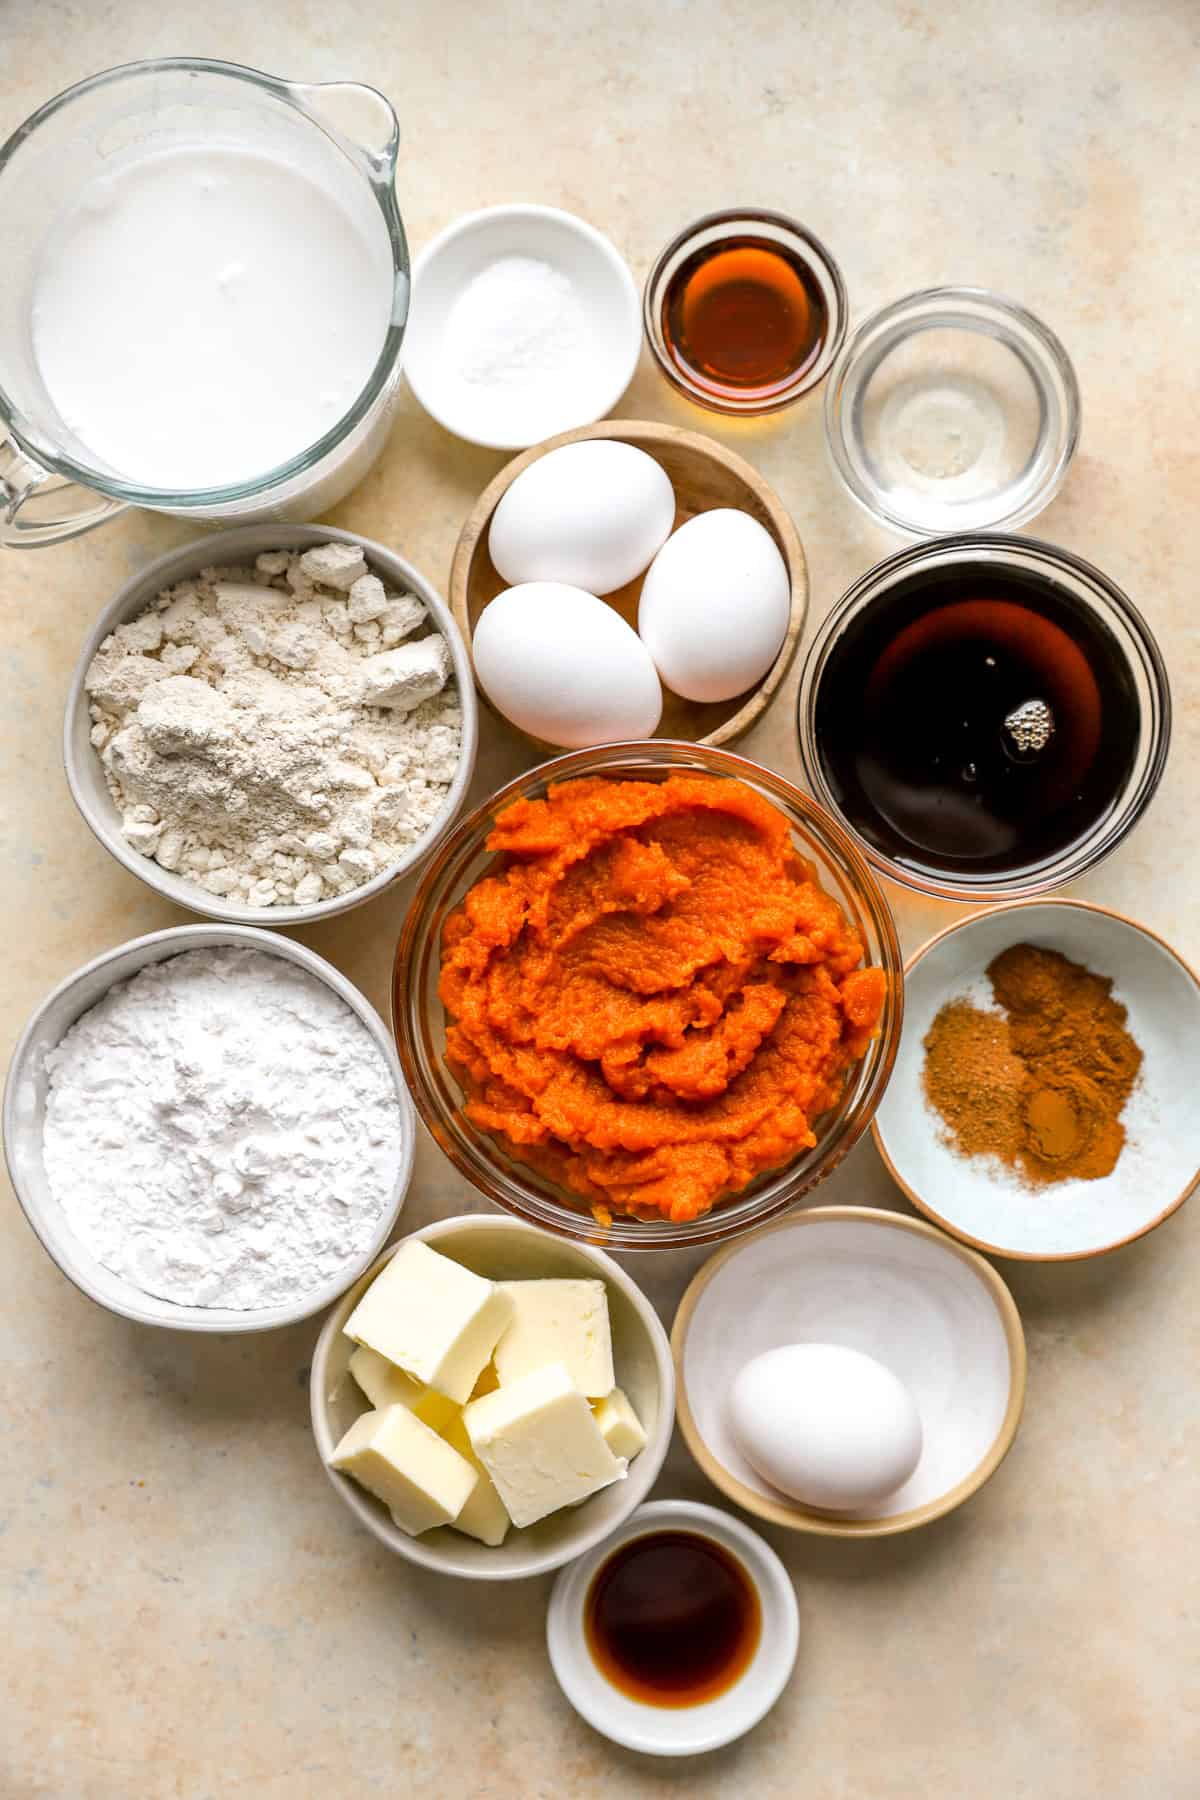
Ingredients For The Best Pumpkin Pie
This pie consists of two main components: the nut-free, gluten-free crust and the creamy pumpkin filling. *Scroll down to the recipe card for the full details and instructions.
For the Gluten-Free Pie Crust:
- Gluten-free Oat Flour – The gluten-free flour base that gives this crust structure and a hint of nuttiness (without actual nuts).
- Tapioca Flour – Adds stretch and helps hold the crust together.
- Butter (or Vegan Butter) – Cold and cubed, for flakiness.
- Egg, Water, and Maple Syrup – Bring the dough together and add a touch of sweetness.
- Salt – Balances out the flavors!
For the Pumpkin Filling:
- Pumpkin Purée – Canned or homemade pumpkin puree, just make sure it’s pure pumpkin, not pie filling.
- Full-Fat Coconut Milk – Gives creaminess without dairy.
- Eggs – Help the filling set while staying smooth.
- Maple Syrup – A natural sweetener that adds depth and warmth.
- Cinnamon, Nutmeg, and Vanilla Extract – Classic pumpkin pie spices that make the flavor shine.
How To Make Gluten-Free Pumpkin Pie
Two Pie Crust Tutorials
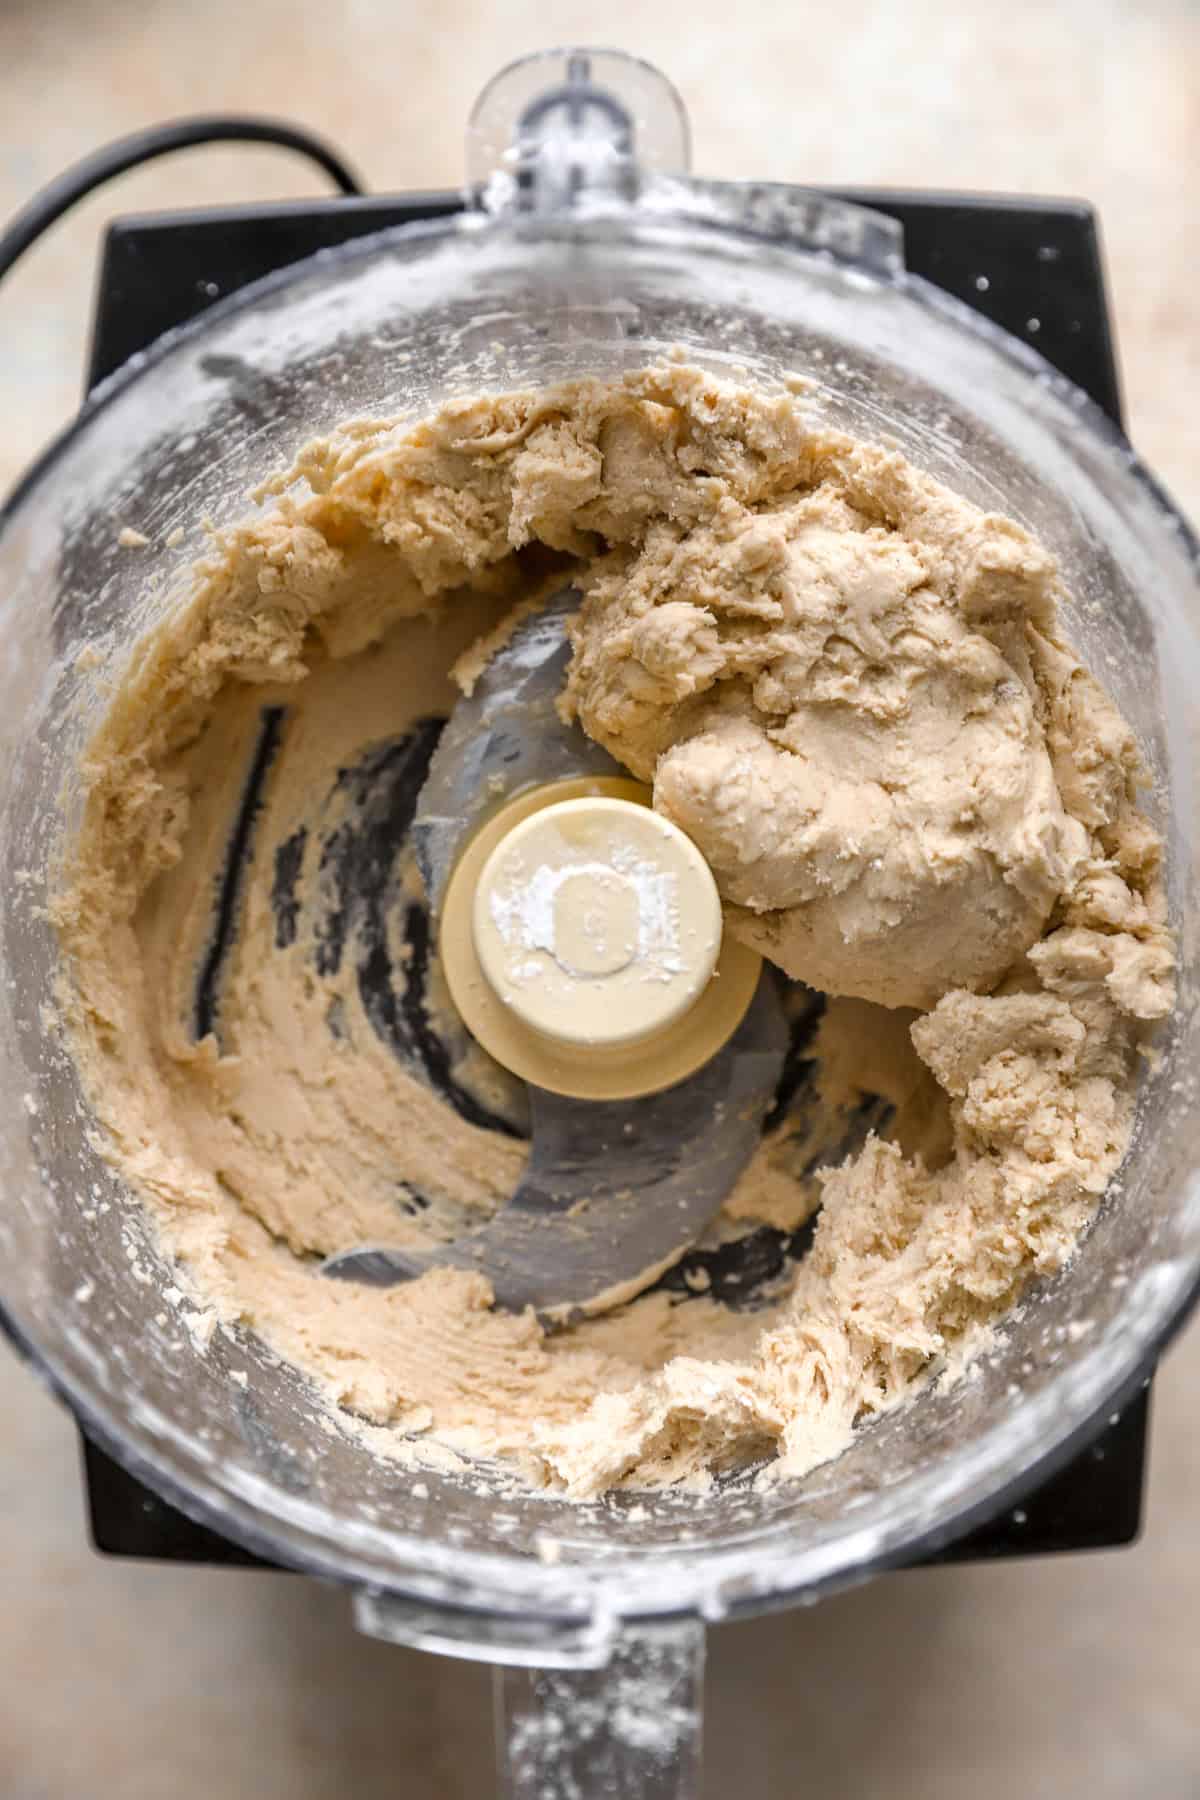
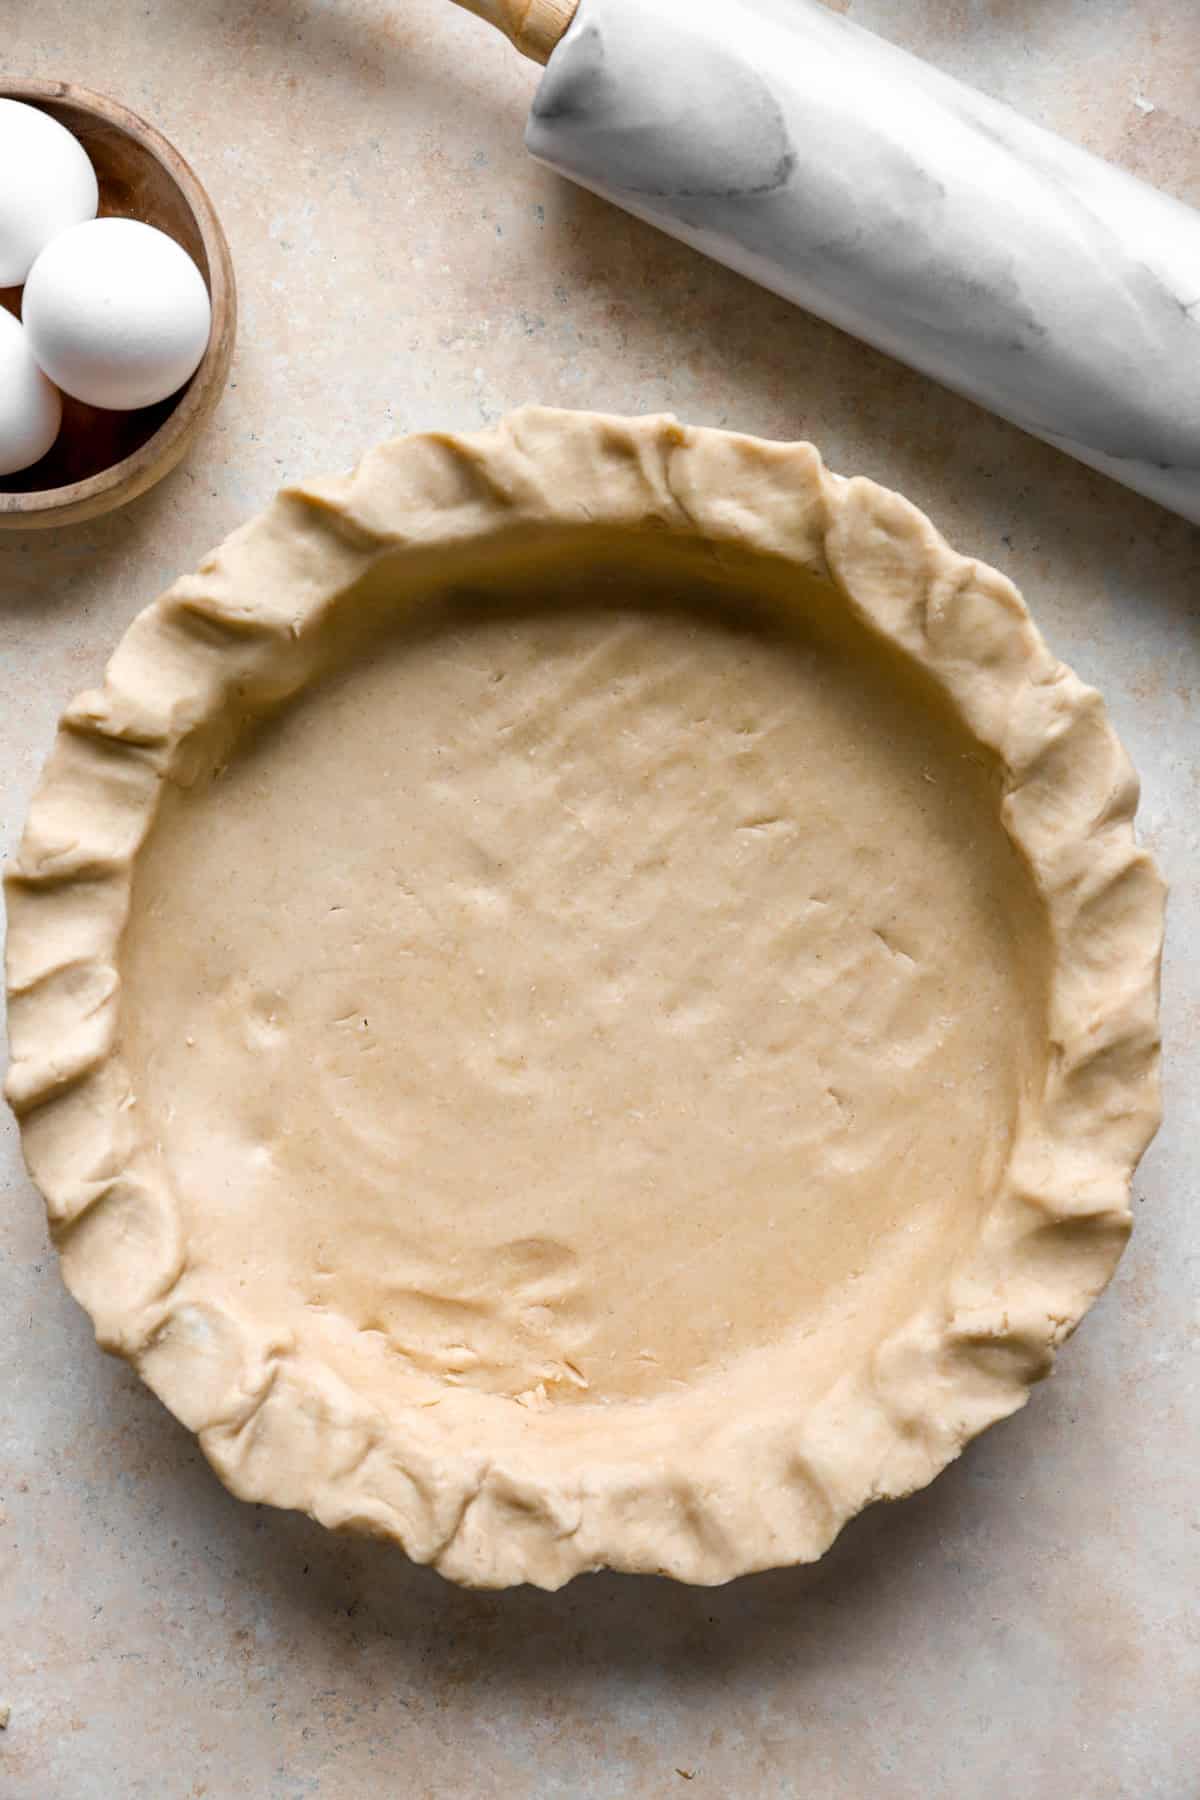
- Start by making the crust. Combine oat flour, tapioca flour, salt, and cold butter in a food processor and pulse until the mixture looks like coarse crumbs. Add the egg, water, and maple syrup, and pulse again just until the dough forms.
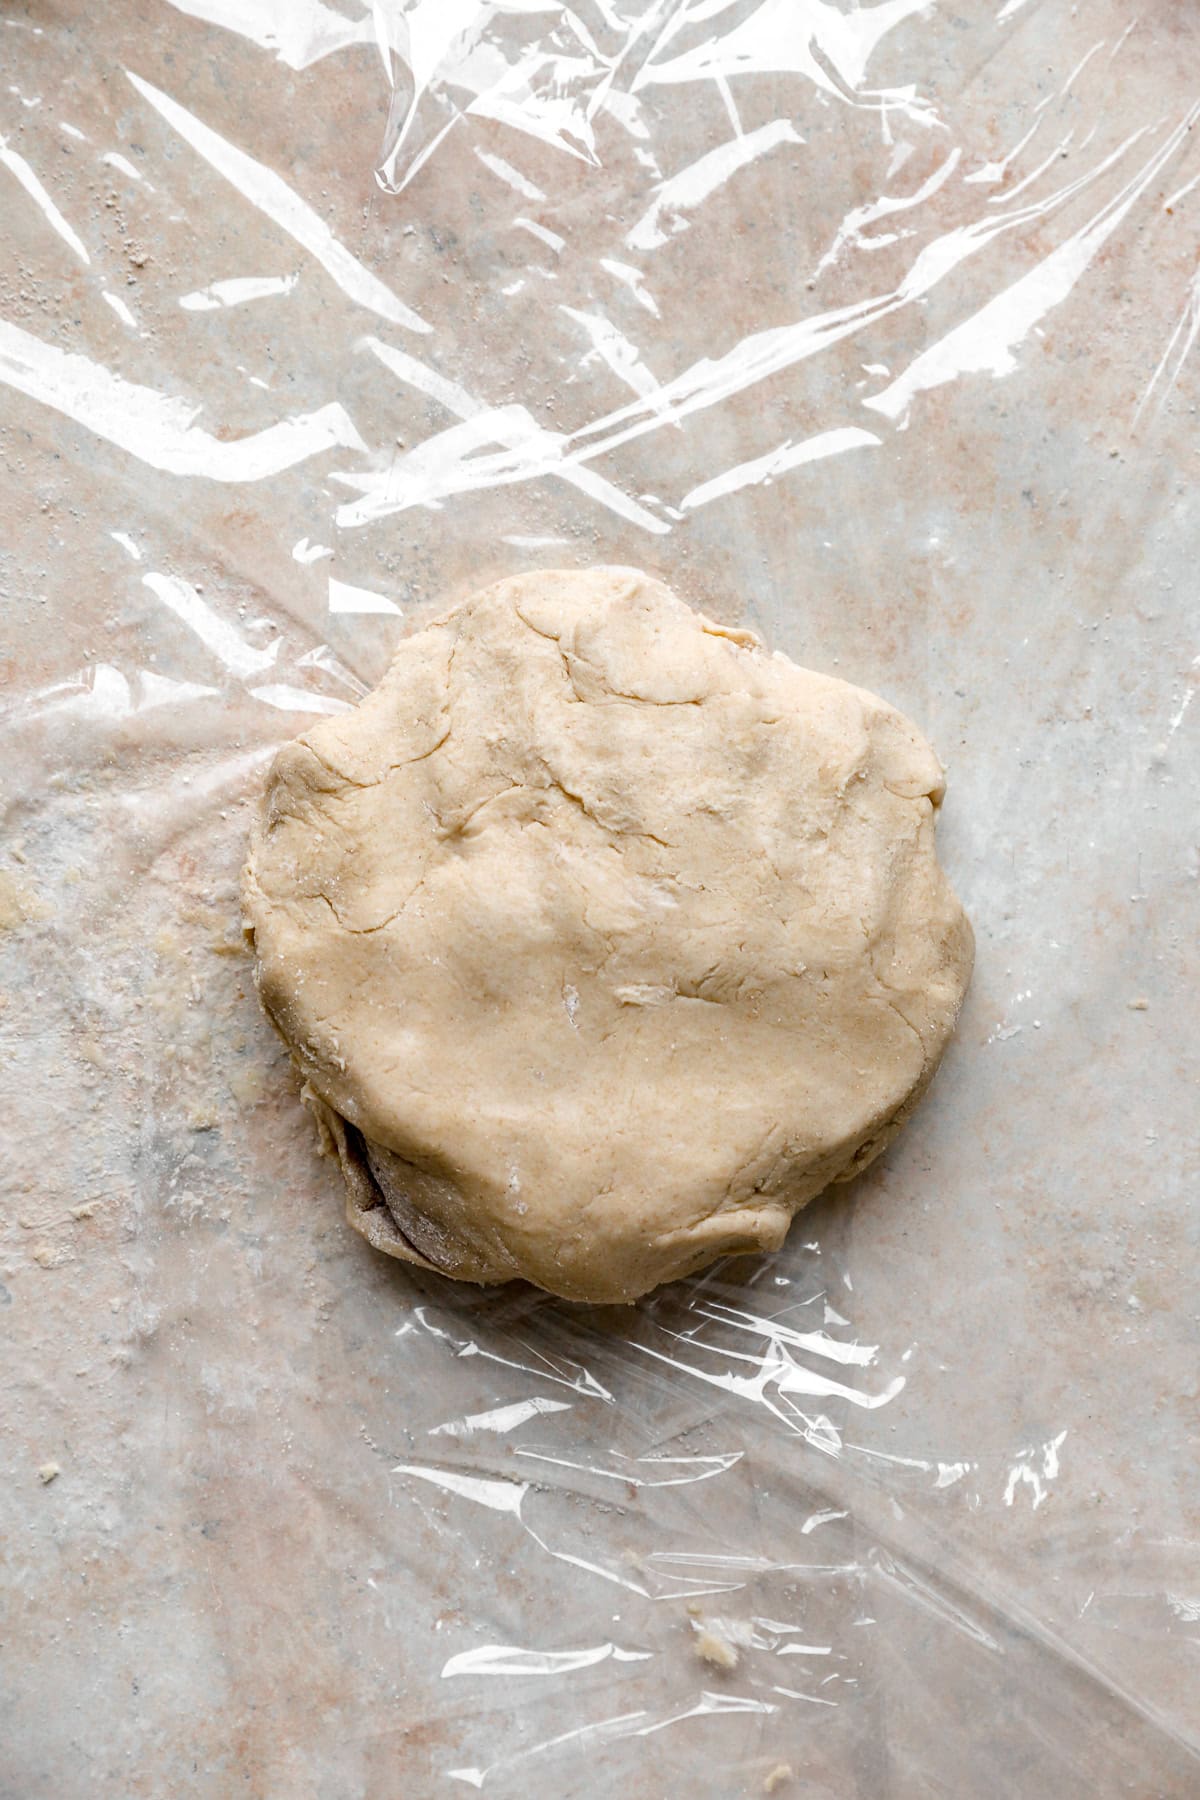
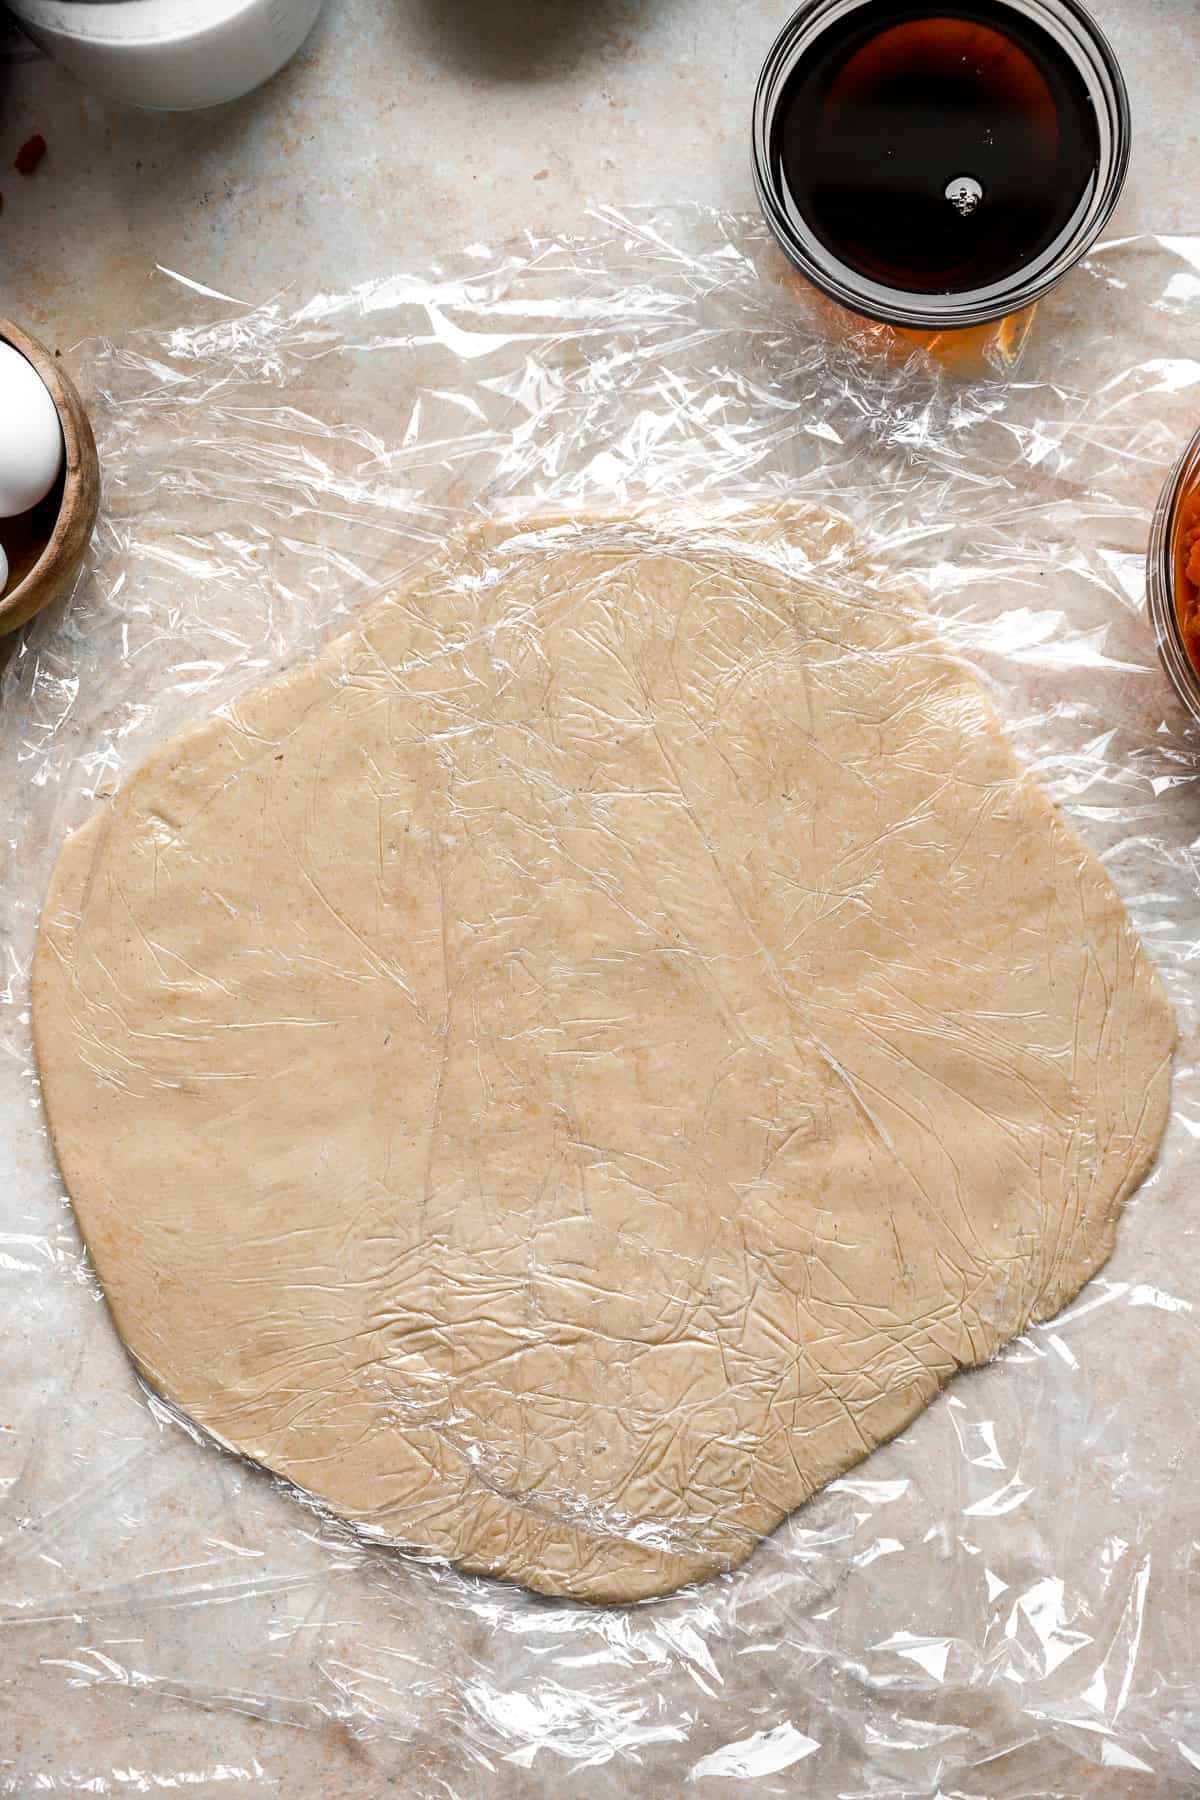
- Roll the dough out between two sheets of plastic wrap, then transfer it to a 9-inch pie dish. Crimp the edges and par-bake at 350°F for about 10 minutes — this step helps prevent the crust from becoming soggy once you add the filling.
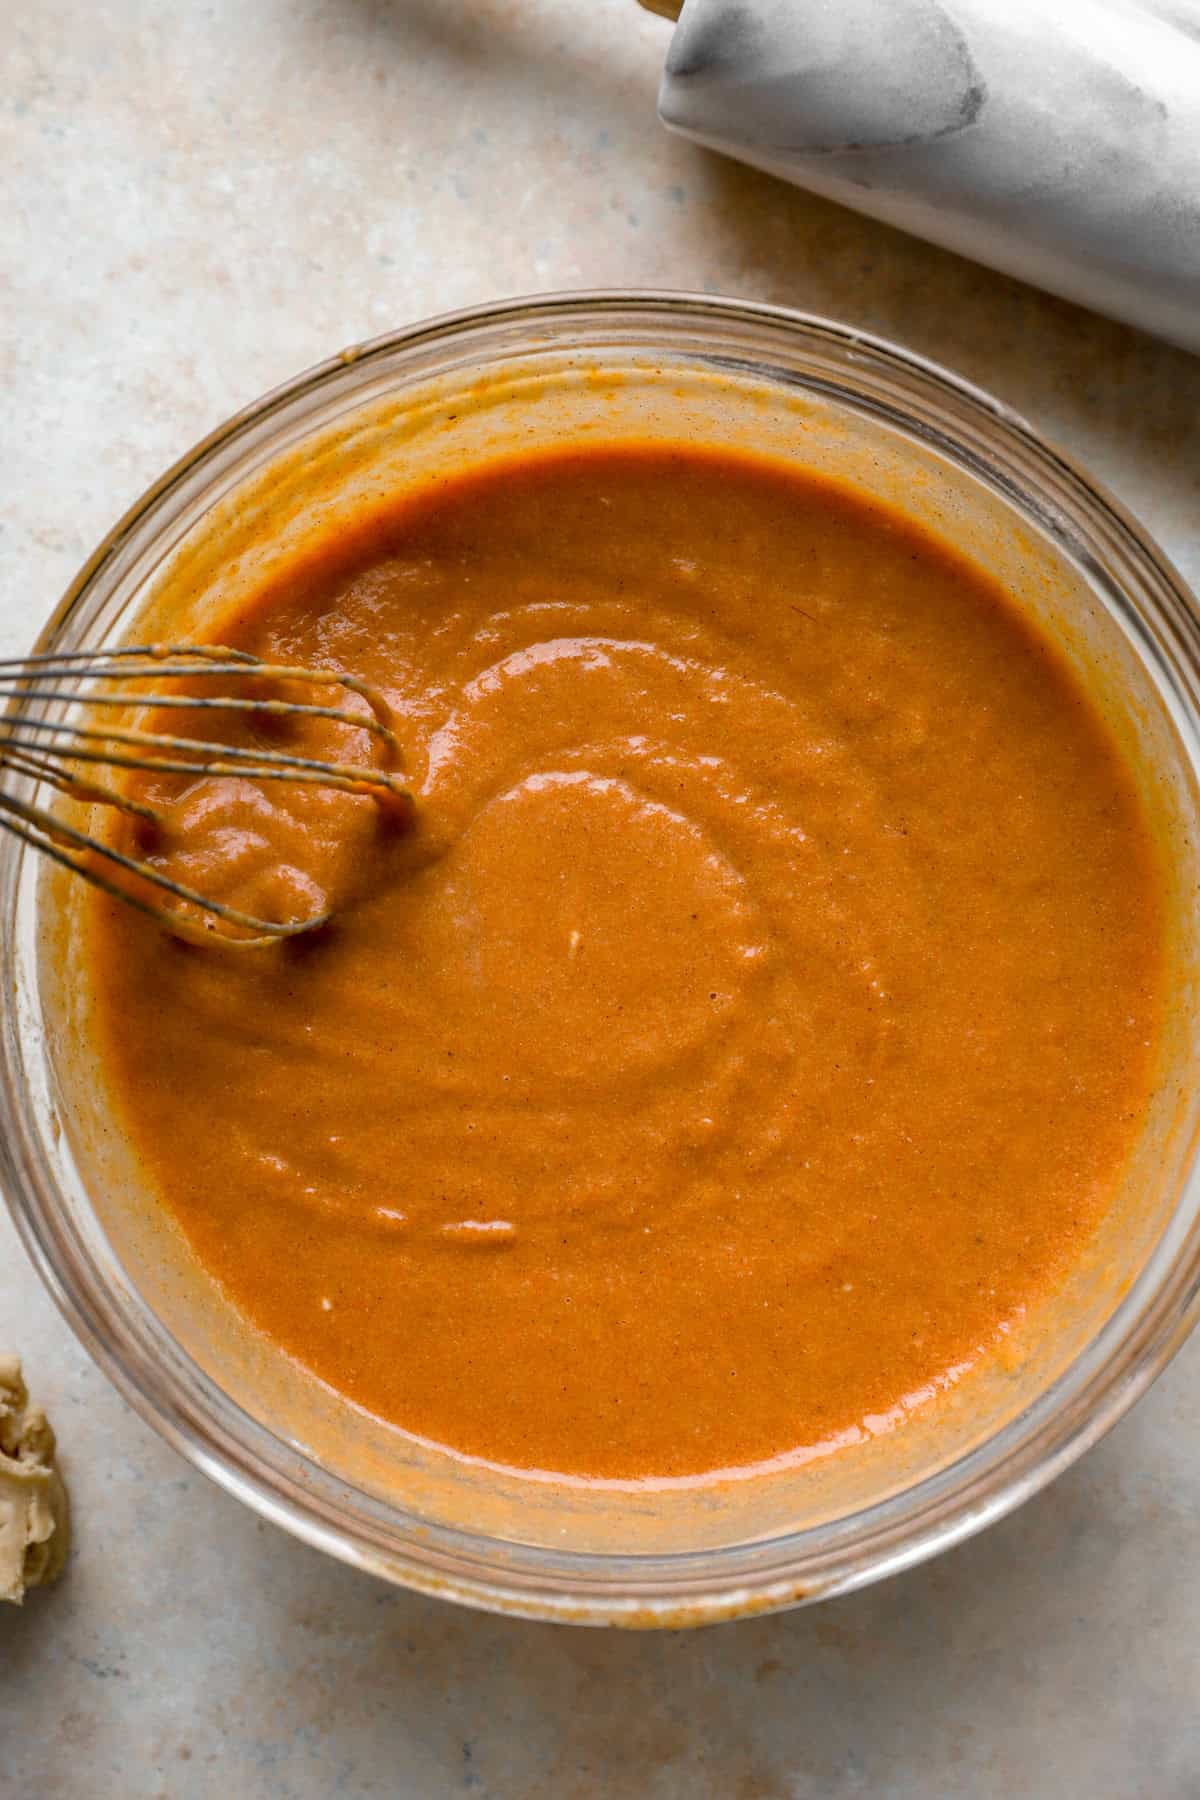
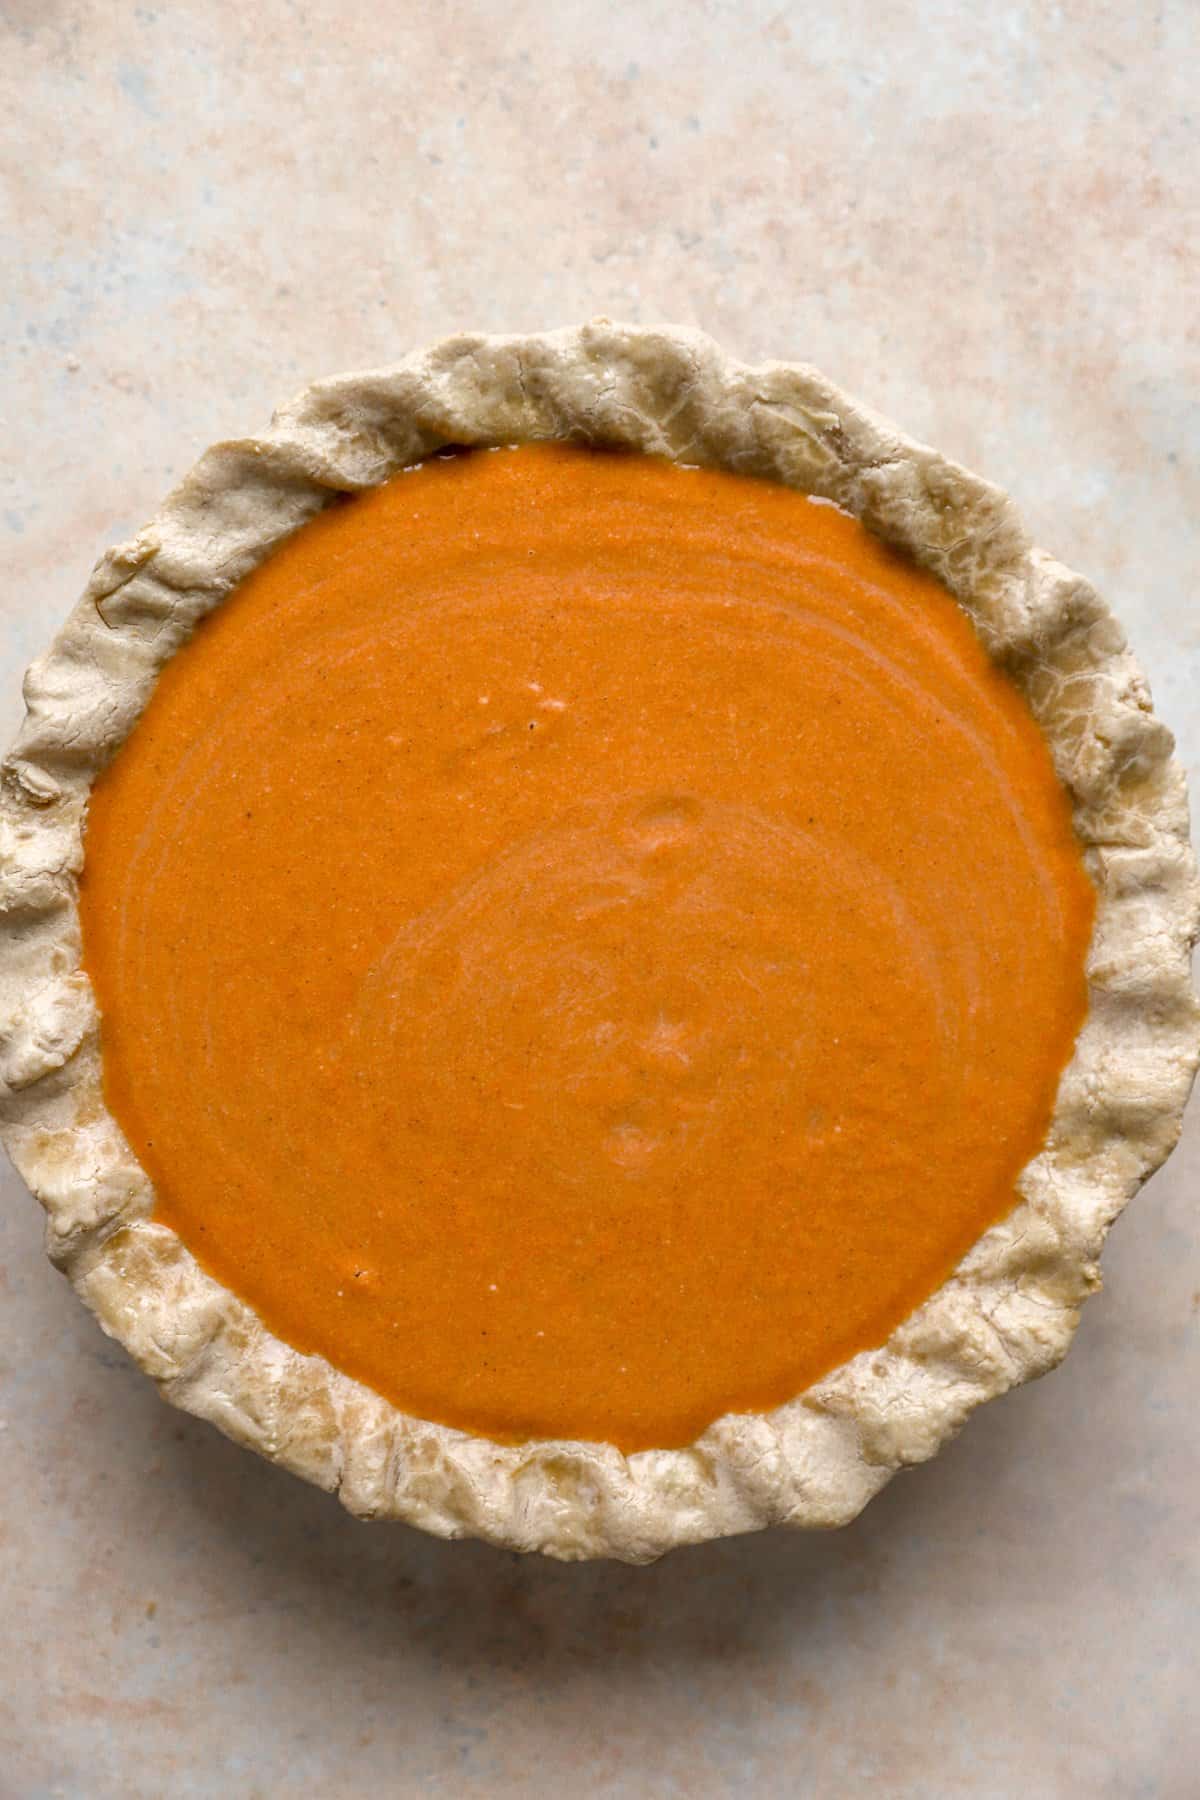
- While the crust bakes, whisk together all the filling ingredients until smooth and silky. Pour into the partially baked crust and bake for about 50 minutes, until the edges are set and the center still has a slight wobble. It will finish setting as it cools.
- Cool the pie completely before placing it in the refrigerator — this helps it firm up and makes slicing much easier.
Tips for Success
A few simple tips make all the difference for pies:
- Let it chill. Refrigerating for at least a few hours helps the texture and flavor settle beautifully.
- Don’t overwork the dough. Once it comes together, stop mixing to keep the crust tender.
- Use cold butter. This helps achieve that perfect flaky texture.
- Weigh your oat flour if you can. It packs differently than all-purpose flour, and too much can make the crust dry.
- Bake until just set. A slight jiggle in the center means your filling will be creamy, not dry or cracked.
Make It Your Own
- Dairy-free entirely? The crust uses butter, but you can swap in vegan butter or solid coconut oil—just know the texture will shift slightly.
- Nut-and-oat free? If you can’t have oats, consider using a different GF crust base ( classic crust option) and follow the same filling.
- Extra spice? If you love a bold spice profile, add ¼ teaspoon ground ginger or cloves for extra warmth.
- Decorative touch: Want to add leaf-shaped pie-dough cut-outs on top? Simply double the crust dough ingredients, roll a second batch, cut out the leaves, bake separately, and place them on top after filling.
Serving & Leftovers
This pie is a show-stopper at dessert time. Serve with a dollop of whipped coconut cream or regular whipped cream if dairy is okay. It pairs beautifully with coffee, after-dinner chats, and the warm glow of a holiday evening.
Leftovers? Covered in the fridge, it keeps well for 3–4 days. Just slice and serve straight from cold—or let it sit at room temperature for 10 minutes before slicing for the best texture.

Tools Used
- Food Processor
- Rolling Pin
- Pie Tin
- Essential items: Bowls, Whisk, Spatula
More Holiday Recipes
- Pork Chop Holiday Dinner
- Maple Roasted Brussels Sprouts with Bacon
- Cranberry Walnut Roasted Acorn Squash
- Thanksgiving Stuffed Acorn Squash
- Green Bean Casserole
- Gluten Free Apple Pie
Watch The Video:

Gluten Free Pumpkin Pie (Nut-Free, Too!)
Ingredients
For the Nut-Free Gluten-Free Crust:
- 1 cup 120g store-bought oat flour (see note)
- 1 cup 116g tapioca flour
- ½ teaspoon salt
- ½ cup butter cold, cut into 8 pieces
- 1 egg
- ¼ cup cold water
- 1 tablespoon maple syrup
For the Pumpkin Pie:
- 3 whole eggs
- 15 ounce pumpkin puree
- 1 cup full fat coconut milk
- ½ cup maple syrup
- 1-½ teaspoon cinnamon
- 1 teaspoon vanilla
- ½ teaspoon nutmeg
- egg wash optional
Instructions
- Pre-heat oven to 350ºF.
- In a food processor combine oat flour, tapioca flour, salt, and cold butter and pulse until the butter is broken down into pea-sized pieces.
- In a small bowl whisk egg, water and maple syrup together. With the food processor running, add egg mixture and process until the dough just comes together.
- Roll out your dough immediately: Place dough on a large piece of plastic wrap and top with another piece of plastic wrap. Roll out into a 12″ circle and take off the top piece of plastic. Invert into a 9″ pie pan and crimp the edges. If desired, brush with egg wash for a more golden crust, but this is not necessary.
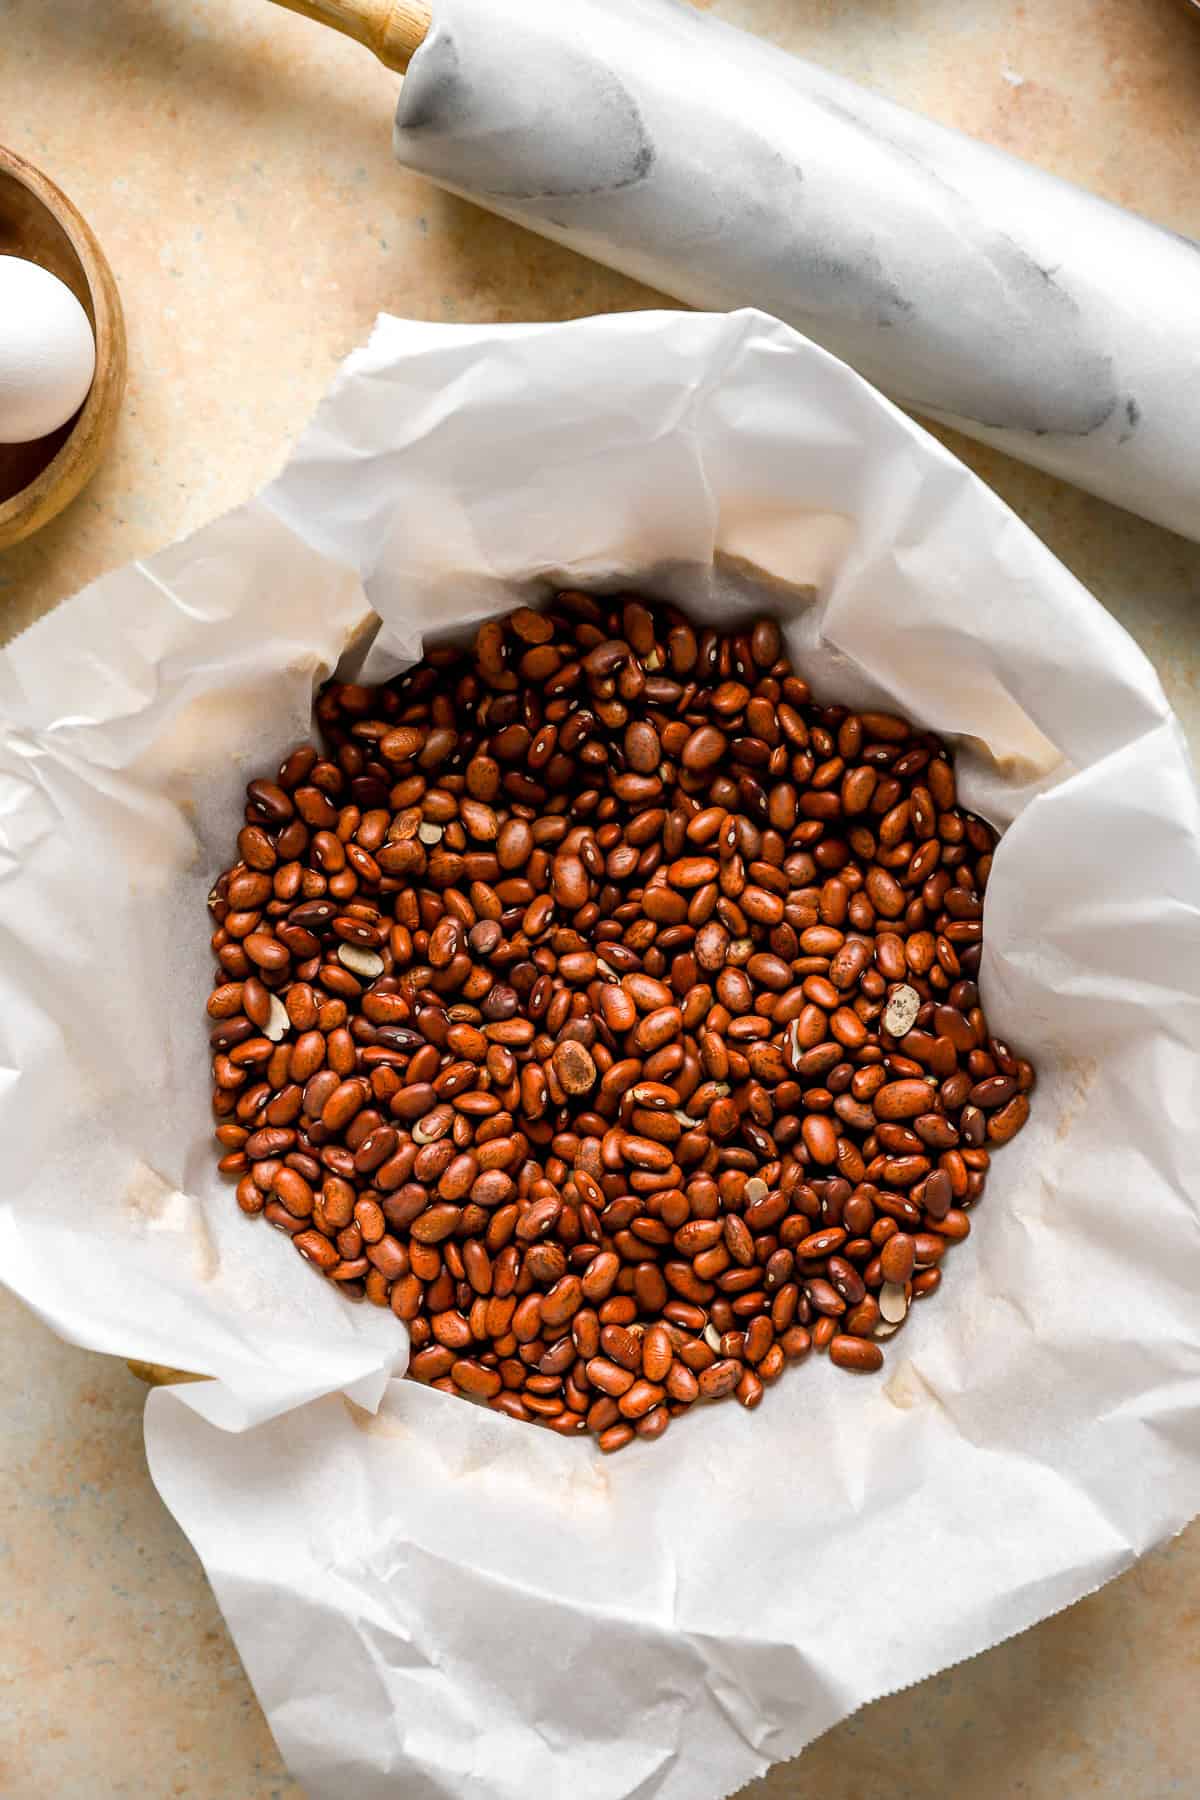
- Par-bake the pie crust by placing a piece of parchment inside the crust and fill with pie weights (or dried beans or rice). Place in the oven and bake for 10 minutes.
- Meanwhile make the filling by combing all the filling ingredients and whisk to combine.
- Once par-baked remove the pie weights and parchment paper and pour the filling into the shell and bake in a preheated 350 degree oven for 50 minutes, or until the filling is set on the edges but still slightly wobbly in the middle (see note). If crust is browning too quickly cover it with foil.
- Let cool briefly, about 1 hour before placing in the refrigerator to continue to set for another 3 hours.


Perfect how it is, but wondering if you could substitute honey for the maple syrup? If so, would it be same measurement? Thank you.
Oh my goodness this gluten free pumpkin pie was so so good! With clean ingredients I felt no guilt enjoying bite after bite. Even my skeptical husband said it was really good. Definitely making this one again!
This makes me so happy.
Honestly, 10/10! I made this for Thanksgiving, and subbed butter for vegan butter due to a dairy allergy, and it worked! I let the crust firm in the fridge for a bit before rolling, and only made the crust go slightly above the filling (it was a little crumbly because of the vegan butter), but if you make a short crust it works well. Everyone loved it, and the people without allergies! And… it was even better the next day (extra bonus that you can make the day before!) Thank you, Lexi and team!
I made this last night and ate some today, is there a way to make it taste more pumpkin-y and less coconut flavor? It had nice texture and color and the crust was good too just need more pumpkin ? any suggestions?
Hi there! Can I use something like palm shortening or soy-free earth balance instead of butter? Thank you!
I made this pie a few days ago and it’s already gone ? SO DANG GOOD. It came together really fast and was so delicious. My boyfriend loved it too, and I am making it again for thanksgiving. The pie dough did come together a little too wet for me, but I just added a couple of tablespoons of rice flour and it firmed right up.
Hi Lexi! Do you think the nut free crust would work for an apple or berry pie too? Or would it only work for cream pies that are blind baked first??? ?
Do you think the filling would bake well if made crustless?
We haven’t tried it, but let us know if you do!
OMG, those dough leaves!