This post may contain affiliate links. Please read my disclosure policy.
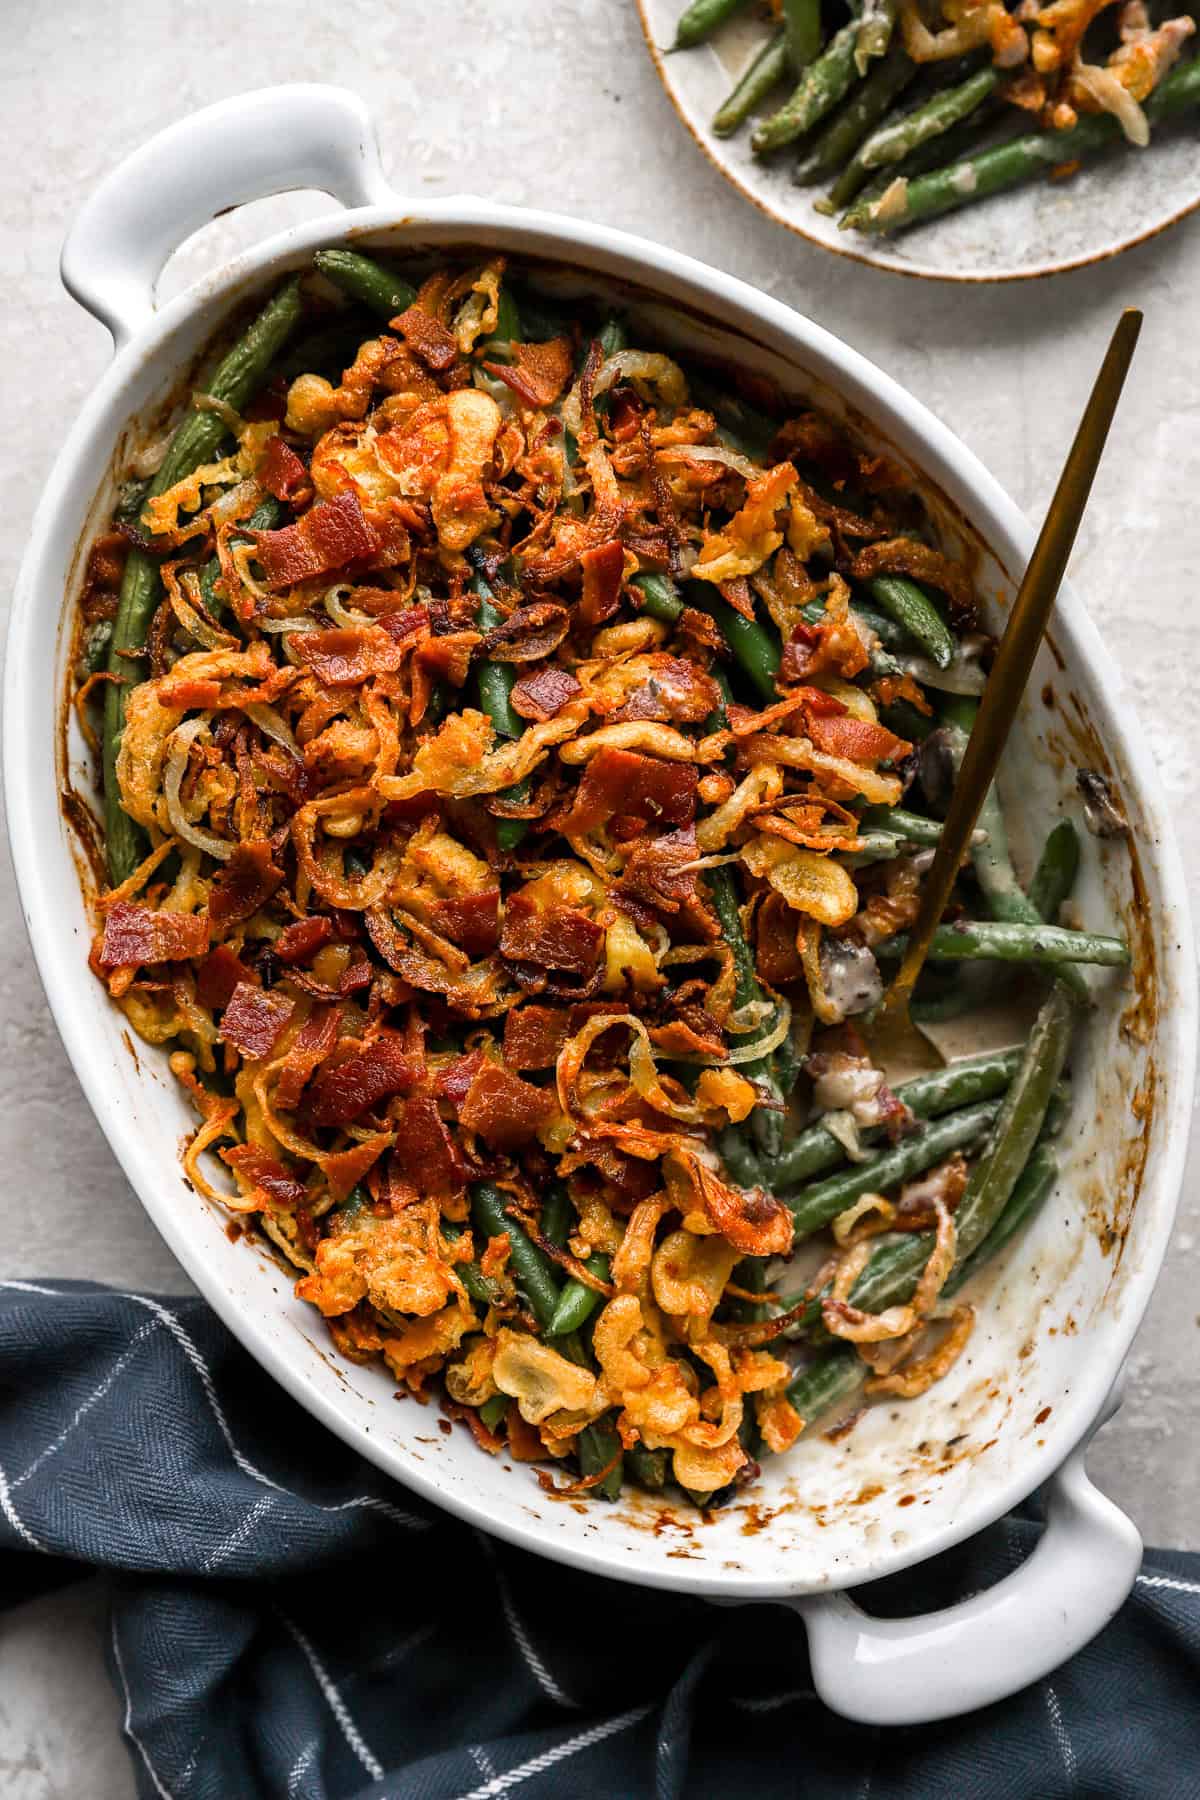
If you’re looking for a side dish that brings all the comfort of traditional green bean casserole, but without the heavy cream and boxed soup, my Healthier Green Bean Casserole is it! This lightened-up version is creamy, flavorful, and delicious!
It is totally gluten-free and dairy-free. It’s a lightened-up version of a classic holiday side dish!
Why I Love This Green Bean Casserole
Growing up, having green bean casserole for the holidays wasn’t something we ate; instead, my family opted for these Garlicky Blistered Green Beans. But once I developed this version… I have not gone back; it’s a family favorite!
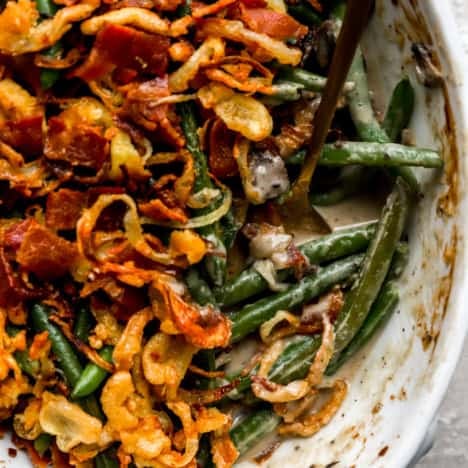
Don’t get me wrong, I serve blistered green beans year-round, but for the holidays? This casserole is here to stay! This casserole retains the essence of the classic! With green beans, mushrooms, that rich “cream of mushroom” flavor, and a crunchy topping, but we’re doing it my way: all from scratch, full of good ingredients, and diet-friendly.
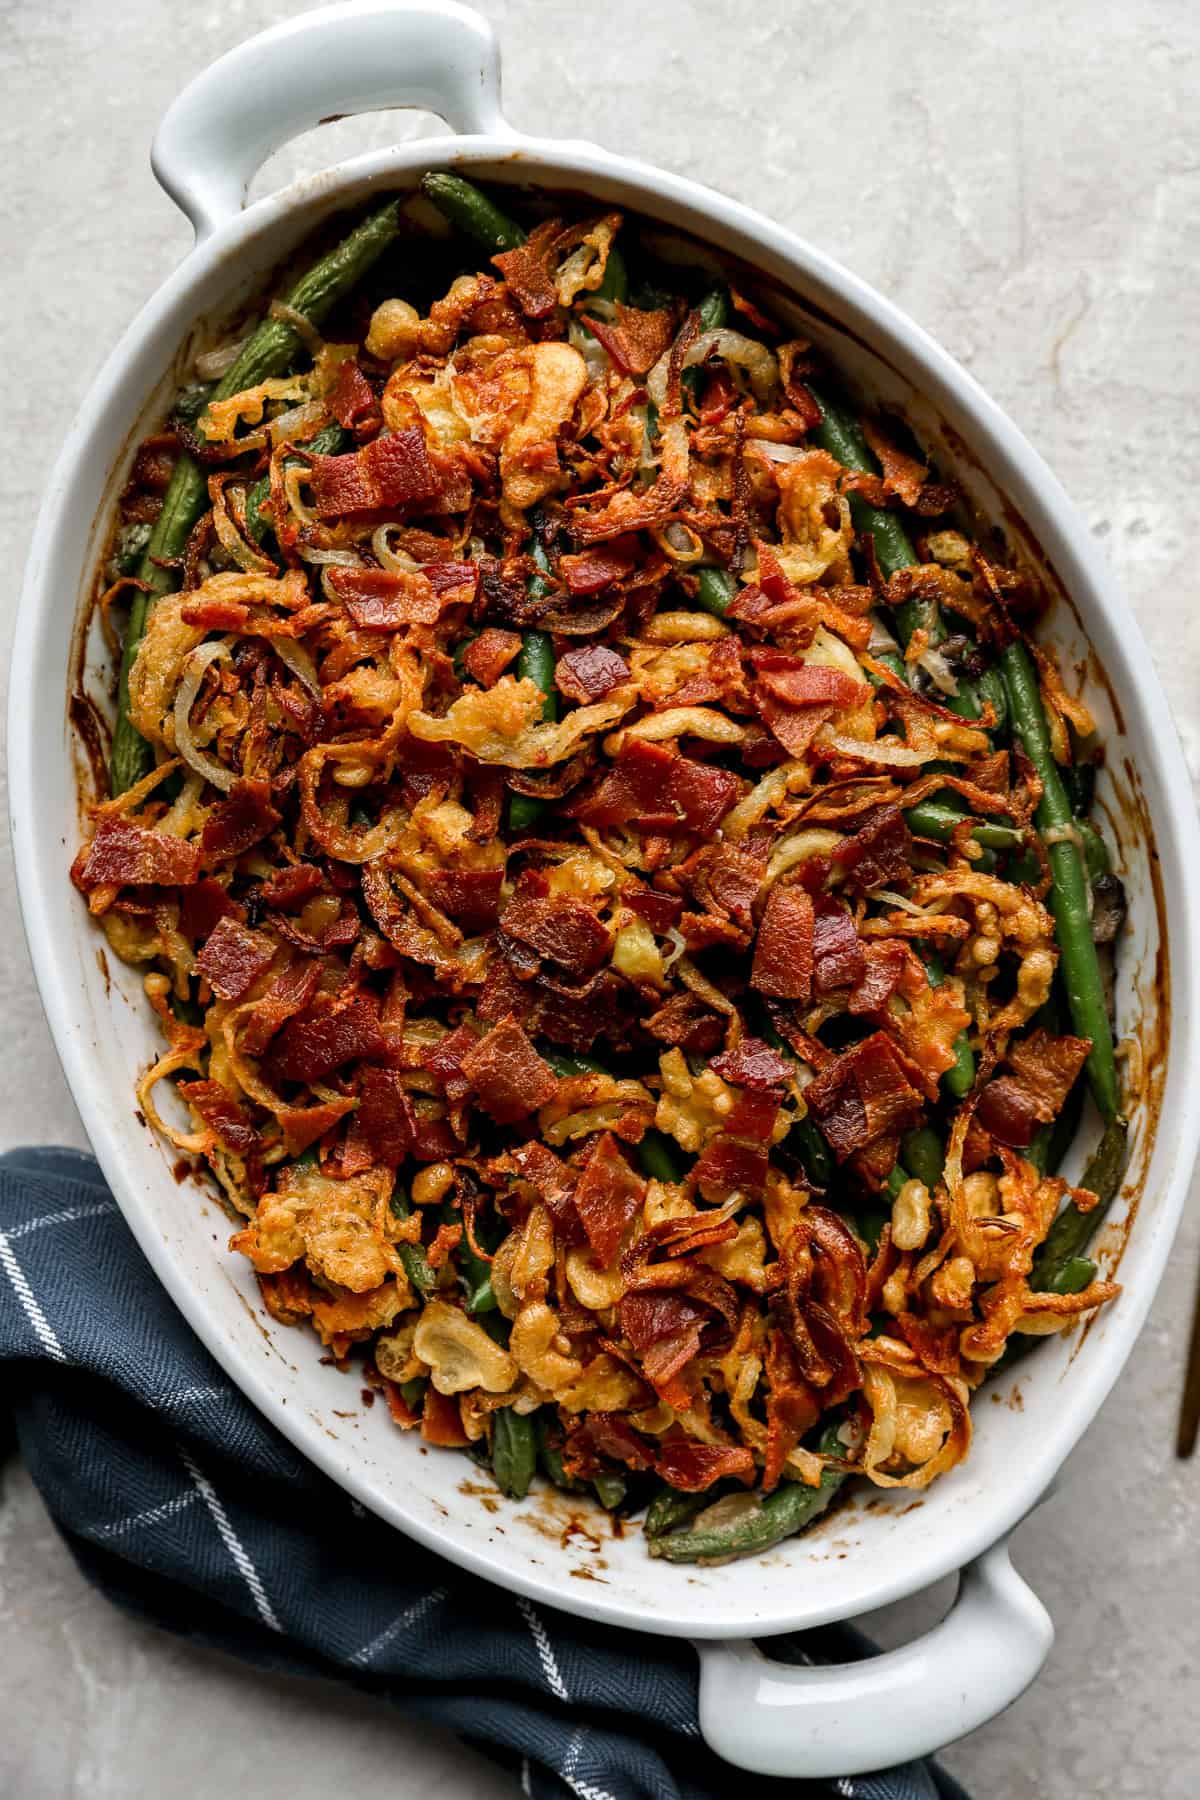
This lightened-up classic is made up of crisp-tender, fresh, green beans baked in a dairy-free cream of mushroom soup, and topped with my homemade, healthier, crispy fried onions! You cannot go wrong with this recipe for the holiday season.
Whether you’re feeding a crowd at Thanksgiving, prepping ahead for a potluck, or just treating your everyday dinner to a little extra love, this casserole hits that comfort zone without compromise.
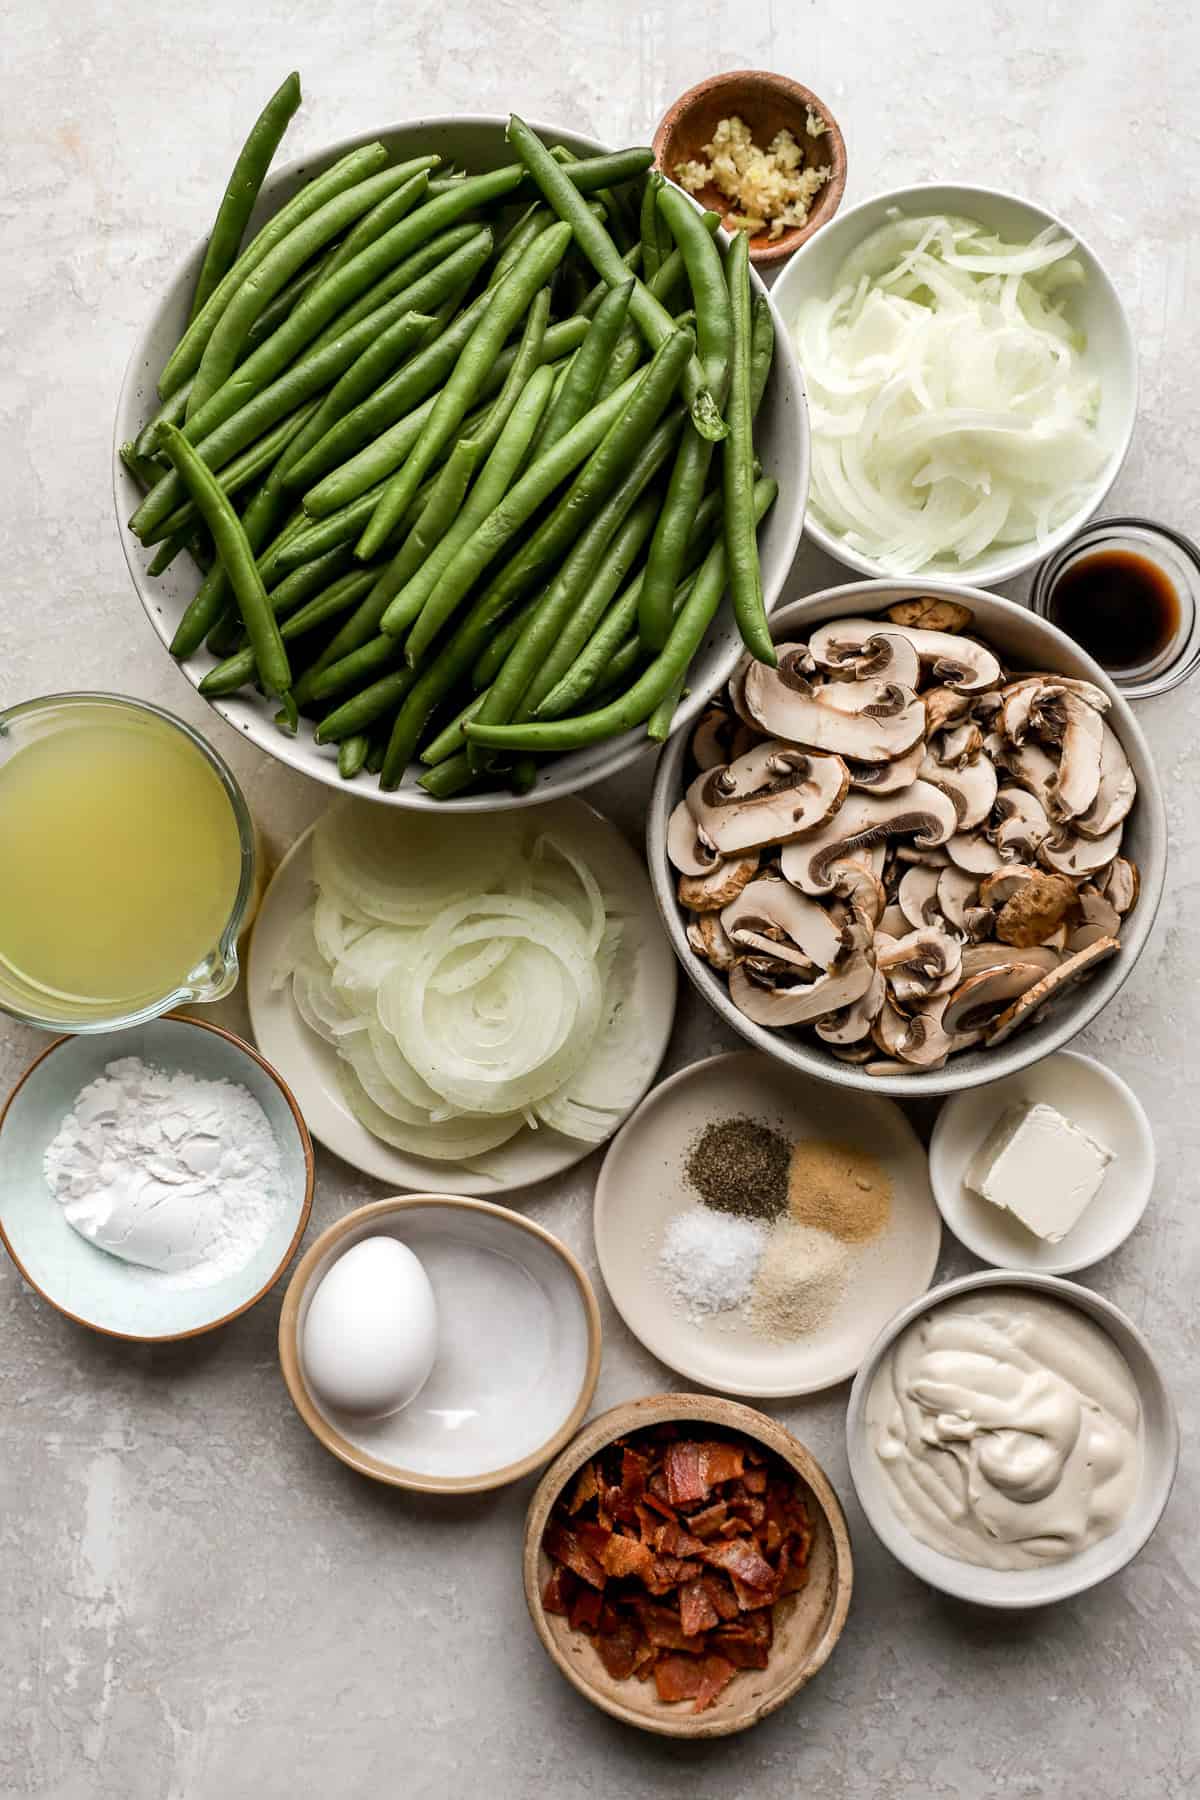
Ingredients You’ll Need
This green bean casserole is entirely made from scratch, from the revamped cream of mushroom soup to the healthier fried onions! *See the recipe card below for the full instructions and cooking time.
- Butter (or oil for a full dairy-free option): Using grass-fed butter adds richness, but you can substitute with oil if desired.
- Fresh Green Beans: Use fresh green beans that are trimmed and cut; this will result in the best firm and crisp tender green beans.
- Mushrooms and Onions: Slice both thinly; this builds the savory base.
- Garlic: Fresh garlic makes for the best flavor. Pre-minced garlic will also work if that’s what you have on hand.
- Coconut Aminos, Cashew Cream, and Vegetable Broth: This trio replaces the traditional cream of mushroom soup, providing a full-on creamy flavor without dairy. *Note: You can use store-bought cashew cream or easily make your own. I always make my own! It’s super easy.
- Seasonings: You’ll use a simple blend of sea salt, black pepper, onion powder, and garlic powder.
- Bacon: This is a totally optional addition if you want to keep your green bean casserole vegetarian, but it does add a delicious, smoky, indulgent touch.
- Crispy Onions: I include a homemade, healthier recipe for crispy onions, but you can use store-bought if preferred.
Cashew cream for the dairy-free win!
Meet my favorite dairy replacement that mimics heavy cream: Cashew Cream! It has a neutral flavor that complements most dishes, resulting in a creamy texture without the need for dairy.
How to Make This Green Bean Casserole
This easy green bean casserole recipe takes just 10 minutes to prepare.
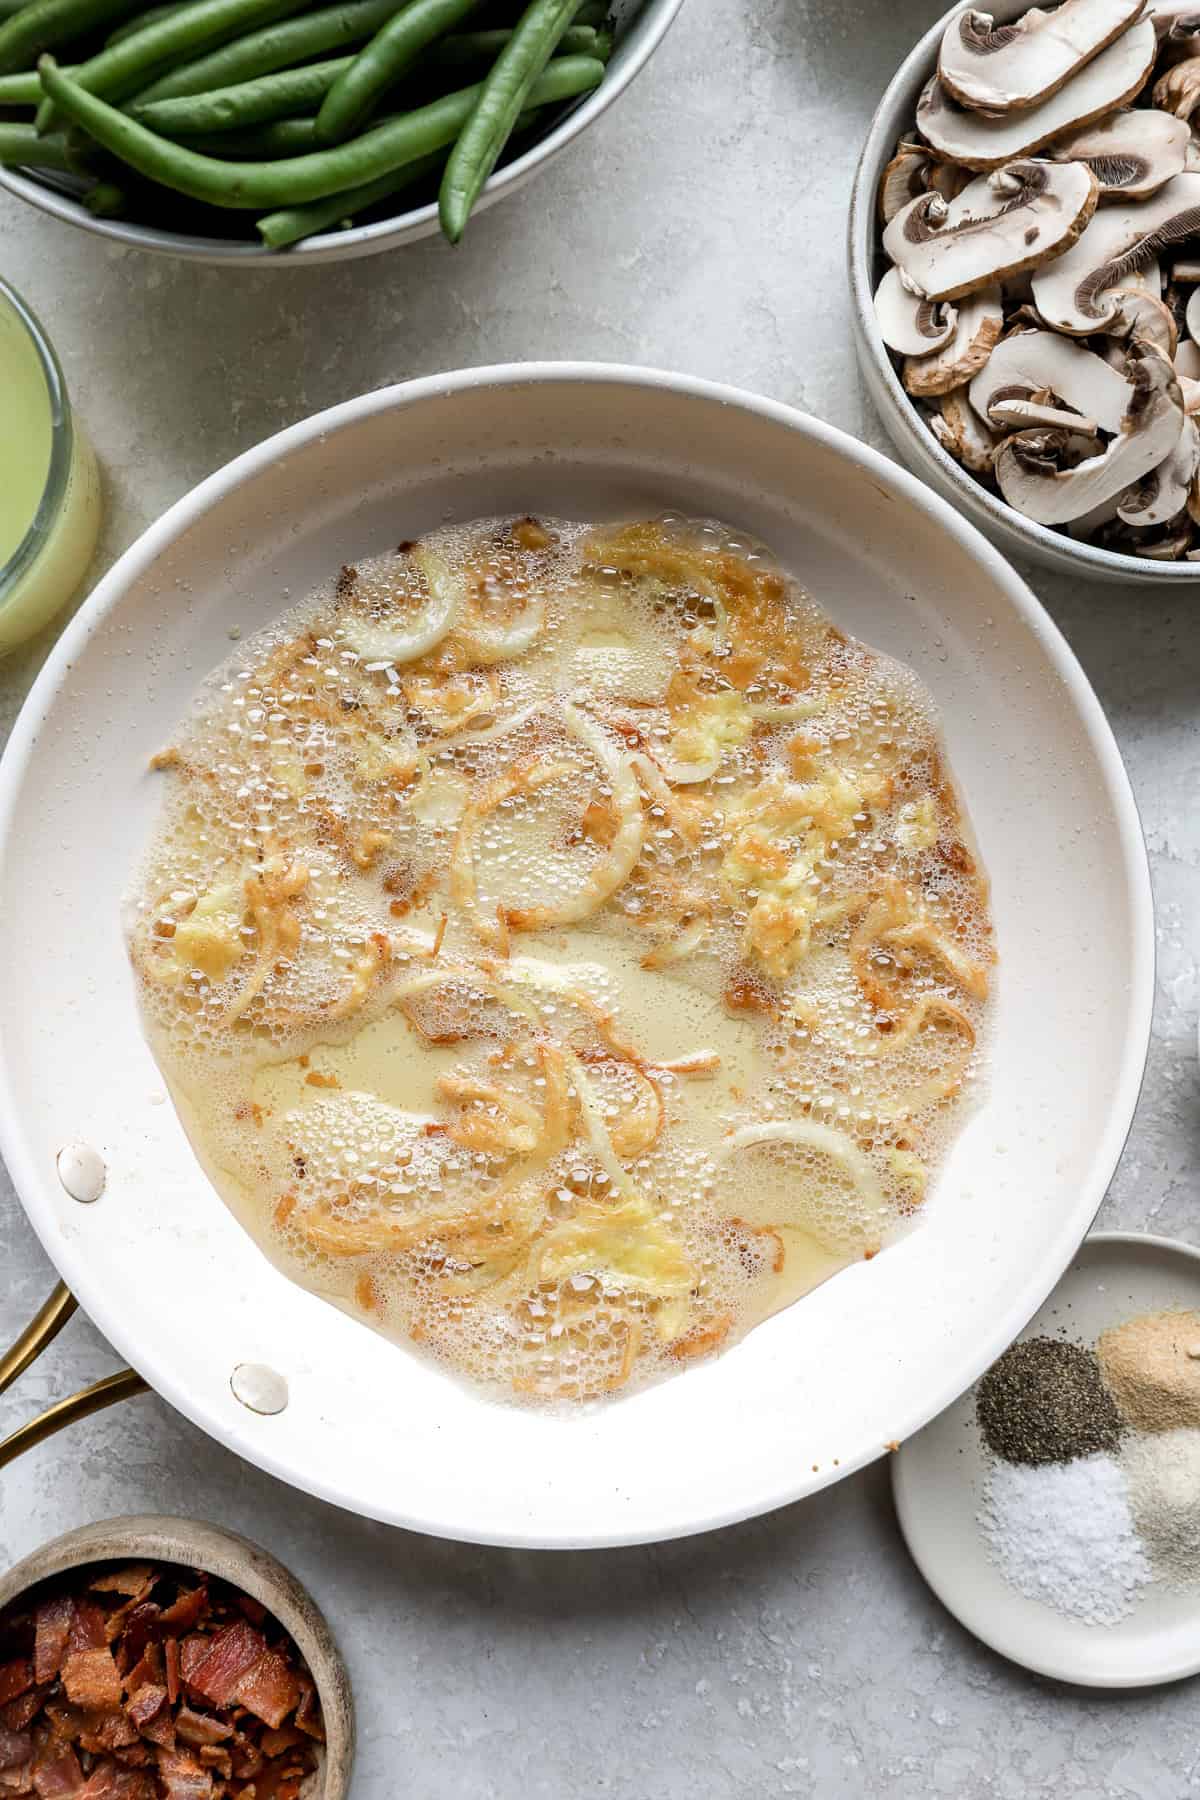
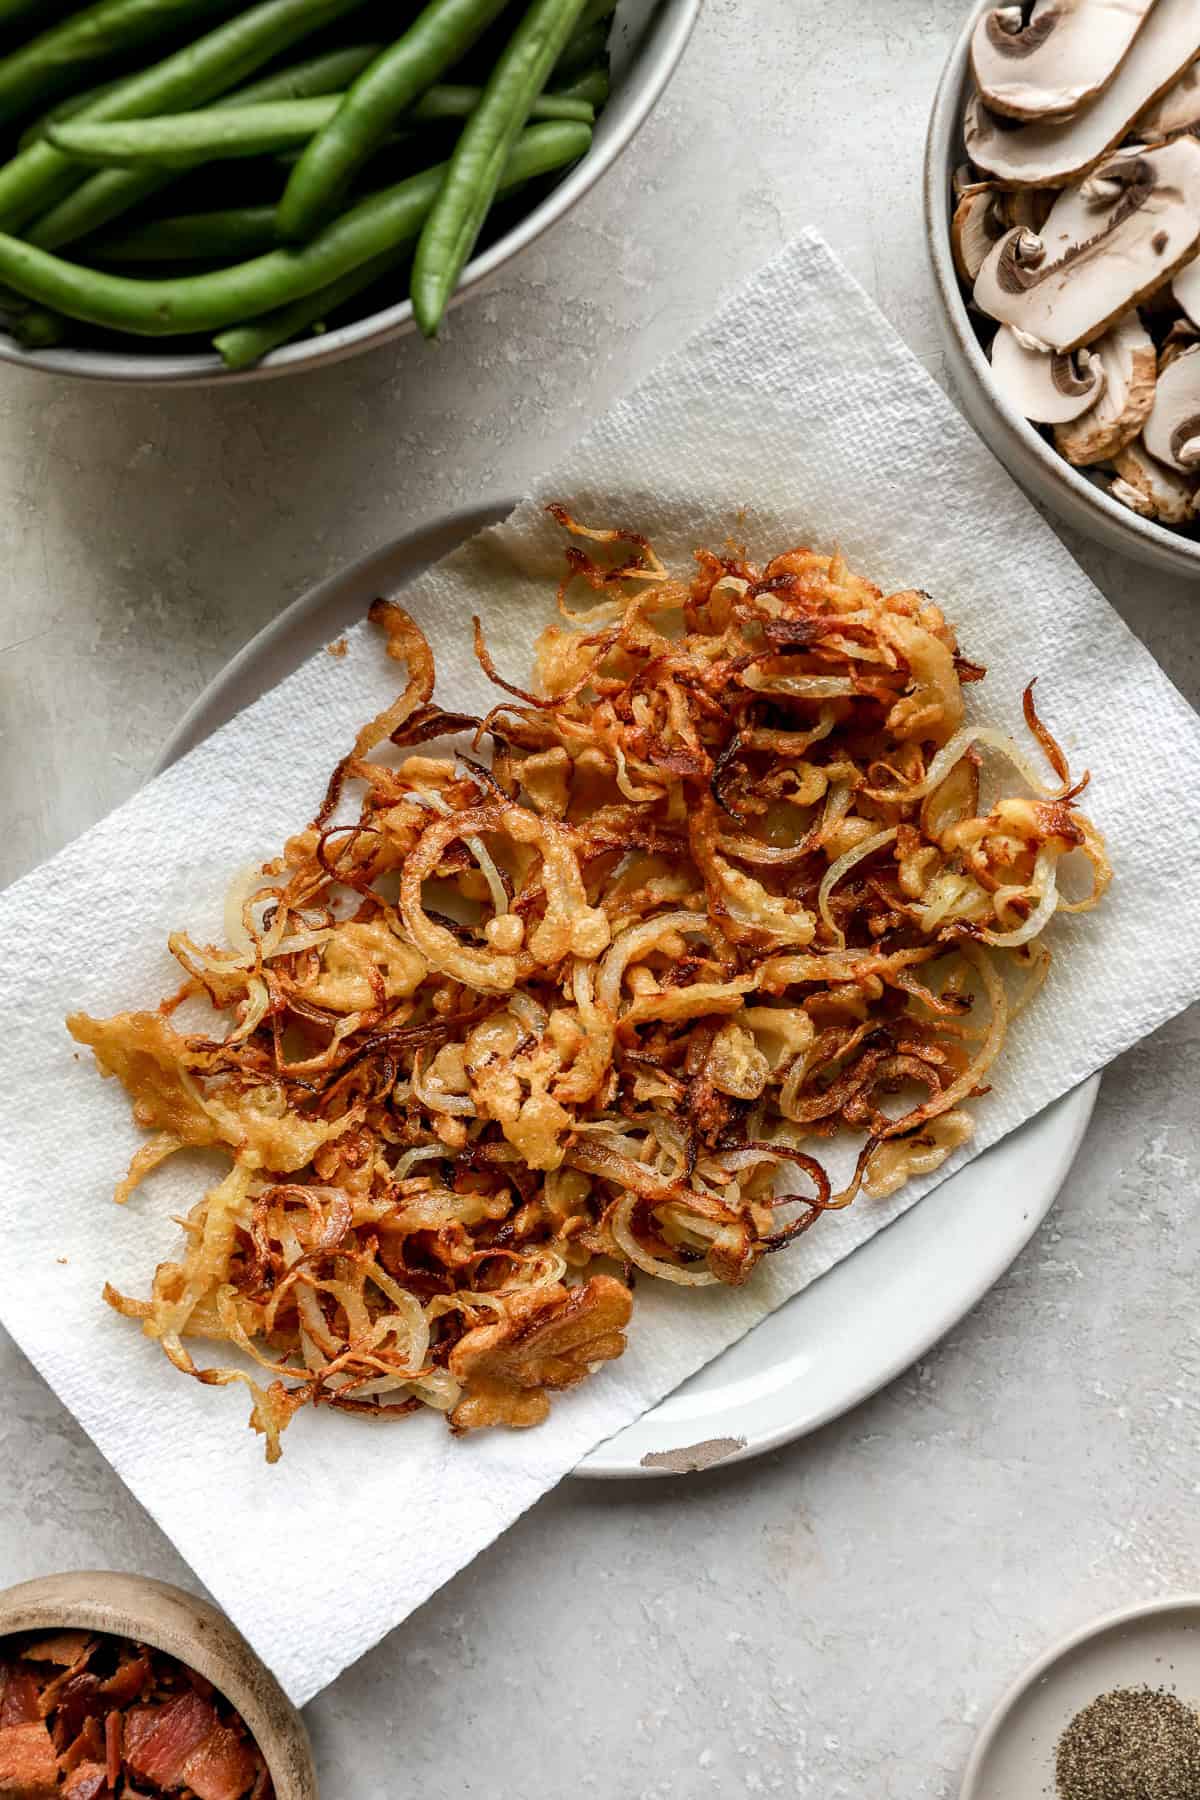
- Make the crispy onions: Whisk an egg with arrowroot flour, dip thin onion rings in it, and then fry in avocado oil until golden brown. Set aside on a paper towel-lined plate.
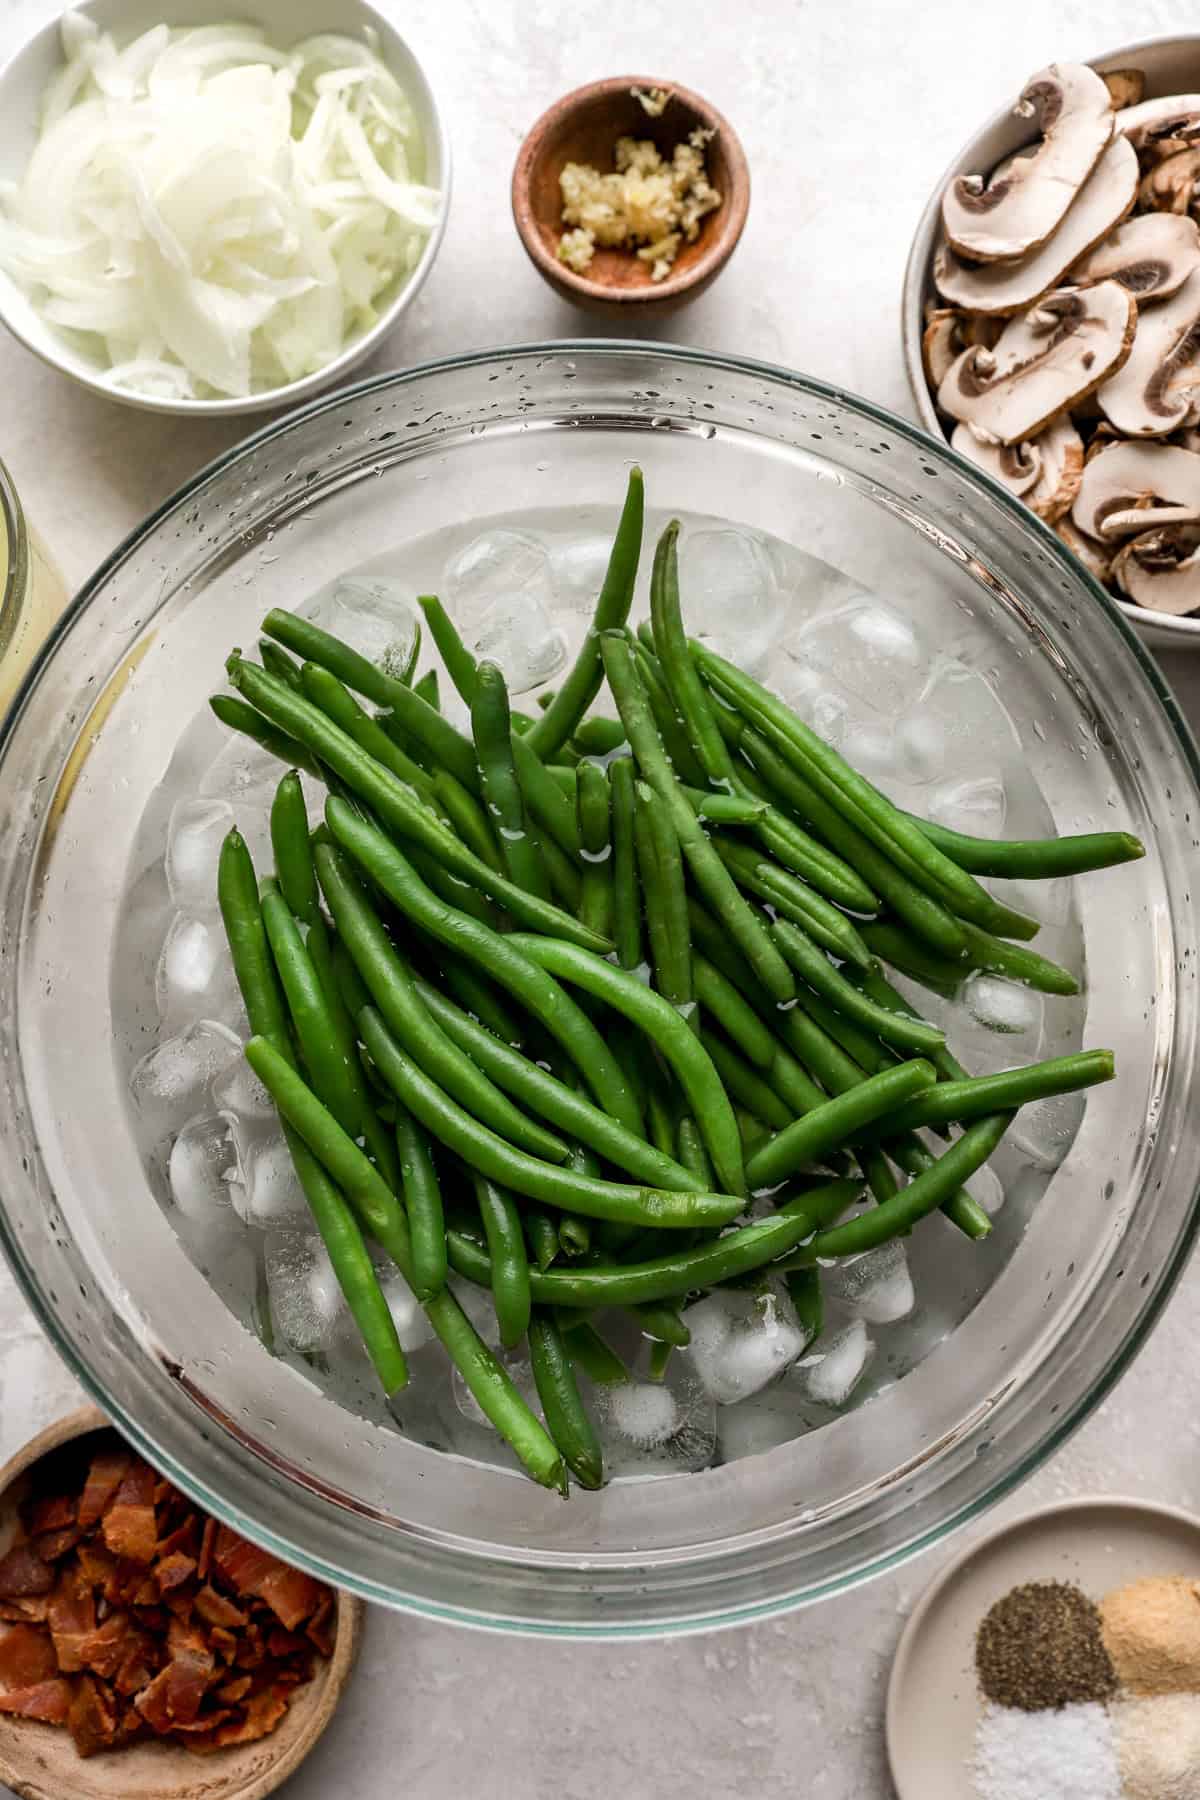
- Blanch the green beans: Add the green beans to a large pot of boiling water with salt and blanch for 5 minutes. Drain and immediately plunge the beans into a large bowl of ice water to stop the cooking. This keeps them crisp-tender.
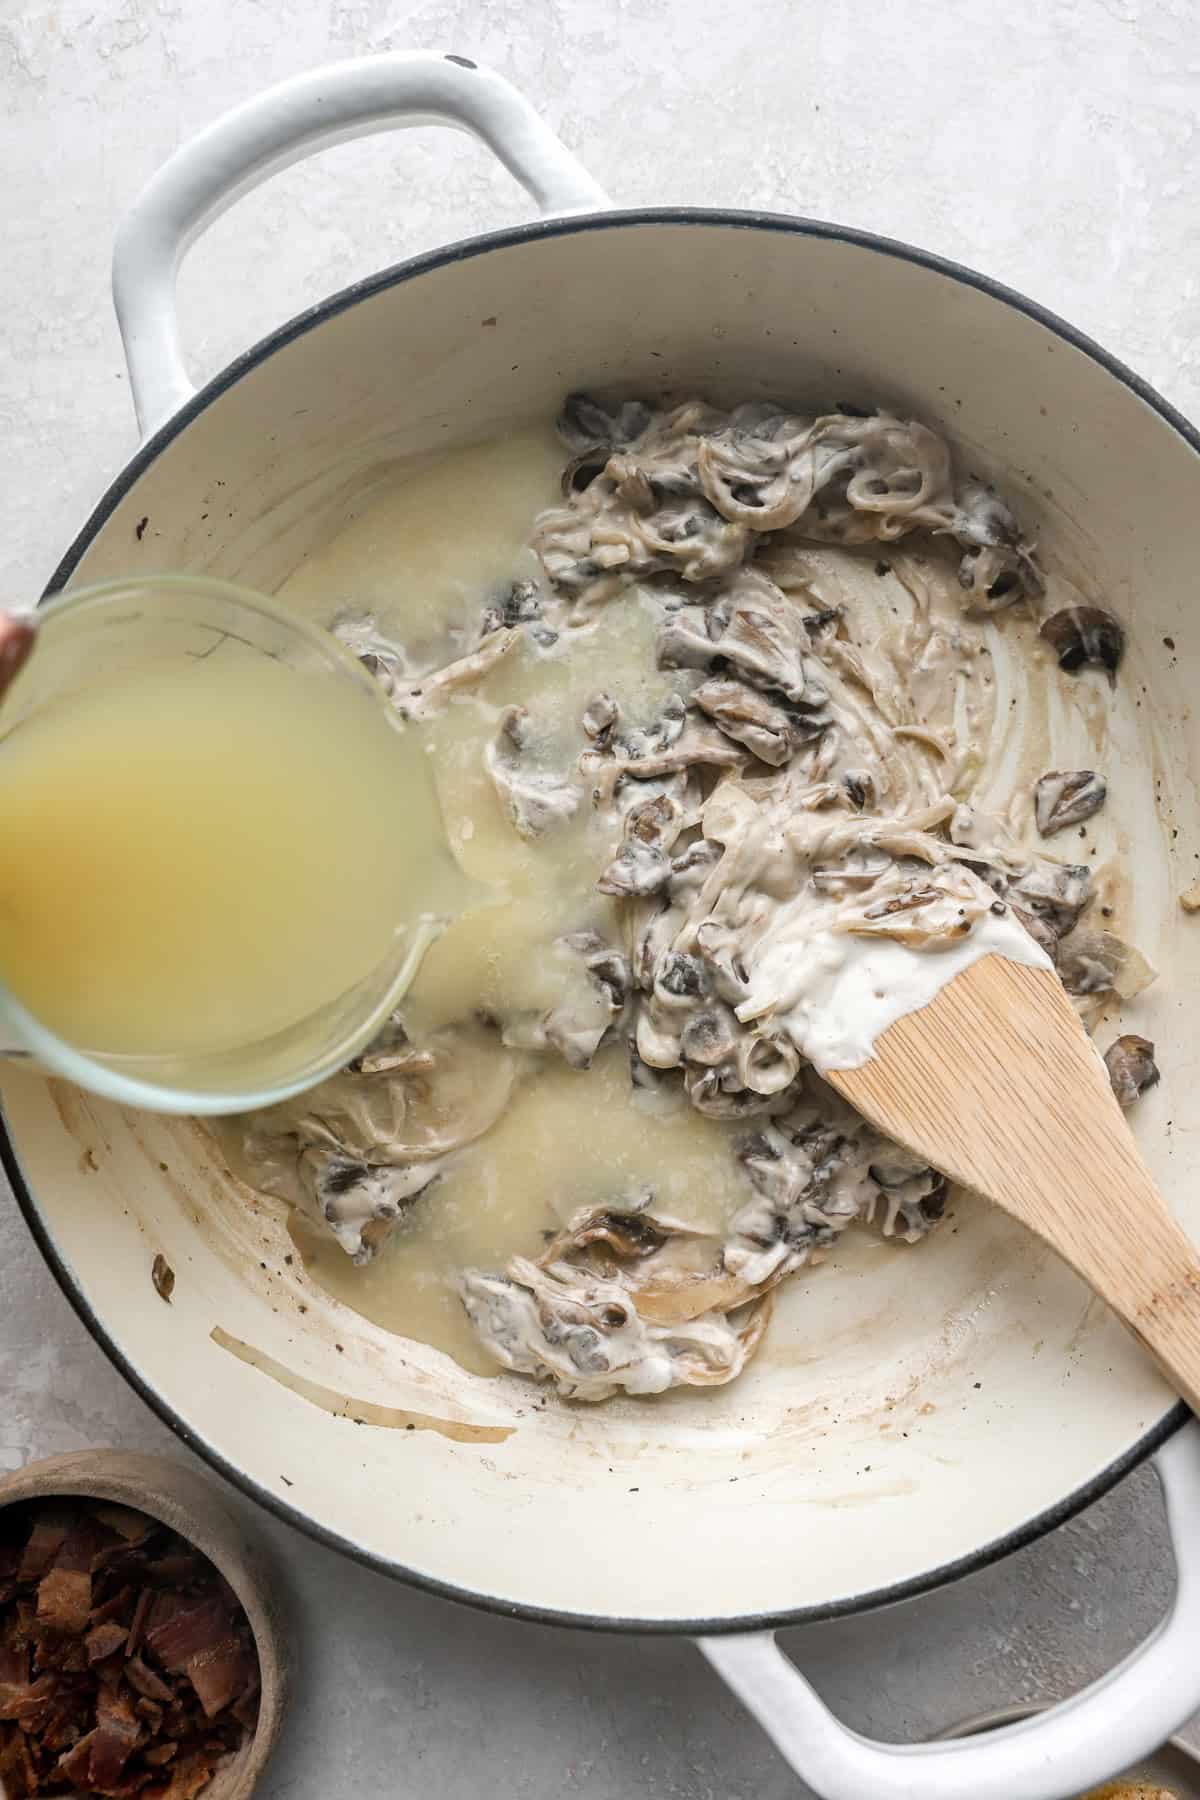
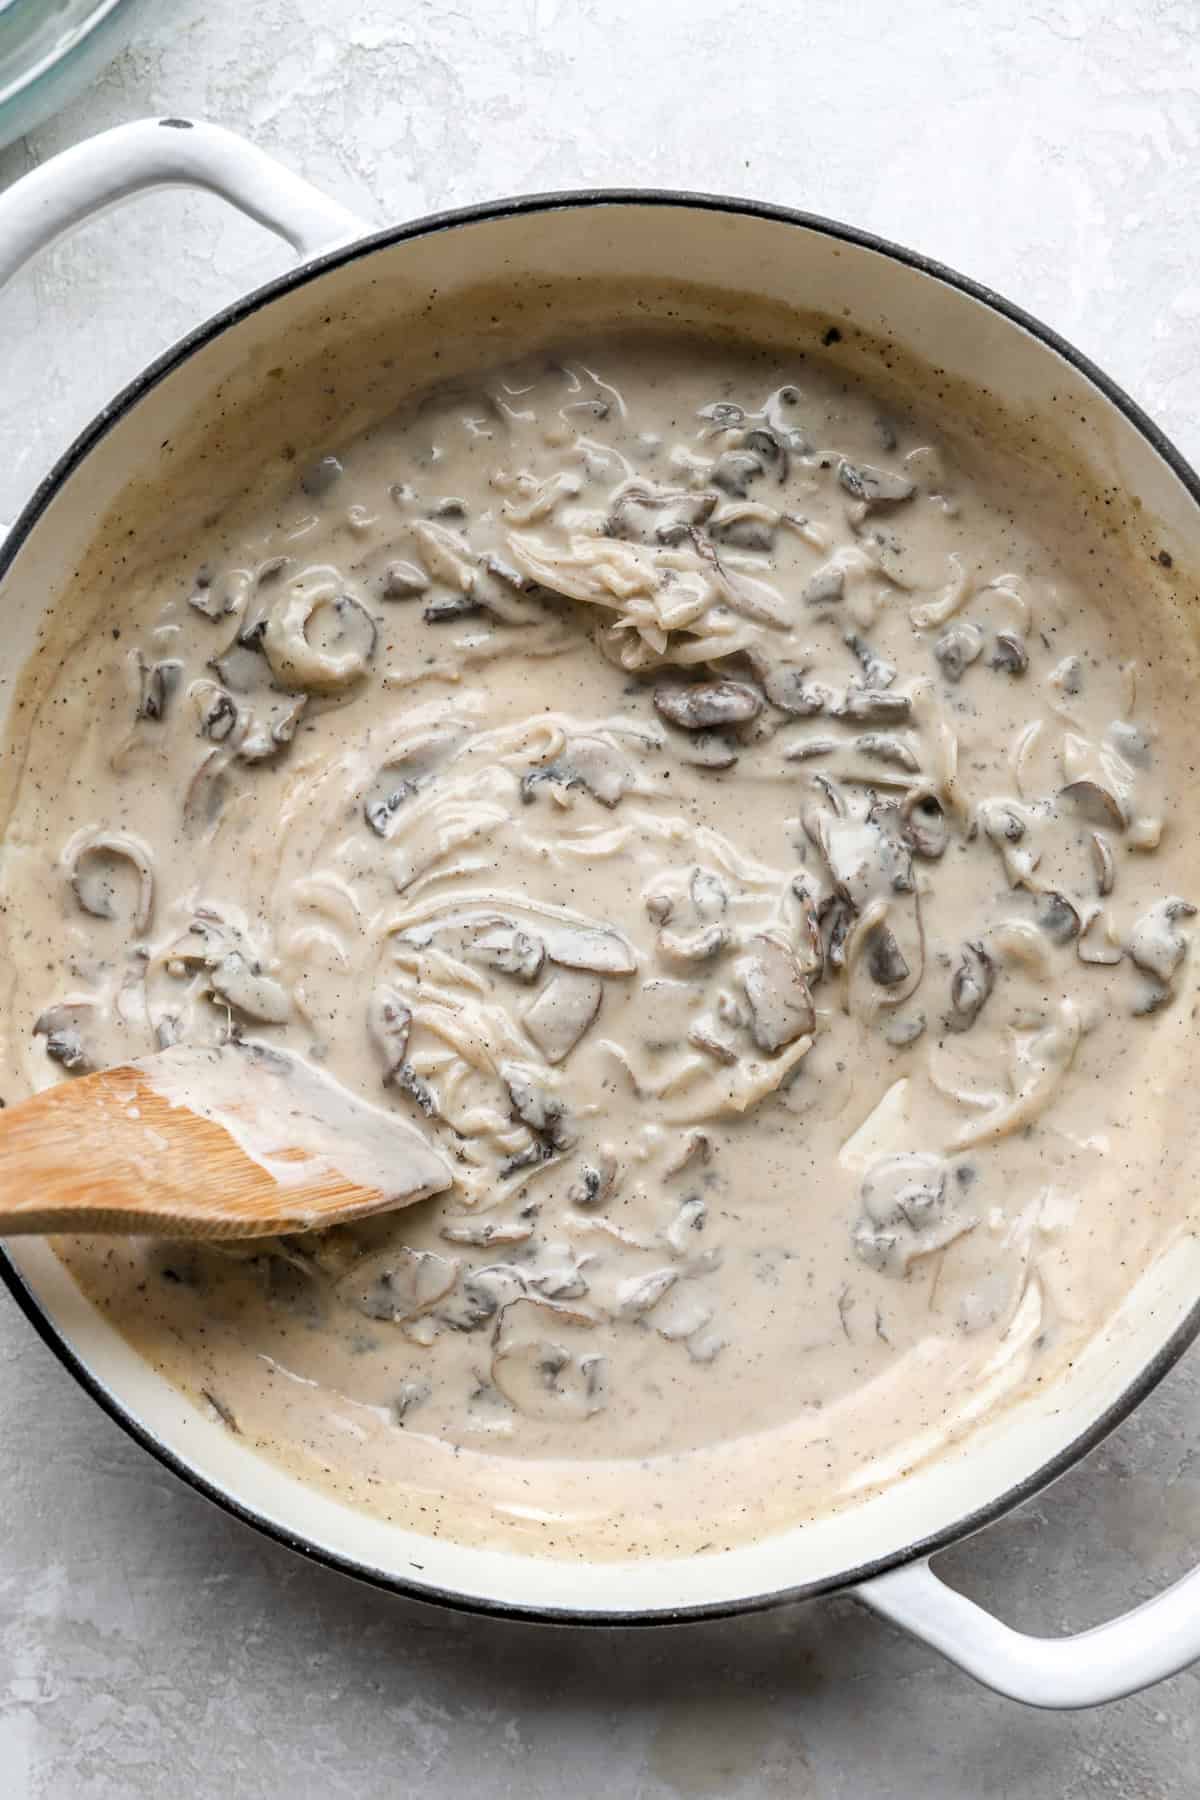
- Build the creamy sauce: In a cast-iron skillet, melt the butter (or heat the oil), then sauté the mushrooms until they release their moisture. Add the onion, garlic, and coconut aminos (soy sauce alternative), and stir in the cashew cream and broth. Reduce the heat, season with garlic/onion powder, salt, and pepper, and let it thicken.
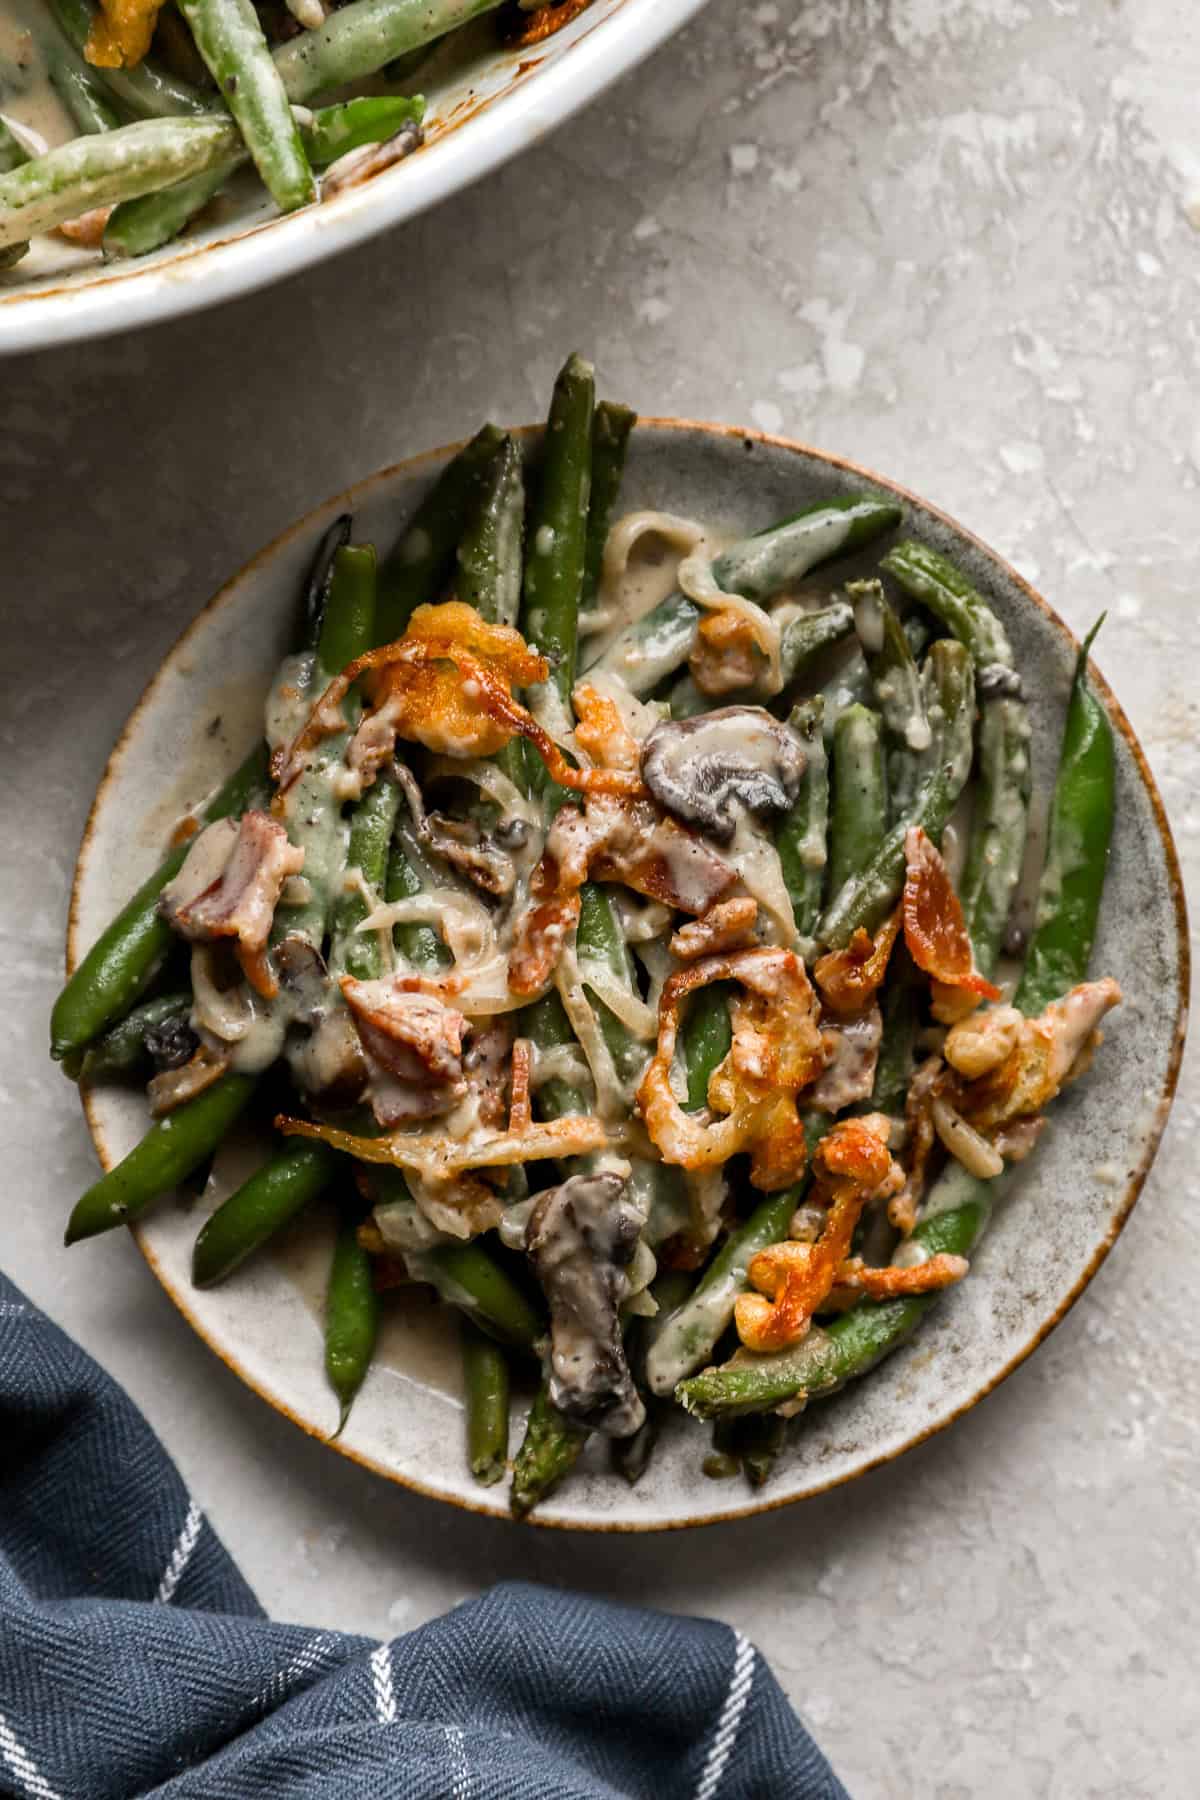
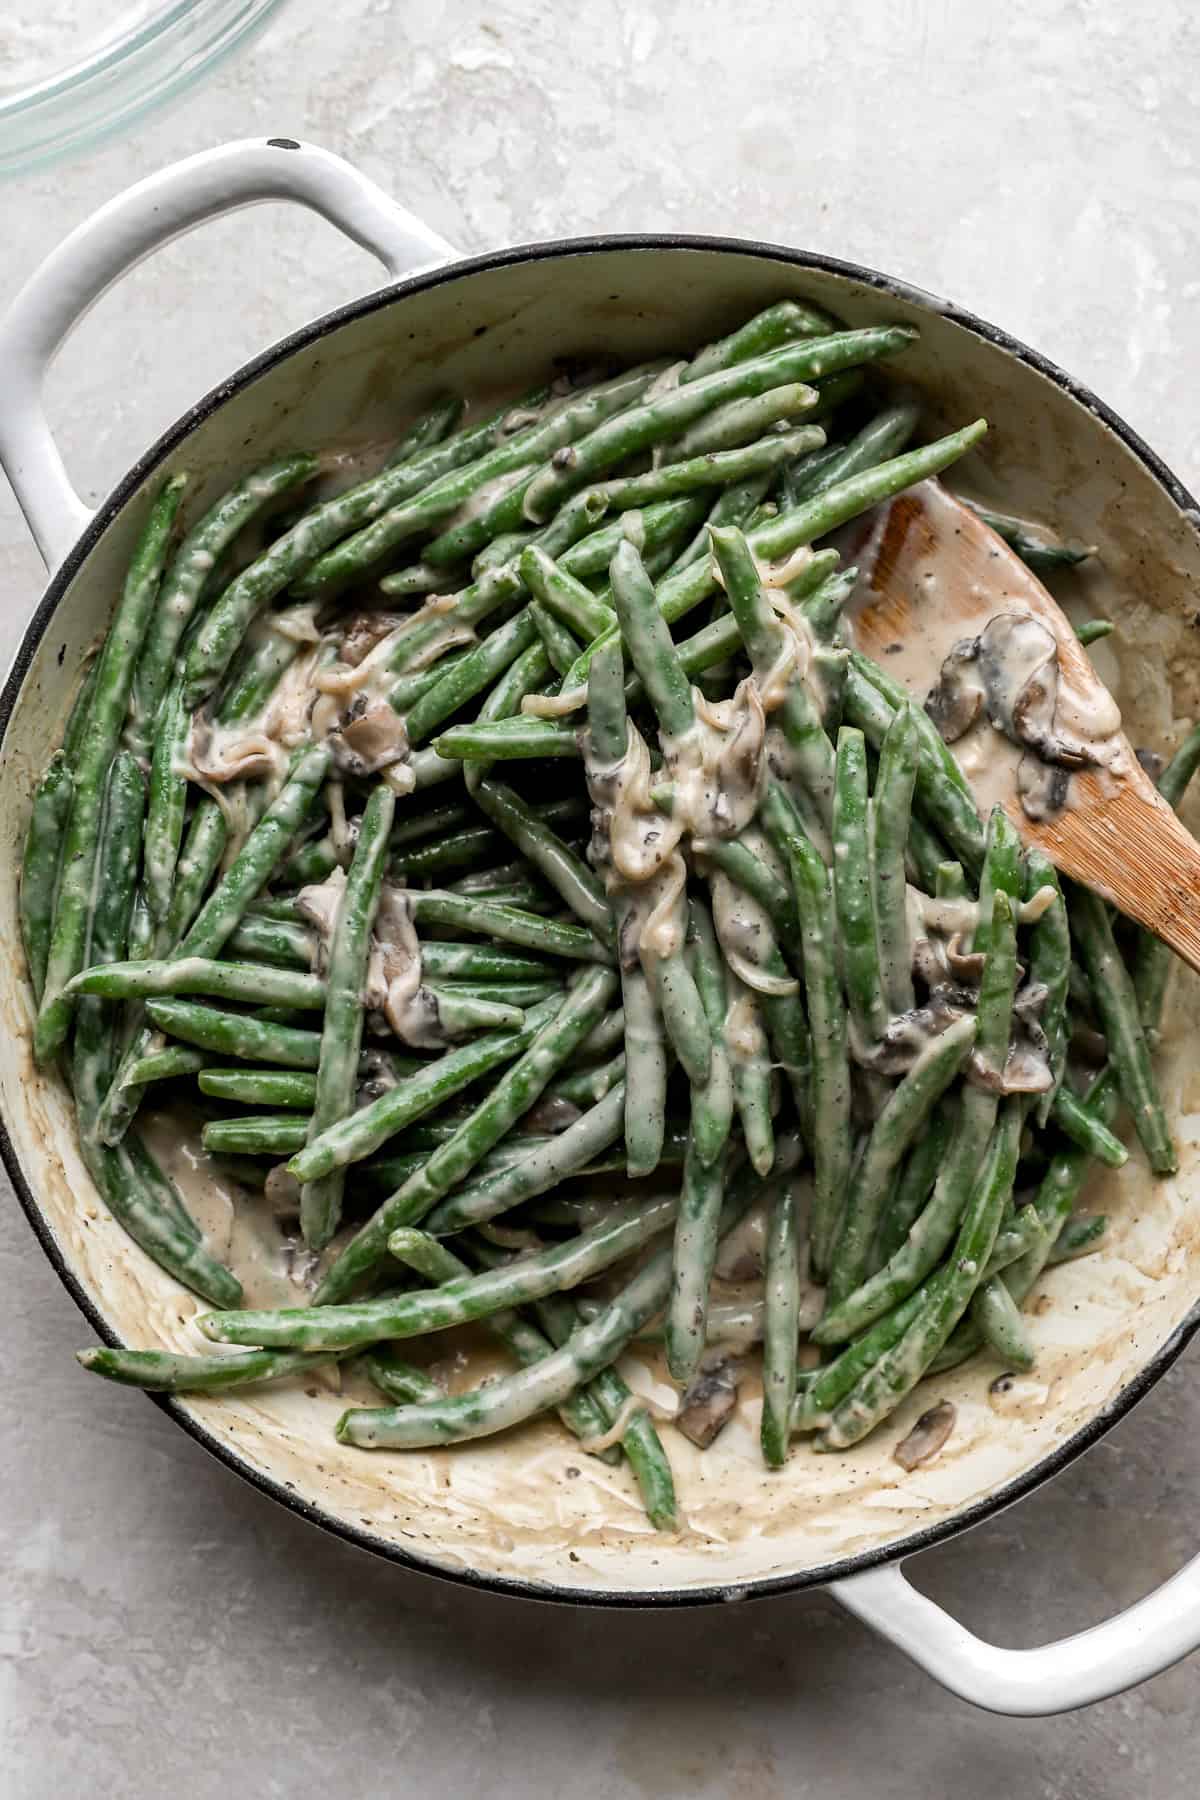
- Combine green beans and sauce: Season the blanched green beans, add them to the skillet, and toss to coat so every piece is silky with sauce.
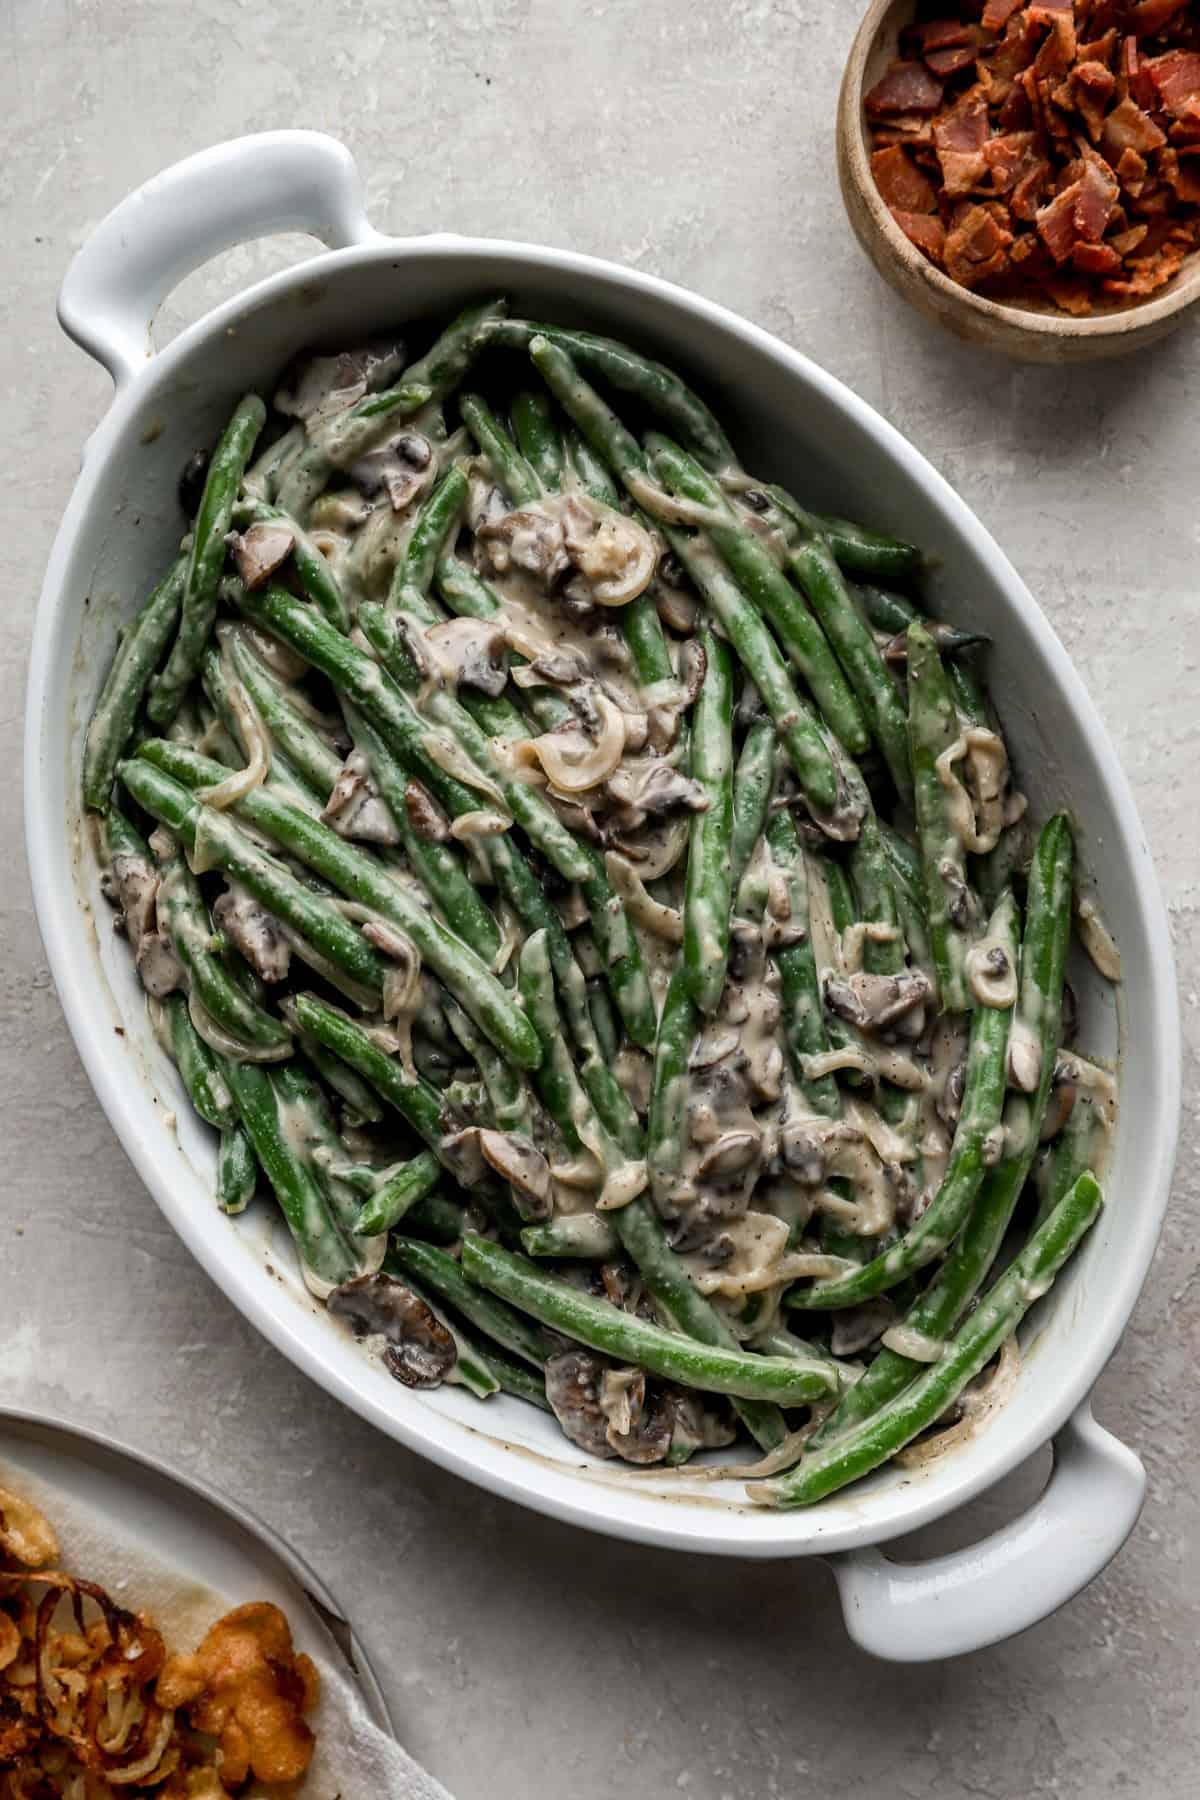
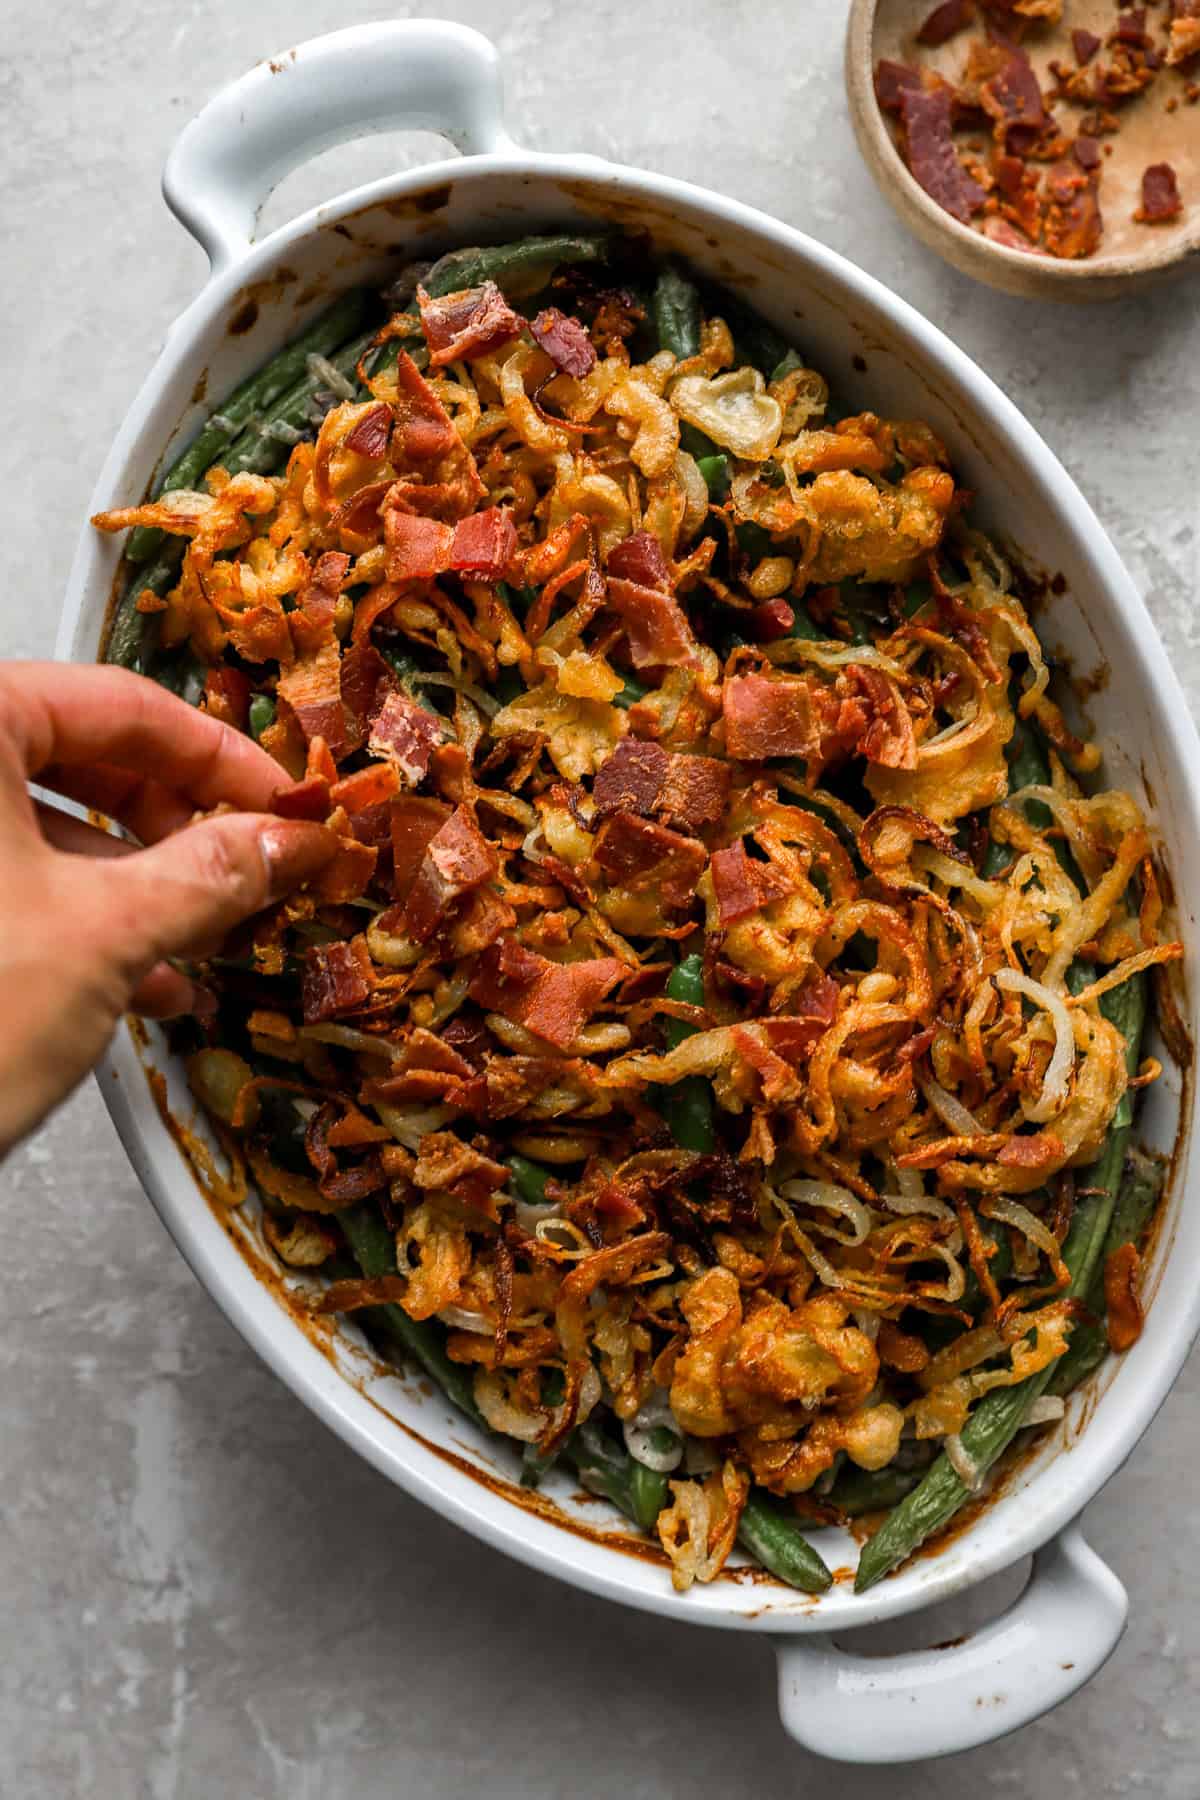
- Bake and serve: Transfer the mixture to a 9×9” baking dish and bake at 350ºF for 30 minutes. Remove, top with the crispy onions (and bacon, if using), then bake for an additional 15-20 minutes until bubbly and tender. Serve warm!

Pro tip: If your onions are browning too fast, the casserole isn’t done yet. Cover with foil and continue baking.
Let’s Talk About Healthier Crispy Fried Onions
How We’re Making These Fried Onions Healthier! We are using avocado oil instead of canola oil (avocado oil is tasteless and great for high-heat cooking) and arrowroot flour instead of white flour. We also aren’t deep-frying and wasting tons of oil; rather, we are pan-frying. We’ll still get those crispy onions we want, but on a lighter note!
FAQ’s:
Technically yes—but full disclosure: fresh beans give the best texture, firmer bite, and superior flavor. Canned or frozen tend to soften more quickly and can end up mushy if you use canned products. To prevent this, drain and rinse them before proceeding.
Absolutely! Assemble up to the baking step, cover, and refrigerate for up to 1 day. Bring to room temperature and bake when ready. You can also freeze the unbaked casserole (we recommend freezing it before baking) for up to 2 weeks. Thaw in the refrigerator and bake as directed.
For the best texture, serve right away. If you have leftovers: store in an airtight container in the fridge for 3-5 days. Reheating: bake at 350°F for about 10 minutes. Microwaving works, but your crispy onions lose crunch. Freezing after baking isn’t recommended—the texture becomes watery.
I haven’t made this recipe with heavy cream, but I am betting it will work just fine here. Coconut cream may work well, but you will taste the coconut flavor.
Final Tips for Making the Best Green Bean Casserole
Blanch the beans. Blanching the green beans gives them that perfect crisp-tender texture. After you boil them, make sure you plunge them into a cold water bath right away to stop the cooking process, otherwise they could become mushy.
Dry the green beans. After you wash the gree beans, be sure to drain and dry them to remove any excess moisture. If they’re too wet, the casserole can become watery.
Wait to add the crispy onions. You want the onions to be crispy, not burnt! Make sure you bake the casserole without the onions at first, then add them when it’s closer to being done.
You can roast the green beans, instead of blanch them if you like. Just toss with some oil, salt, and pepper and roast at 375ºF for 20-30 minutes. If you do roast and season the green beans, be careful not to add too much salt later on.
Holiday side dish? Weeknight upgrade? Yes & yes.
Whether you’re putting this on the table for Thanksgiving, squeezing in one last “summer-to-fall” dinner with friends, or simply looking to upgrade your weekend menu, this casserole has the depth, comfort, and flavor to deliver. Plus, it’s a great way to add in some veggies (hello, vibrant green beans) while keeping things elevated.
More Thanksgiving Side Dish Recipes You’ll Love:
- Scalloped Potatoes
- Gluten-Free Stuffing
- Roasted Veggies
- Cranberry Walnut Roasted Acorn Squash
- Crockpot Cranberry Sauce
Watch the Video:
Green Bean Casserole
Ingredients
- 2 tablespoons butter use oil for dairy-free
- 1 1/2 pounds green beans trimmed and cut into pieces
- 2 cups mushrooms sliced thin
- 1 small onion sliced thin
- 2 garlic cloves minced
- 1 teaspoon coconut aminos
- 1/2 cup cashew cream
- 1 cup vegetable broth
- 1/2 teaspoon garlic powder
- 1/2 teaspoon onion powder
- 1/2 teaspoon sea salt more to taste
- 1/2 teaspoon black pepper more to taste
- Optional: 4 strips bacon cooked crispy and broken into pieces
Crispy Onions:
- 1 medium onion sliced into thin rings
- 1 egg
- 2 tablespoons arrowroot flour
- Avocado oil for frying
Instructions
- Pre-heat the oven to 350°F. Grease a 9x9 inch baking dish with butter or oil and set aside.
Make The Crispy Onions:
- Slice the onion into thin rings.
- In a small skillet, heat avocado oil until hot.
- While waiting for the oil to heat up, whisk the egg and arrowroot together in a medium mixing bowl.
- Working in batches, dip the onion into the egg/arrowroot mixture and then place into the hot oil. Cook for about 2-3 minutes on each side, or until a dark brown.
- Set aside on a plate lined with paper towels.
Blanch The Green Beans:
- Bring a gallon of water and 2 tablespoons of salt to a boil in an 8-quart saucepan.
- Add the green beans and blanch for 5 minutes.
- Drain in a colander and immediately plunge the beans into a large bowl of ice water to stop the cooking.
- Drain and set aside. See notes for recipe steps if you would rather roast the green beans.
- Melt the butter in a 12-inch cast iron skillet set over medium-high heat.
- Add the mushrooms, 1 teaspoon salt and pepper and cook, stirring occasionally, until the mushrooms begin to give up some of their liquid, approximately 4 to 5 minutes.
- Add the onion, garlic, and coconut aminos and continue to cook for another 1 to 2 minutes.
- Add the cashew cream and mix well.
- Add the broth and simmer for 1 minute.
- Decrease the heat to medium-low and add salt, pepper, onion powder, and garlic powder.
- Cook over low heat until the mixture thickens, stirring occasionally, approximately 6 to 8 minutes.
- Season green beans with salt and pepper. Add green beans to skillet with the sauce and mix until the green beans are well covered. Taste and adjust seasoning as needed.
- Pour the green beans and sauce into the 9 x 9 baking dish. Bake for 30 minutes.
- While baking, make the bacon if using.
- Remove from the oven and top with crispy onions and optional bacon, if adding.
- Bake for an addition 15-20 minutes, or until green beans are tender and bubbly.
- Serve warm!
Notes
- See post: How to Make Cashew Cream!
- Roasting Instead of Blanching. You can roast the green beans, instead of blanch them if you like. Just toss with some oil and roast at 375ºF for 20-30 minutes. If you do roast the green beans, do not salt them!
- Blanch the beans. Blanching the green beans gives them that perfect crisp-tender texture. After you boil them, make sure you plunge them into a cold water bath right away to stop the cooking process, otherwise they could become mushy.
- Dry the green beans. After you wash the gree beans, be sure to drain and dry them to remove any excess moisture. If they’re too wet, the casserole can become watery.
- Wait to add the crispy onions. You want the onions to be crispy, not burnt! Make sure you bake the casserole without the onions at first, then add them when it’s closer to being done.
- You can roast the green beans, instead of blanch them if you like. Just toss with some oil, salt, and pepper and roast at 375ºF for 20-30 minutes. If you do roast and season the green beans, be careful not to add too much salt later on.

Not a fan of mushrooms….can I just leave them out? Maybe do more green beans??
Yes!
Is there a substitute for cashew cream?
These look great! I was reading the recipe and it says to review the notes for roasting the beans instead of blanching them but there wasn’t anything in the notes for roasting. Do you have tips for roasting them? Thanks!
OOPS! I find it easier to blanch here, but you can roast with some oil + s&p on 375 for 20-30 minutes or so!
Thanks. i love your blog. Thank you for all the great ideas!
I was raised with some sort of green bean casserole so it’s a must at my Thanksgiving table! I just wanted to say that I tried this recipe last week to give it a test run, and let me tell you, this recipe is AWESOME!!! Everyone at my table raved over it and wanted seconds and thirds. And the recipe! Lexi, thank you for such delicious recipes to make our Paleo journey that much better!!! You’re one of my all time favorites!!!!!
Can you use roasted cashews instead of raw ones for the sauce?
If they’re salted just be careful not to add too much additional salt.
Is there an easier replacement for Cashew Cream?
Can’t wait to try it! We’re having a Lexi’s Clean Kitchen Thanksgiving!
Thank you!
YAY. You probably can, but this is the way we’ve made this dish and haven’t tested it other ways!
Hi
This looks great. But it says to mix onions with garlic and coconut aminos. Then later it says to top with crispy shallots. I don’t see shallots listed in ingredients. Are onions used twice?
This looks amazing!! One question when you go to make the cashew cream..do the cashews have to be raw or roasted?
Thanks!
It looks so good and so easy to make! Definitely will give it a try soon 🙂
This looks amazing! Can’t wait to make it. Is it possible to use GF flour instead of arrowroot?
That, or tapioca will probably work!
So excited to make this! Do you think I can prepare everything other than the Green Beans tonight (night before) and then in the am roast the green beans and mix with the sauce before cooking? Thank you!!
YAY. I think YES!
Am I reading the instructions correctly?— use one onion to make the crispy topping and another onion gets cooked into the sauce?
Correct- adjust as you’d like, though 🙂
Butter grass fed not is still concentrated cow breast milk and not dairy free in any term. Omit butter
Per the ingredients, use oil instead of butter for dairy-free 🙂
One of my favourite blogs! Thanks you!
Thank YOU!
Perfect side for turkey day!
Coming to a dinner table near me…ASAP!
I didn’t grow up with green bean casserole, either. And I’ve had a hard time getting behind the traditional versions with all the soup mix, etc. But I’m TOTALLY down for this lightened up dish! I need to try it ASAP! Also, I just want to pick off all those crispy onions!
Awesome Lexi! Il can’t believe this is dairy-free!
It’s SO creamy, too!!
Wow! It looks so delicious and yummy. Amazing Lexi I will definitely try your recipe and thanks for sharing such amazing and wonderful recipes 🙂
Can’t wait to hear how you like!