This post may contain affiliate links. Please read my disclosure policy.
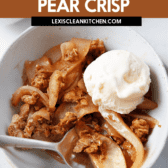
This Vanilla Bean Pear Crisp is the perfect Fall or Winter dessert! Sliced pears are baked into a warm, sweet, gooey filling and finished off with a sweet, buttery oat crisp topping! It’s nut-free, gluten-free, and easy to prepare!
Incredible Pear Crisp Recipe
This vanilla bean pear crisp recipe is a delicious spin-off of the more common American dessert: apple crisp…and it’s SO GOOD!
The natural soft sweetness of the fresh pears melds so deliciously with the warm gooey sweetness of the filling. That paired (pun very much intended) with the crispy crunchiness of the oat topping is absolutely incredible!
This dessert is so easy to make and is a perfect recipe to whip up before holiday parties or when you just want something sweet and delicious. If you love fruit crisp recipes, check out my popular apple cranberry crisp or my paleo peach raspberry crisp!
Have you ever wondered what the difference is between a fruit crumble and a fruit crisp? I used to as well! It’s quite simple. A crumble is baked fresh fruit, like a crisp is, but with a more decadent streusel crumb topping. Similarly to a crumble, a crisp uses baked fresh fruit, but the streusel topping is less work, and typically it includes oats unless you are making it paleo-friendly!
Ingredients Needed
This pear crisp recipe is made up of two super simple components: the gooey pear filling and the crispy oat topping! Scroll down for the full ingredient list!
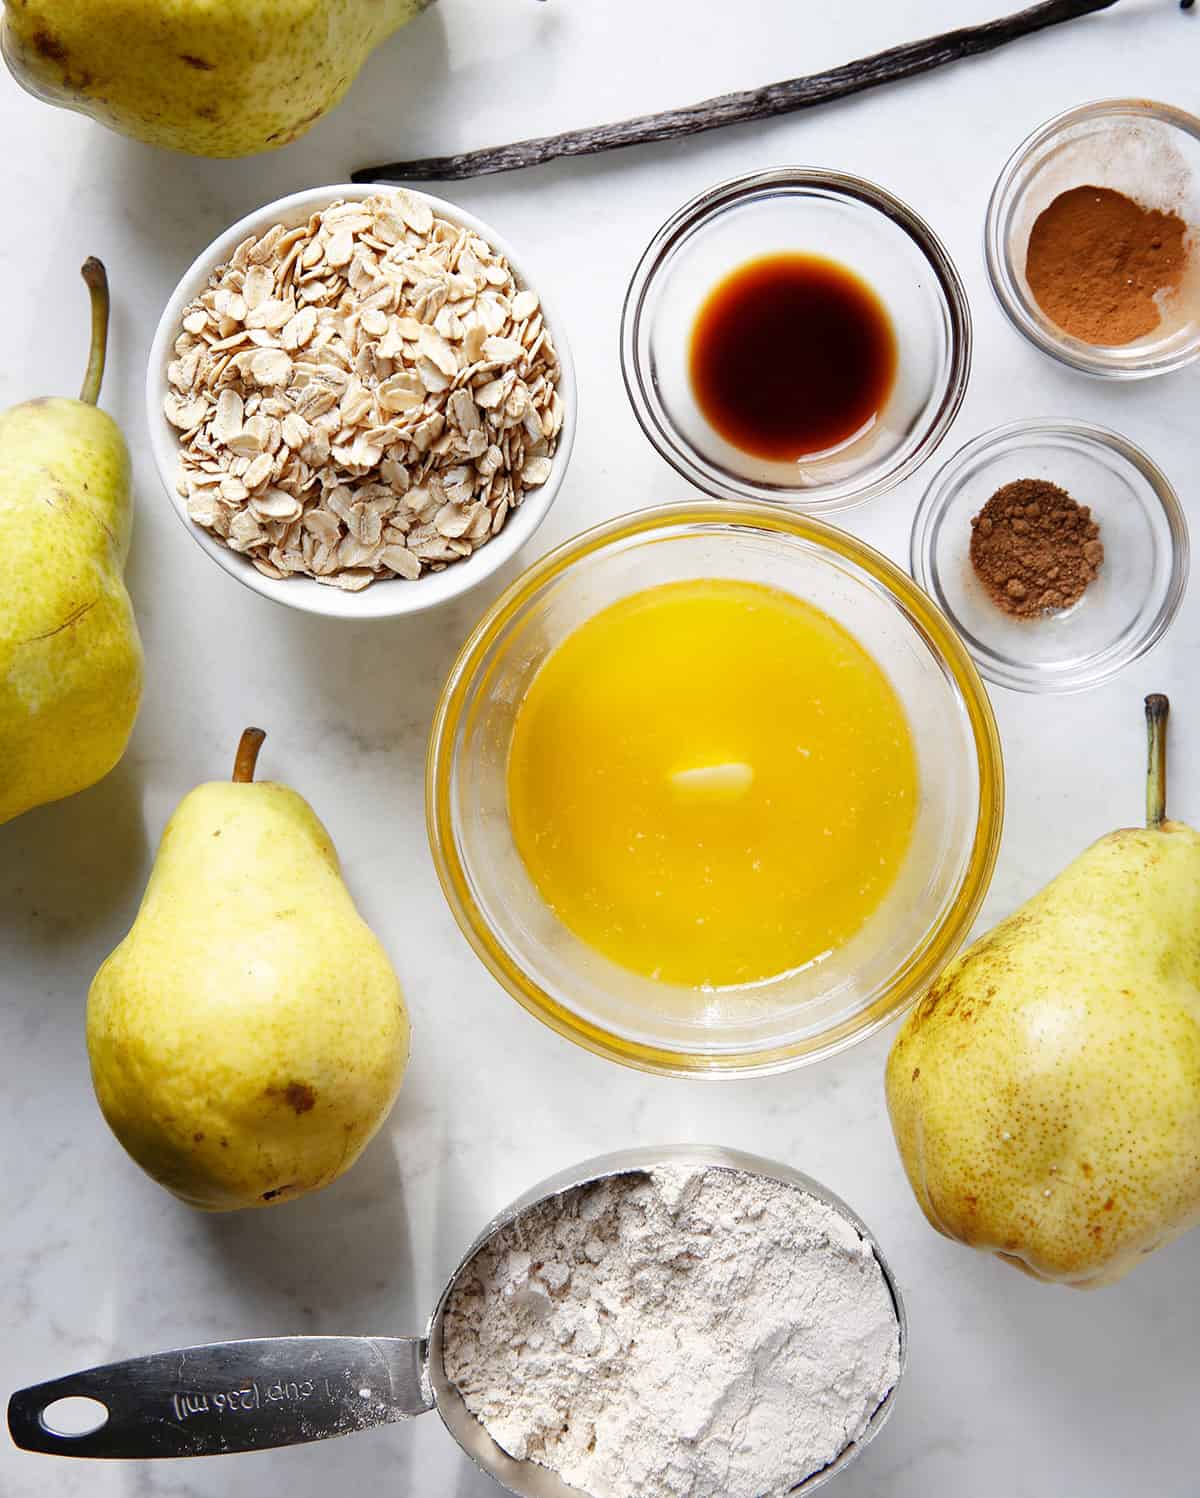
Pear Crisp Oat Topping
- Oat Flour and Oats: we’re using whole oats and ground oats to give the topping its structure. You can easily make your own oat flour or grab a bag at the store!
- Sugar: I use coconut sugar or maple sugar!
- Ground Cinnamon and Nutmeg: gives the topping a touch of warm, sweet spiciness.
- Chopped Nuts: walnuts or pecans are delicious. If you’d rather keep this nut-free, just leave these out!
- Butter: be sure to use unsalted butter so the topping isn’t too salty.
- Sweetener: maple syrup or honey will work!
- Vanilla Extract: adds flavor depth and ties in the vanilla flavor in the filling.
- Sea Salt: just a touch to cut the sweetness.
Pear Crisp Filling
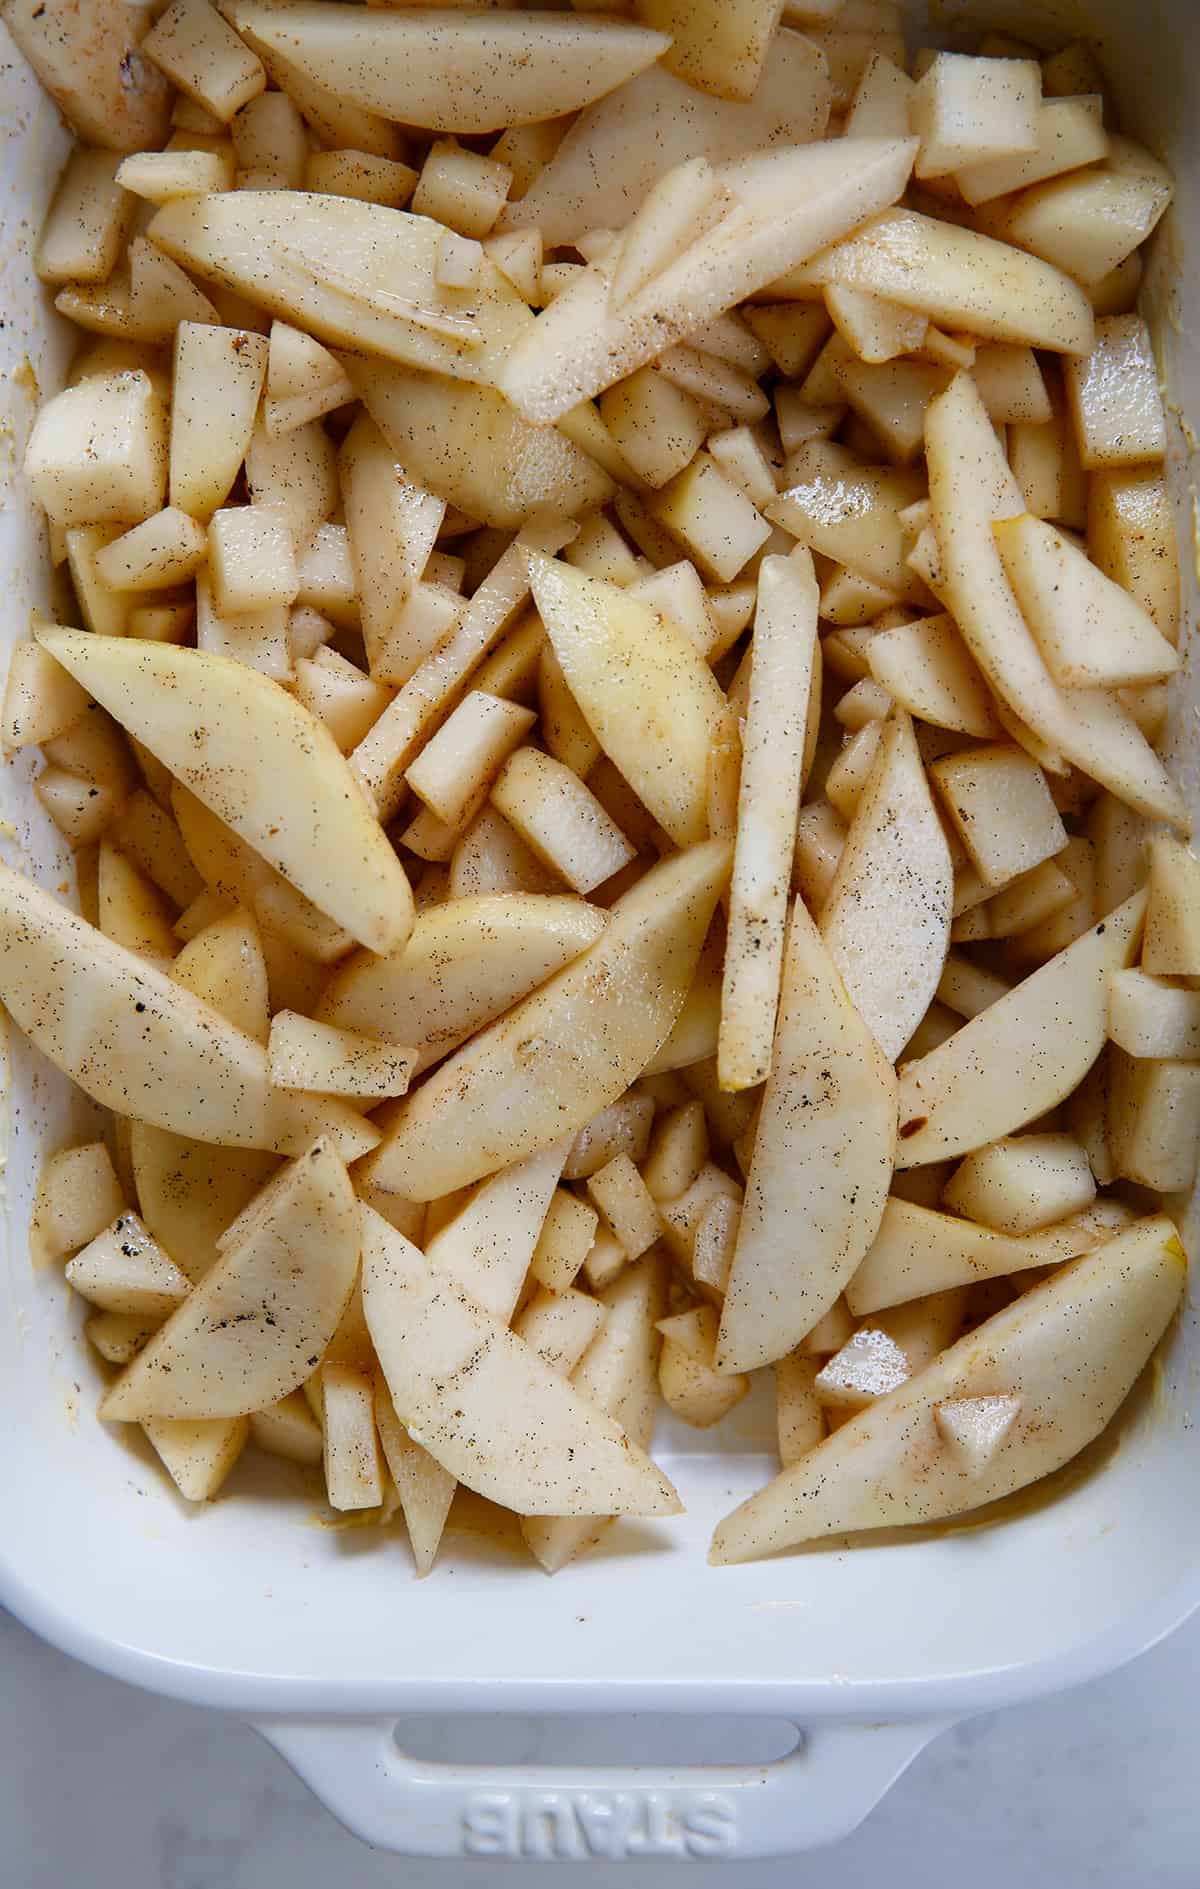
- Pears: peeled and sliced.
- Vanilla Extract and Vanilla Beans: I love to use both vanilla extract and fresh vanilla bean in this recipe! The extra vanilla bean seeds will give your pear crisp a really yummy, warm and rich vanilla flavor.
- Sweetener: you can use either honey or maple syrup depending on your preference.
- Lemon Juice: gives the otherwise sweet filling a tough of tangy brightness.
- Arrowroot Flour: our gluten-free alternative to all-purpose flour. The flour helps thicken the filling so you get that gooey texture.
- Cinnamon: adds flavor depth and warm, sweet spiciness.
Substitutions
- Can’t do oats? Use almond flour!
- Don’t love pears? Use apples or another fruit you love!
- No arrowroot flour? Tapioca could work here.
- Don’t have any coconut sugar or maple sugar? Brown sugar will work here.
- No vanilla beans handy? You can swap the vanilla bean out for vanilla bean paste or omit it entirely (though they are swoon-worthy).

How to Make Vanilla Bean Pear Crisp
This pear crisp recipe couldn’t be easier! Scroll down for the full preparation method.
- Make the filling: In one bowl combine all the filling ingredients.
- Make the topping: In a separate bowl, combine all the topping ingredients.
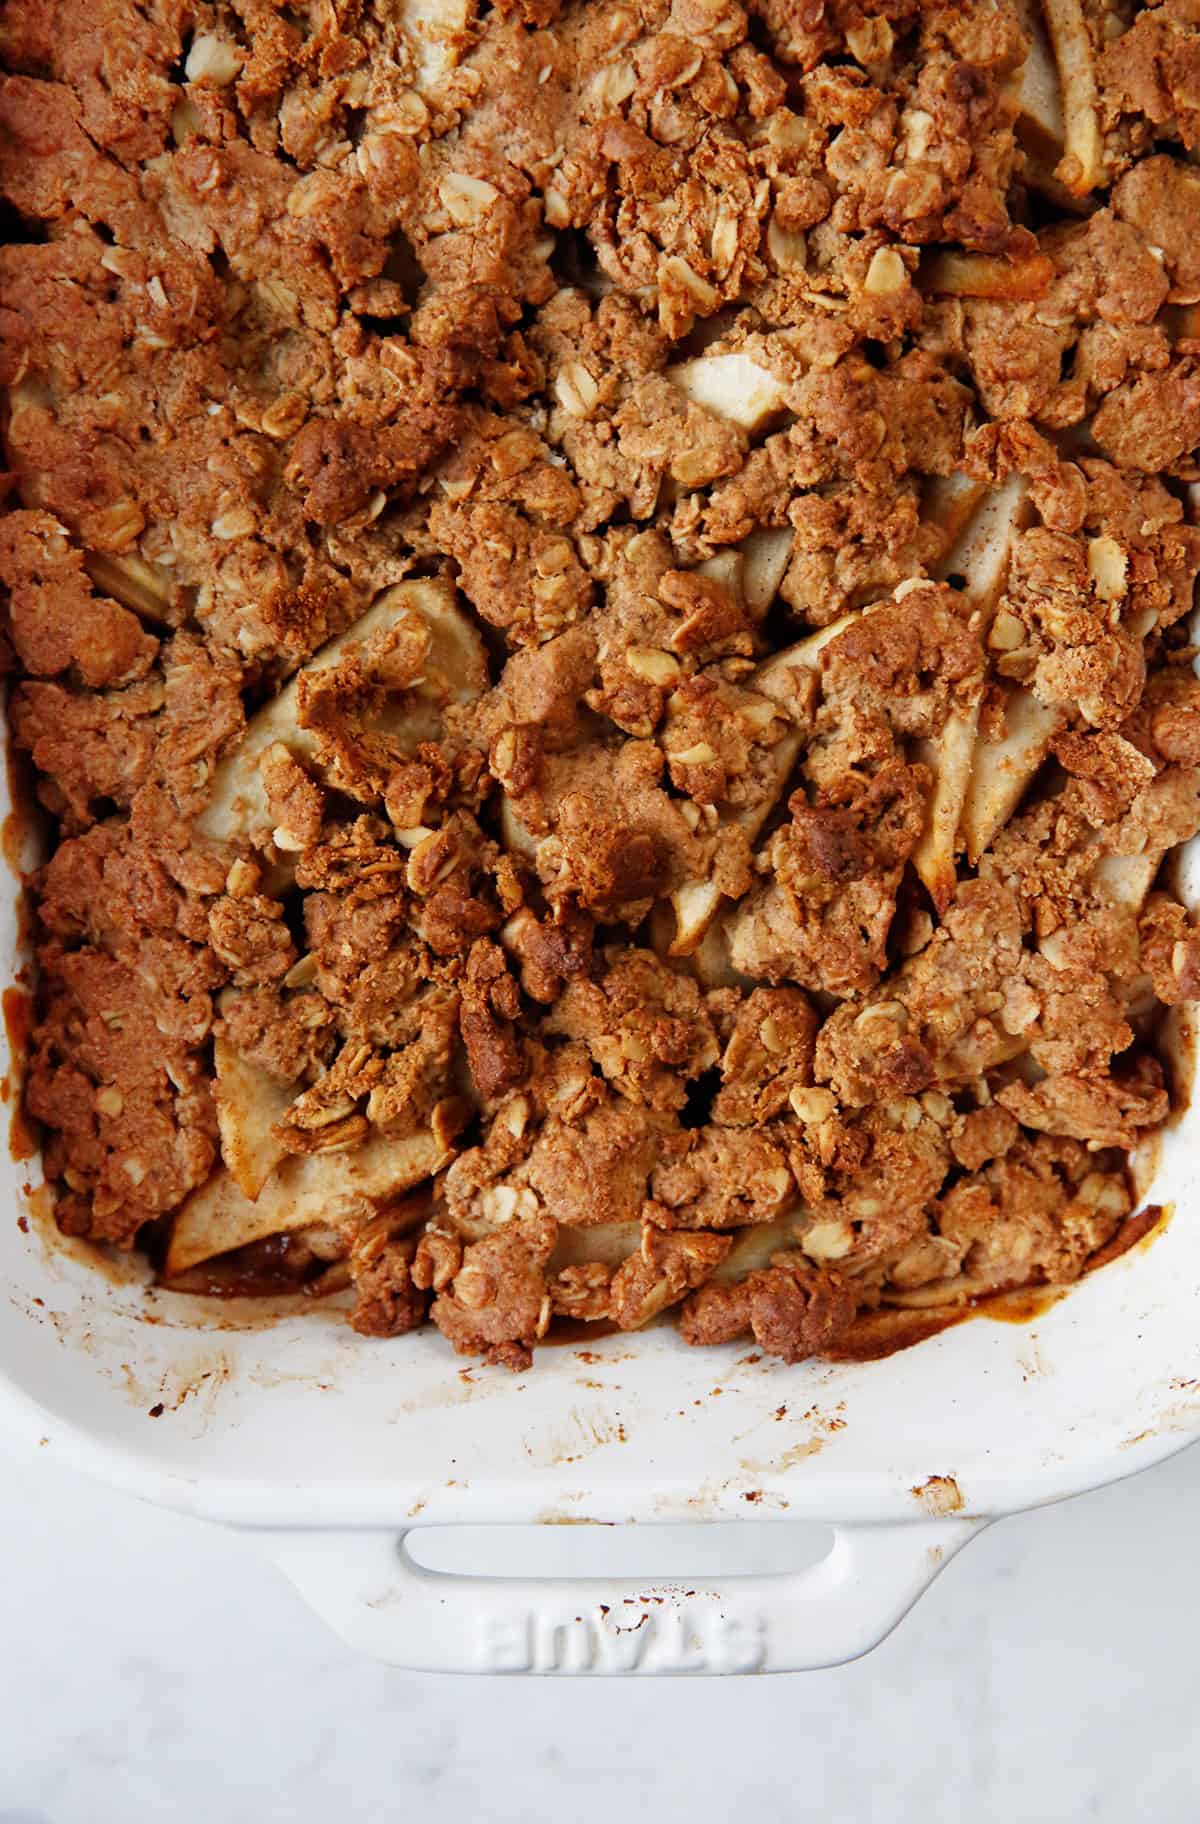
- Assemble the crisp: Pour the filling into a 9×9” baking dish and crumble the topping over the top.
- Bake: Bake the pear crisp at 350ºF for 45-55 minutes, until bubbling and golden brown.
Should You Peel the Pears?
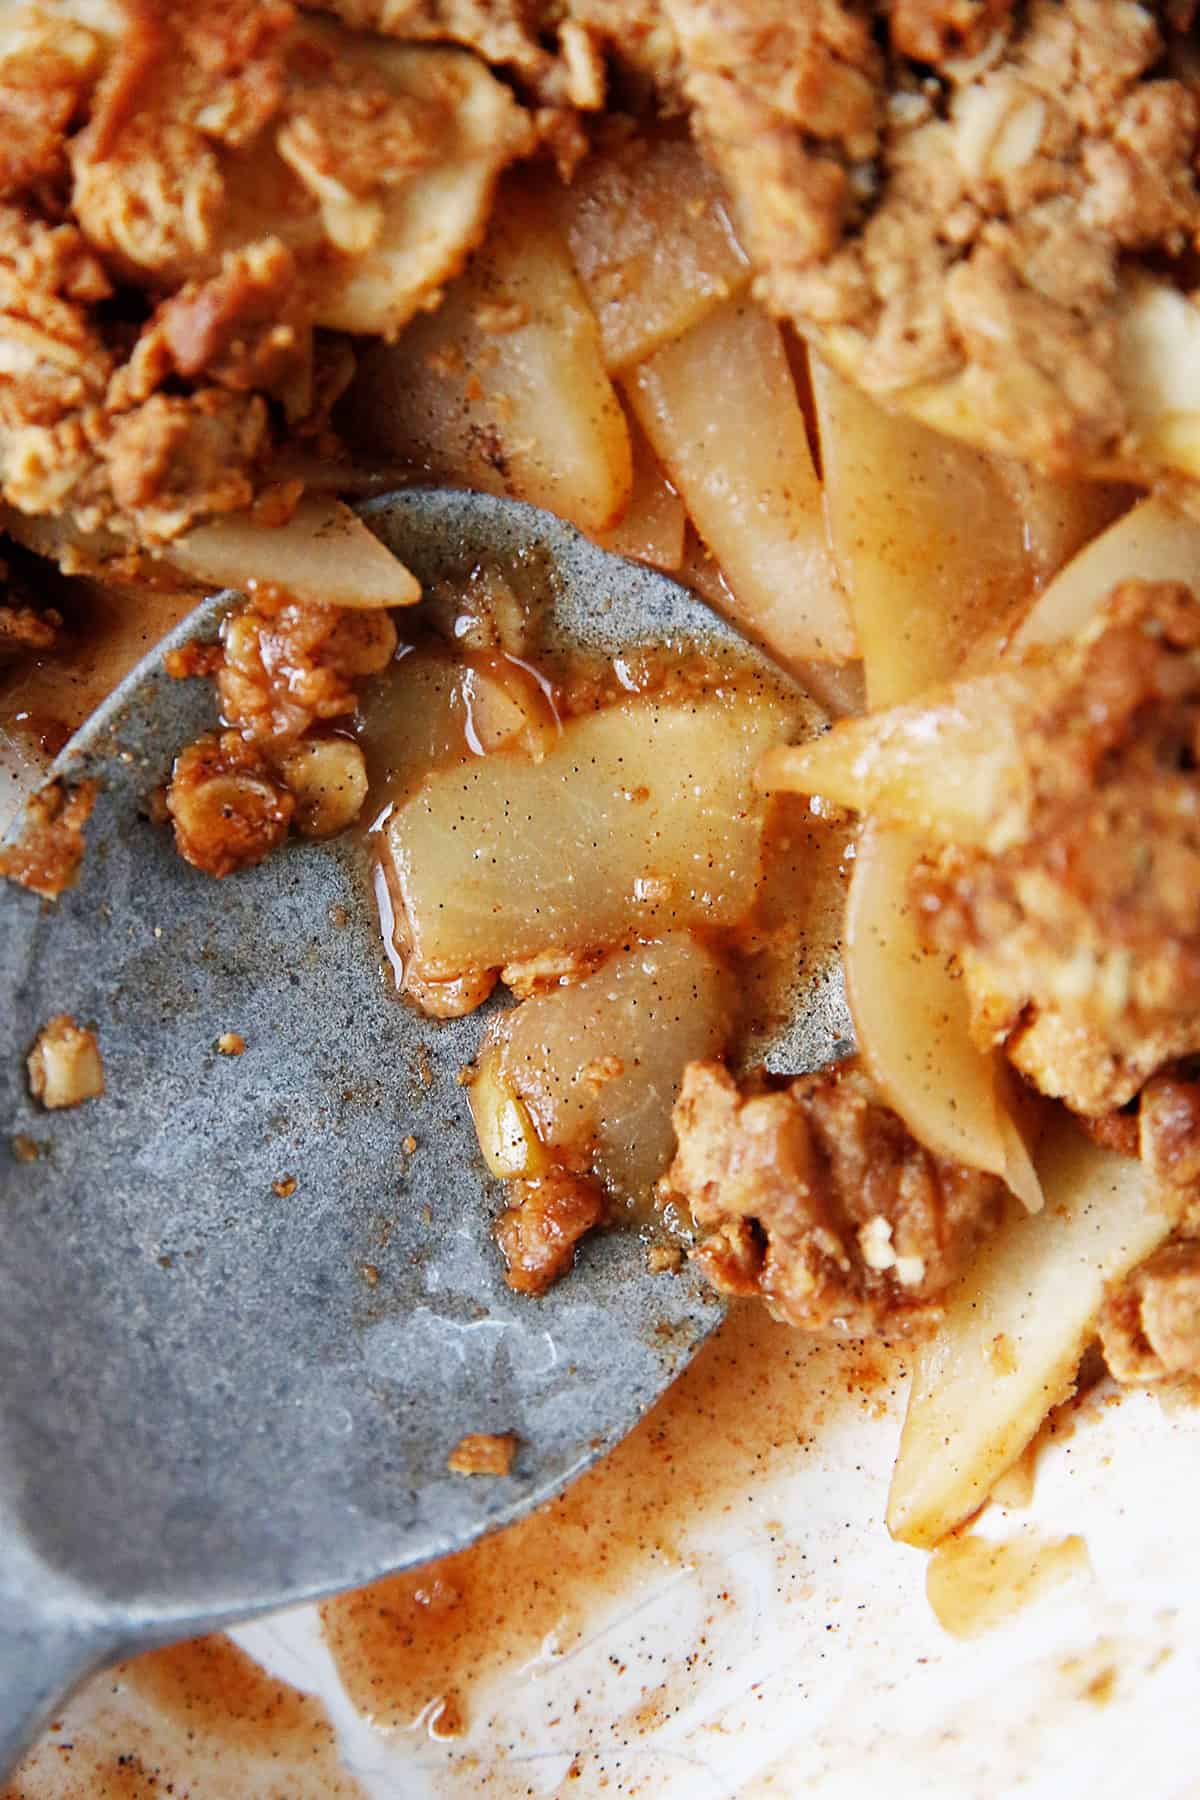
I definitely recommend peeling the pears before you cook them. The skin becomes tough and chewy when it’s heated. If you do decide to leave the peel on, make sure that you wash the pears thoroughly before you slice them.
Can you use canned pears?
In theory, yes, but I really recommend using fresh pears. Canned pears are softer and tend to become somewhat soggy when baked into a fruit crisp. Fresh pears hold up better in the gooey filling so the dessert still has a little bit of texture! Canned pears are also likely to have added ingredients, so read those labels!
How do you split and scrape a vanilla bean?
- Split the bean lengthwise.
- Gently open up the pod to reveal the tiny dark seeds.
- Use the dull side of a paring knife to scrape out the tiny seeds in a downward motion so you scrape seeds from the entire bean.
- Now you are ready to enjoy!
- Want to have no waste? The scraped out empty pods can be used to infuse milk with vanilla flavor! YUM!
P.S. I love using vanilla beans to make Homemade Vanilla Extract!
Fruit Crisp Pro Tips
- Slice thinly but not too thinly. You want the pear slices to be thin enough that they cook through, but not so thin that they break down too much and become soggy.
- Use a fork or your hands to mix the topping until it isn’t too crumbly.
- If the topping is browning too much but the crisp isn’t fully heated through, cover the baking dish with foil.
- Let it cool. After the crisp is baked, let it cool slightly, or even overnight, to give the filling time to thicken. If you serve it right away, the filling will still be runny.
- Swap the fruit. You can super easily use other fruit in place of the pears if preferred. Try this fruit crisp with berries, cherries, peaches, or apples!
Serving Suggestions
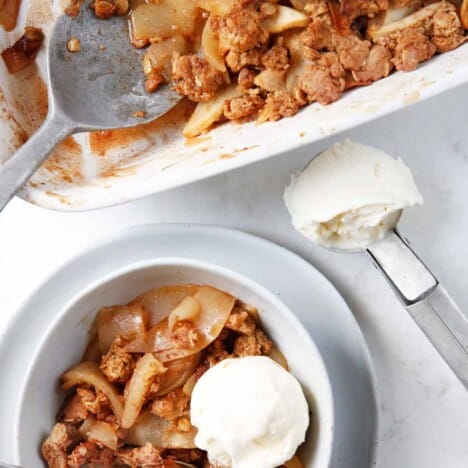
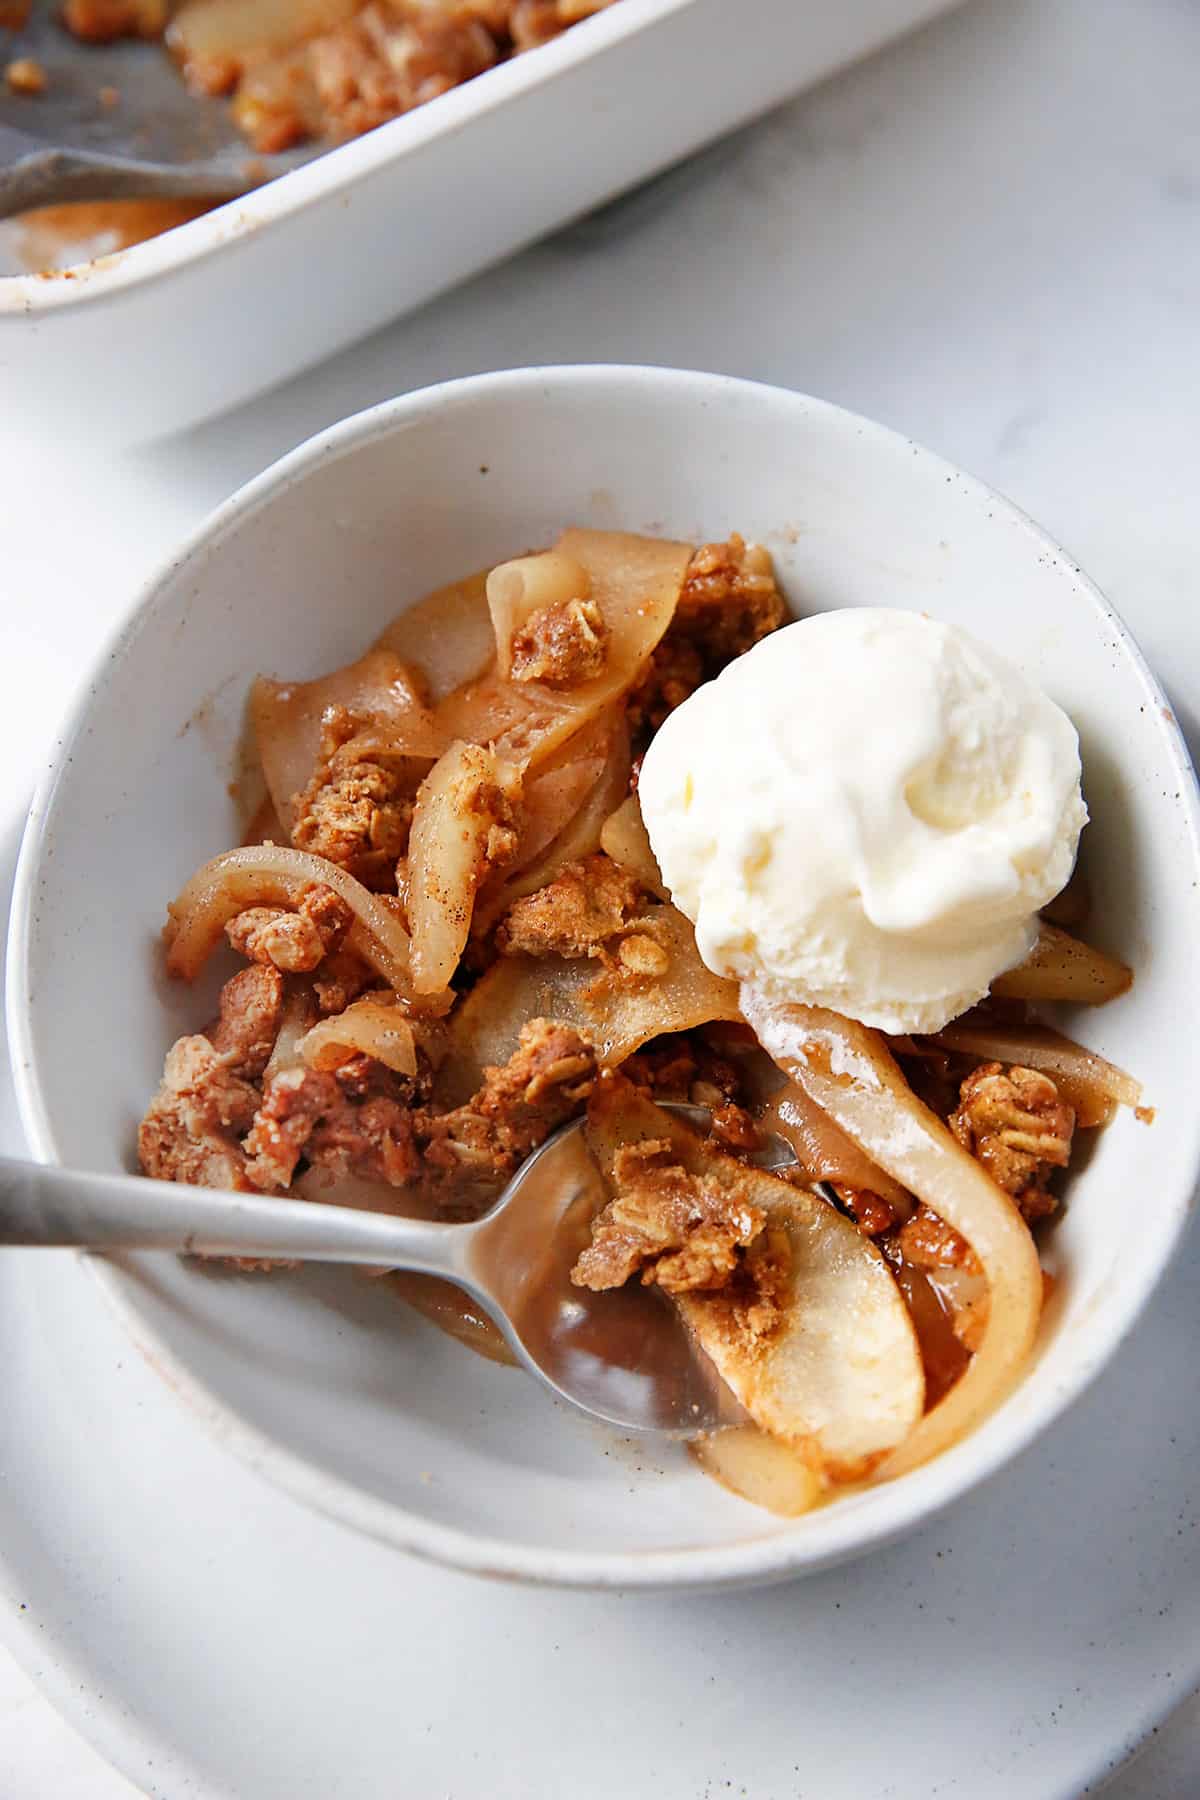
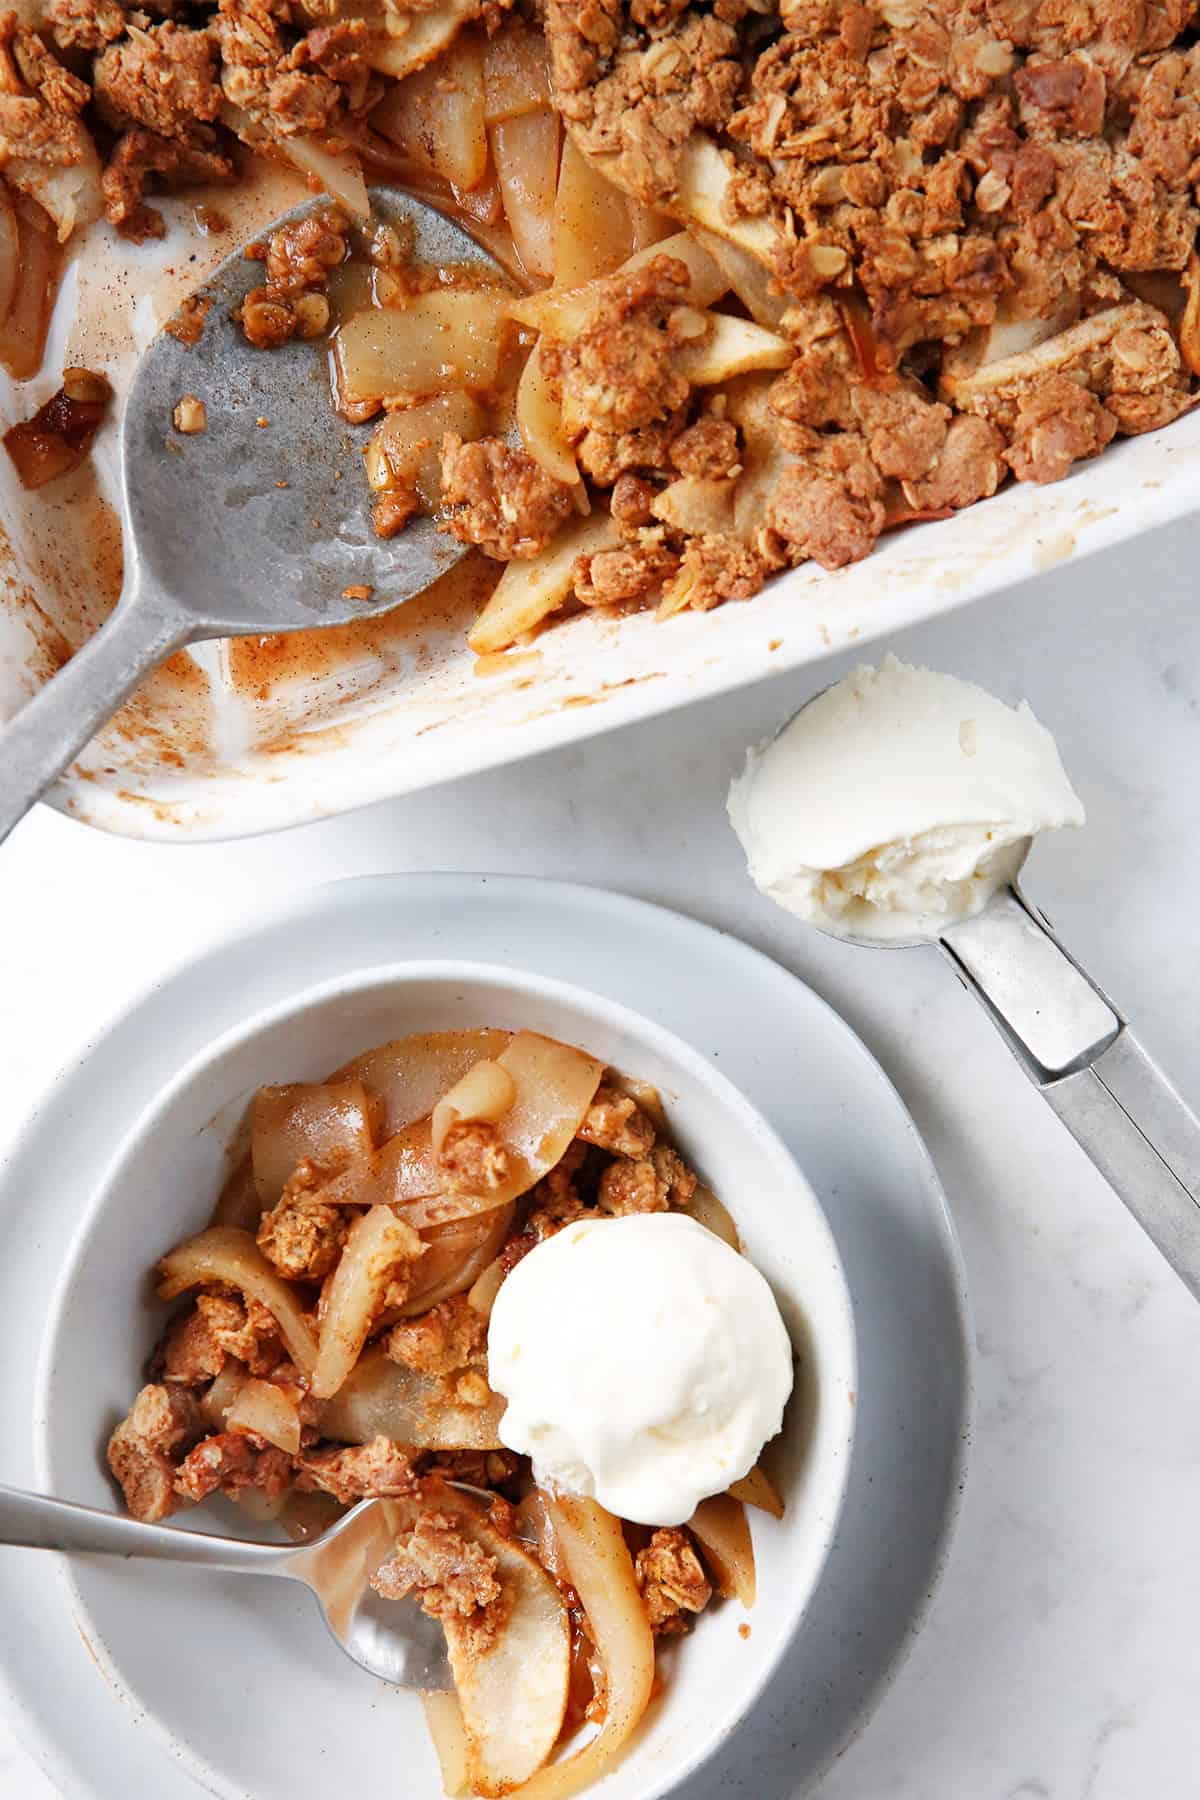
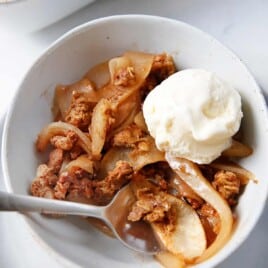
I love to serve my pear crisp warm and topped with coconut whipped cream. It’s also absolutely delicious next to a scoop of vanilla ice cream or drizzled with caramel sauce!
Can Pear Crisp Be Prepped Ahead of Time?
Yes! You can assemble the pear crisp up to 2 days in advance, cover it, and store it in the fridge. When you’re ready to serve, simply uncover it and bake as directed.
How to Store a Fruit Crisp
Leftover baked pear crisp will last in an airtight container in the fridge for 2-3 days. It can also be frozen for up to 3 months.
To reheat, thaw overnight in the fridge if frozen, and bake at 350ºF for about 15 minutes to warm and re-crisp! You can microwave it as well but it will be mushier.
More Fruit Dessert Recipes You’ll Love
- Gluten Free Apple Galette
- Baked Hasselback Pears
- Healthy Blueberry Crumb Bars
- Gluten-Free Cherry Pie Bars
- The Best Winter Fruit Salad
- Healthy Berry Cobbler
- Gluten Free Apple Pie
Watch The Video:
Vanilla Bean Pear Crisp
Ingredients
Pear Crisp Topping:
- 1 cup oat flour
- 1/2 cup rolled oats gluten-free if needed
- 1/3 cup coconut sugar or maple sugar
- 1/2 teaspoon ground cinnamon
- 1/4 teaspoon ground nutmeg
- Optional: 1/2 cup chopped nuts of choice omit for nut-free
- 1/4 cup unsalted butter melted
- 2 tablespoons maple syrup or honey
- 1/2 teaspoon vanilla extract
- Pinch of fine sea salt
Pear Crisp Filling:
- 6 pears peeled and sliced
- 1 teaspoon vanilla extract
- 1 vanilla bean split and scraped
- 1/4 cup maple syrup or honey
- 1 teaspoon lemon juice
- 1 tablespoon arrowroot flour
- 1/2 teaspoon ground cinnamon
Instructions
- Preheat oven to 350ºF.
- In a bowl combine the filling ingredients.
- Meanwhile, in a large bowl make topping: Using a fork of your fingers, mix together until the mixture is crumbly.
- Pour the fruit filling and any juices into a 9×9″ (or similar sized) baking dish. Crumble the crisp topping over the top and bake in the preheated oven for 45-55 minutes, until the juice is bubbling and the pears are baked through. If the crisp topping is browning too fast, cover the dish with aluminum foil.
- Let cool slightly, or overnight, before serving. Serve as is, with coconut whipped cream or ice cream.
Notes
- While I love fresh vanilla bean in this, you can also use vanilla bean paste or omit.
- To reheat: Bake at 350ºF for about 15 minutes to warm and re-crisp! You can microwave it as well but it will be mushier.


Made this for my Thanksgiving dessert and it was wonderful! I have never used vanilla beans before and used one as suggested in this recipe. It made the dessert have a really intense (but not overwhelming) vanilla flavor. I will be looking for more recipes that use a whole vanilla bean and will definitely make this crisp again!
I plan on making this recipe on saturday. Can i just say that your recipes are by far the most enjoyably thorough?! You are concise while still answering all my FAQs. I appreciate the detail and thought behind your site. Thank you!
I appreciate you so much Tamara! Thank you for taking the time to write me!
Delicious! I had a couple of pears to use so I was so excited this recipe got posted the same day. It’s delicious! I halved everything and it turned out great. Will definitely be making again!
I am so happy!!
love this, pears don’t get enough attention! I like using vanilla bean in this too, plus the crisp itself is a dessert I haven’t had in a long time, so thank you
I agree!! It’s always apple focused – I love pears for this! 🙂
Made this tonight with apples and cranberries. Delicious!