This post may contain affiliate links. Please read my disclosure policy.
If you’ve ever wondered How to Cook a Whole Chicken in the Instant Pot, this post has you covered. It tastes just like a rotisserie chicken you buy at the store, only you get to control the ingredients! It’s largely hands-off cooking time and the chicken is so juicy! This chicken is perfect to serve as is for dinner, or you can use for meal prep or for other chicken recipes.
 How to Cook a Whole Chicken in the Instant Pot
It’s How to Wednesday and today we’re talking about: How to Cook a Whole Chicken in the Instant Pot! The rotisserie chickens you find in the grocery stores often have such tender juicy chicken, and they definitely are convenient, but we always love to be able to control the ingredients in our food. When you cook a whole chicken in the Instant Pot, using our blend of spices, it comes out just as tender and juicy as a store-bought whole rotisserie chicken. It’s great to serve as-is with a few sides like Mashed Potatoes, Herbed Cucumber Salad or Honey Glazed Carrots or you can use it for meal prep for the week. You can turn it into Chicken Salad, Soup or Chicken Bacon Ranch Baked Hummus Dip.

Now we aren’t saying we don’t enjoy an Oven Roasted Chicken, because we do, but there are definitely a lot of advantages of cooking a whole chicken in the Instant Pot.
- The first is that it is quicker. It takes about an hour to roast a chicken in the oven, but then you also have the prep time, the time it takes to heat up an oven and the cooling time. Cooking in the Instant Pot does speed up the time.
- The second advantage is because there is no guess work as to when your chicken is done! Roasting a chicken in the oven can have so many variants, and if you leave it in too long it will be dry. But in the Instant Pot, that is much less of a worry.
- And third, the chicken is SO JUICY and fall-off-the-bone tender. Hands down a chicken that is cooked in the Instant Pot is way more tender and juicy than one that is brined and roasted in the oven, because that is what makes cooking in a pressure cooker so magical.
How do I cook a whole chicken in the Instant Pot?
Here is an overview of the steps needed to cook the chicken. Find the full recipe below!
And the best part is, it’s so easy to do!
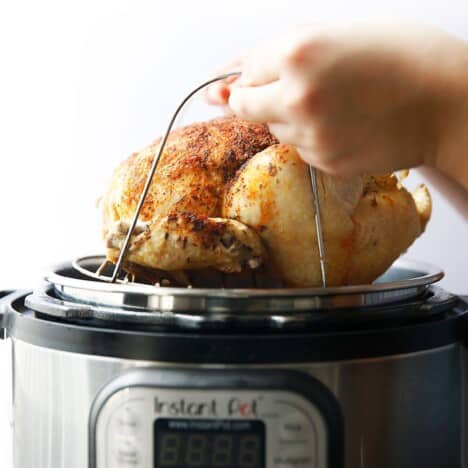
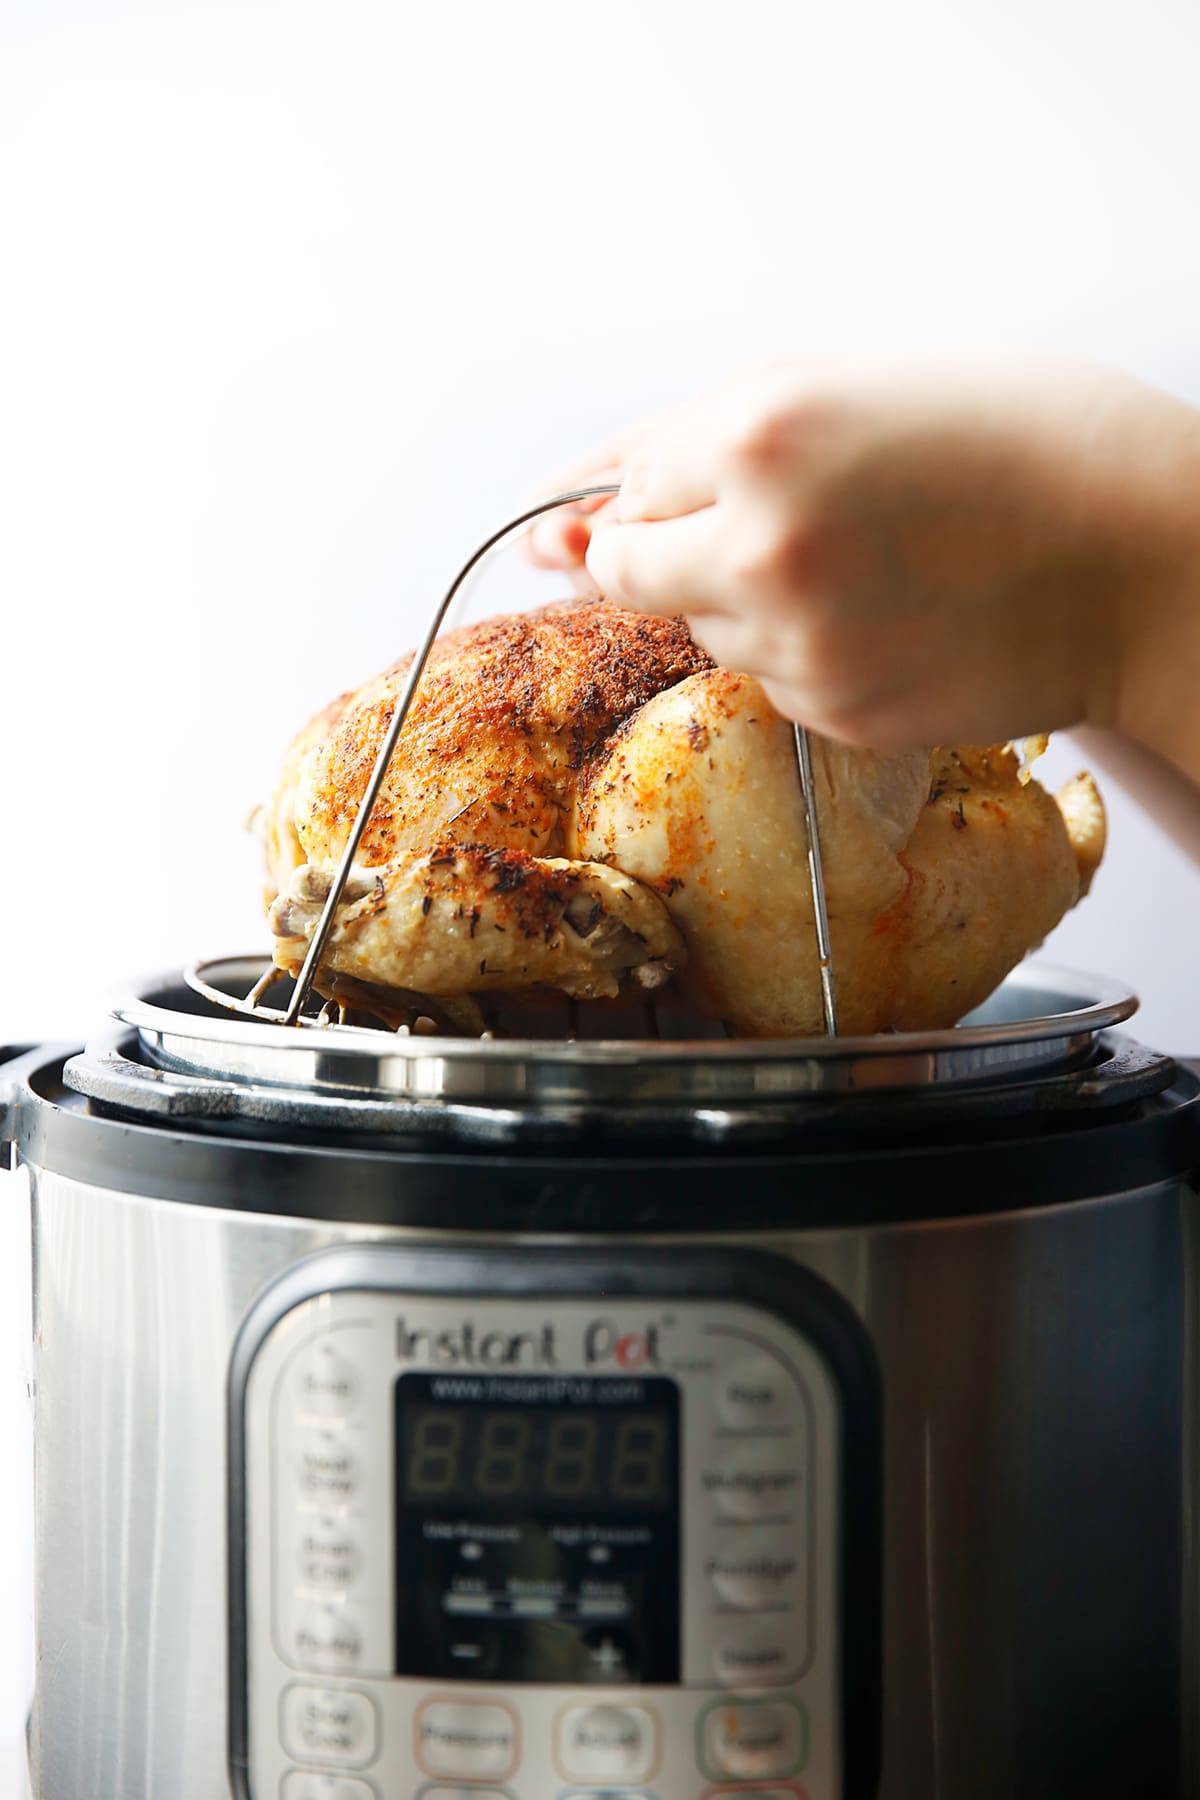
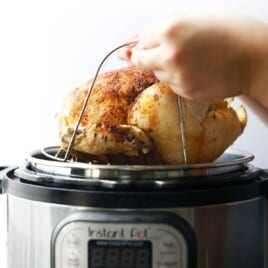
- Season the chicken
- Sear the chicken
- Add onion and remaining seasoning to chicken
- Place trivet inside of the Instant Pot with chicken broth
- Cook on manual pressure for 24 minutes (or 6 minutes per pound)
- Natural release for 15 minutes and then release remaining pressure
- And then your chicken is READY!
P.S. you can also cook a chicken in the slow cooker or in the oven!
If you like this How to Recipe, check out these others:
- How to Make Oatmeal
- How to Make Cashew Cream
- How to Make Homemade Vanilla Extract
- How to Make Cold Brew Iced Coffee
- Homemade Mayo
- How to Make a Lettuce Wrap Sandwich
Watch the video:
What to do with leftover chicken bones/carcass? Reuse them and make HOMEMADE BROTH!
How to Cook a Whole Chicken in the Instant Pot
Ingredients
- 1-4 pound whole chicken giblets removed
- 2 teaspoons fine sea salt
- 1 teaspoon garlic powder
- 1 teaspoon ground black pepper
- 1 teaspoon paprika
- 1 teaspoon dried thyme
- 2 tablespoons avocado oil divided
- ½ onion
- 1 cup chicken stock
Instructions
- Using a paper towel, dry off chicken.
- In a small bowl mix together all of the spices. Place half of the spices in another small bowl and add 1 tablespoon avocado oil to create a paste.
- Carefully rub the paste underneath the skin on the chicken breasts. Take care not to break the skin.
- In a 6 or 8 quart Instant Pot press the saute function.
- Once hot add remaining oil and sear the whole chicken, breast side down about 3-4 minutes. Then flip and sear on the other side. Press cancel on the saute function.
- Remove chicken, and season the inside of the cavity with salt and pepper and place ½ an onion inside of the cavity. Rub the remainder of the dry spices all over the chicken breasts and thighs and set aside.
- Place the trivet inside of the Instant Pot and pour in chicken stock. Place chicken back inside on the travel and close the lid with the vent set to sealing.
- Cook on manual high pressure for 24 minutes (or 6 minutes per pound)
- Natural release for 15 minutes, then use the manual release function to release any remaining pressure. With an instant-read thermometer check the temperature of the chicken in the thickest part of the breast and make sure it is at least to 160ºF. It will continue to cook as it rests. See notes for troubleshooting if it is below 155ºF.
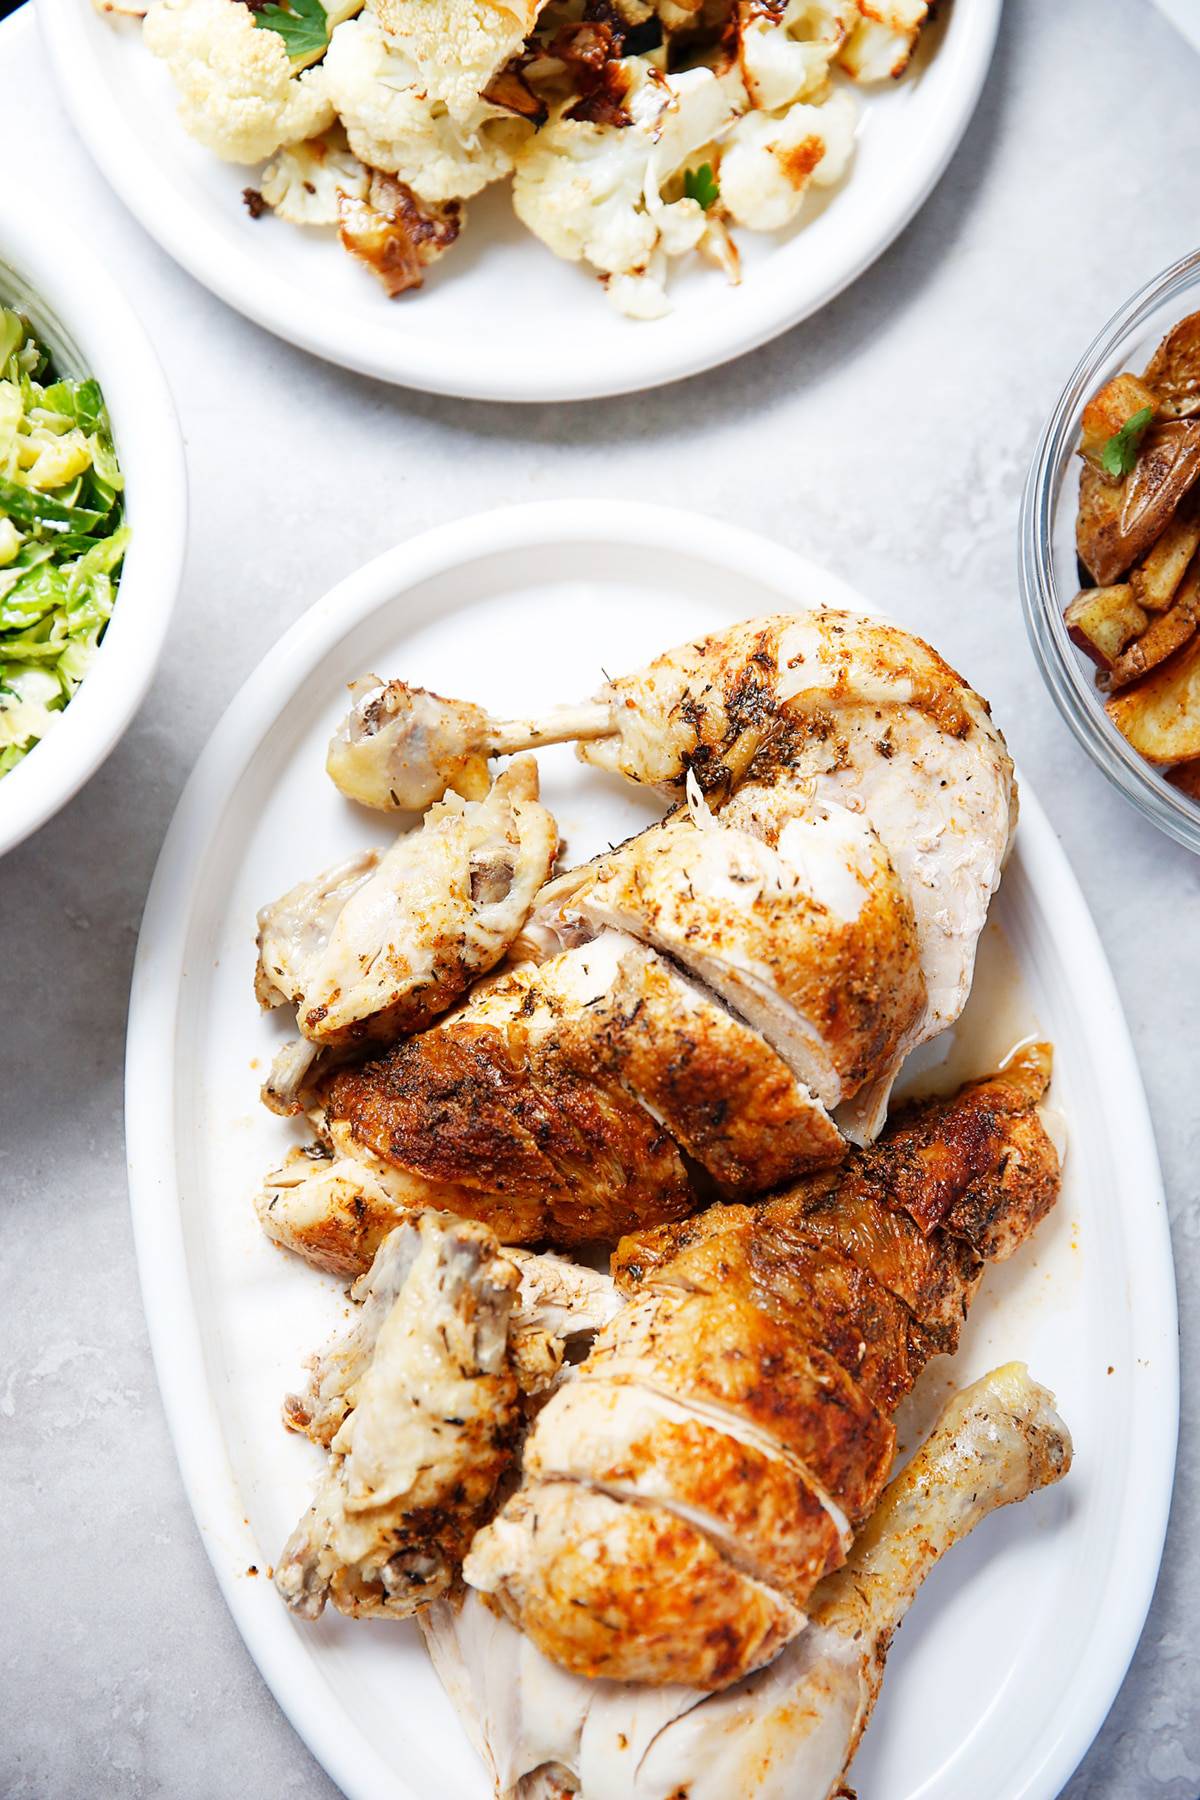
- Let chicken sit until it has cooled down slightly, about 10 minutes. Butcher the legs, wings and finally the breasts and serve along with your favorite sides!
I have not had any wings better than these, so delicious!! I agree that you do not need to marinate. They were perfect, and my husband wants me to make all the time. Thanks for a wonderful recipe!!
I pushed manual and time in receipe and it must of been on low. LUX 80 is stew and meat 35 min (normal) I hope it’s high pressure.. Should I stop it at 24 min ? Manual did not allow for choosing pressure so it must of not cooked left lid on reset to meat.
You changed it to a cup of broth, but earlier you say 1/2 cup still. Not sure why there are two sets of directions.
Hi Dan! Thanks for the catch! If you read the notes, we updated the recipe after we published it and increased the amount of broth from 1/2 cup to 1 cup. The overview of steps didn’t get updated along with it. So I went ahead and updated that. Thanks for pointing that out!
I want to use whole chicken breats x 4. Will this work with the above instructions?
Chicken breasts cook differently, and will be dry if over-cooking. Here are a few posts that may help:
1. https://lexiscleankitchen.com/instant-pot-frozen-chicken/
2. https://lexiscleankitchen.com/baked-bbq-chicken-breast/
3. https://lexiscleankitchen.com/easy-chicken-marinades/
Hello again Lexi, thanks for your latest response! This will almost certainly be my final message on this topic, but I had just a few final thoughts.
First, an oversight, despite my faithful efforts I neglected to include that I allowed 15min natural release in both of the 30min cooking episodes. Just FYI for you or anyone reading.
Second, I’m surprised to hear that you think I could have rectified the undercooking with as little as 2 – 4 minutes additional cook time! Is that per pound or in total? That seems counterintuitive and I’d love to hear you expand on how such a small additional margin could have made such a large difference, either in these comments or maybe in a future post. I use my instant pot almost every day, but I still feel like I’m just learning. For what it’s worth, the “cheat sheet” that came with my pot recommends 8 minutes per pound of whole chicken, vs your 6, which for a 5lb bird would call for an extra 10 minutes total (40 vs 30). Thoughts?
Finally, I’m very impressed with your transparency in posting our conversation in full, and promptly, as it speaks to your integrity and inclines me to trust your recipes in the future.
Use your meat thermometers, kids!
ps the leftovers are great! Maybe you can’t oversteam a chicken?
Hi Ben! We stand by our recipes so I’m happy to have this conversation here in the comments! Our timing of 6 minutes per chicken has always worked for us, and we have felt that 8 minutes per pound overcooks the chicken. I’ve made it with this formula (btw this is Kelli the food editor speaking!) since we developed this recipe a few years back, and it’s never failed me. The point of this specific recipe isn’t to make shredded chicken, but to make cooked chicken, similar to how it would come out in the oven. Of course, me cooking in my kitchen, or Lexi cooking in hers doesn’t always translate to another person cooking in their kitchen. There can always ALWAYS be differentials we can’t account for, but we do our best to address them if we can foresee them happening. It seems that for some reason, this formula didn’t work for you this time, and I’ve enumerated in a previous comment to you some possibilities for that. And just like it is suggested to be a good cook you have to get to know your oven, after years of professionally working with IPs…the same goes for that. I have two different sizes and models of IPs and they definitely work differently. That’s really the best I can offer you on that.
As to why I think 2-4 minutes of additional cook time would work? It’s just how the Instant Pot works. You have to remember, that it takes a minimum of about 5 minutes for the IP to come up to pressure and whatever is in it for that period of time is cooking as it’s heating up, as well as the few minutes it takes for it to come down from pressure. If your chicken was at 140, even if it was in the oven it might only take about 10 minutes to come up to the correct cook time, depending on the temperature of your oven. The IP works even faster.
Per this discussion here, I’ve updated the recipe to include my suggestions on what to do if another reader encounters a similar issue you’ve had.
Thanks for responding, Lexi, I don’t see an option to reply to your reply so I’ll do so as a new reply here. I’ll probably overdo it on the detail so we can have the best chance of figuring it out. Mine is the Duo Nova 6 quart, the newer model which automatically sets to “sealing” when the lid is closed. I put my 4.9lb chicken in the pot set on high pressure normal heat for 30 minutes (6minx5lb). It got up to pressure, but for some reason after about 5 minutes I noticed steam escaping from the vent and the pin down again, which normally doesn’t happen. So I cancelled, checked the lid seal and other components, then restarted for the full 30 minutes with an added cup of broth, checking back every few minutes to ensure it kept pressure the entire time. So overall it got a little more cooking time than what your guidelines would suggest (unless I screwed up the math!?), and it came out extremely underdone, as stated – I even took pictures if you’d like them. Bird was still half raw and leaking purge.
I then put the whole thing back in the pot for ANOTHER 30 minutes, because now I was paranoid. When done it was literally falling off the bone under its own weight, thermometer confirmed it had hit or surpassed 190F, and surprisingly the meat was stiill moist, tender and delicious but not mush (haven’t tried the leftovers yet). So at least we know the instant pot was functioning and able to get to temperature and pressure, it just took a lot longer than expected.
So, that’s my story.
Hi Ben! I appreciate you putting the detail into this to let us know how it went for you. At the end of the day, there are a lot of different variables when it comes to cooking, including how cold you refrigerator is (which in turn affects how cold your bird is), your specific instant pot, how meaty your bird is, etc. It’s hard to tell exactly what went wrong with your bird not being completely cooked in the allotted time, but I think you likely only needed an extra 2-4 minutes of cook time, if your bird had already come up to 140. I’m going to update some of the language I use, in case somebody else comes up to this situation about how to proceed if the bird hasn’t reached the proper temperature. Sorry this didn’t turn out as expected for you!